

FAQ
How do I Create an Account?
Once you have signed the current Yearbook Purchase Agreement, you will receive an email invitation pictured below.
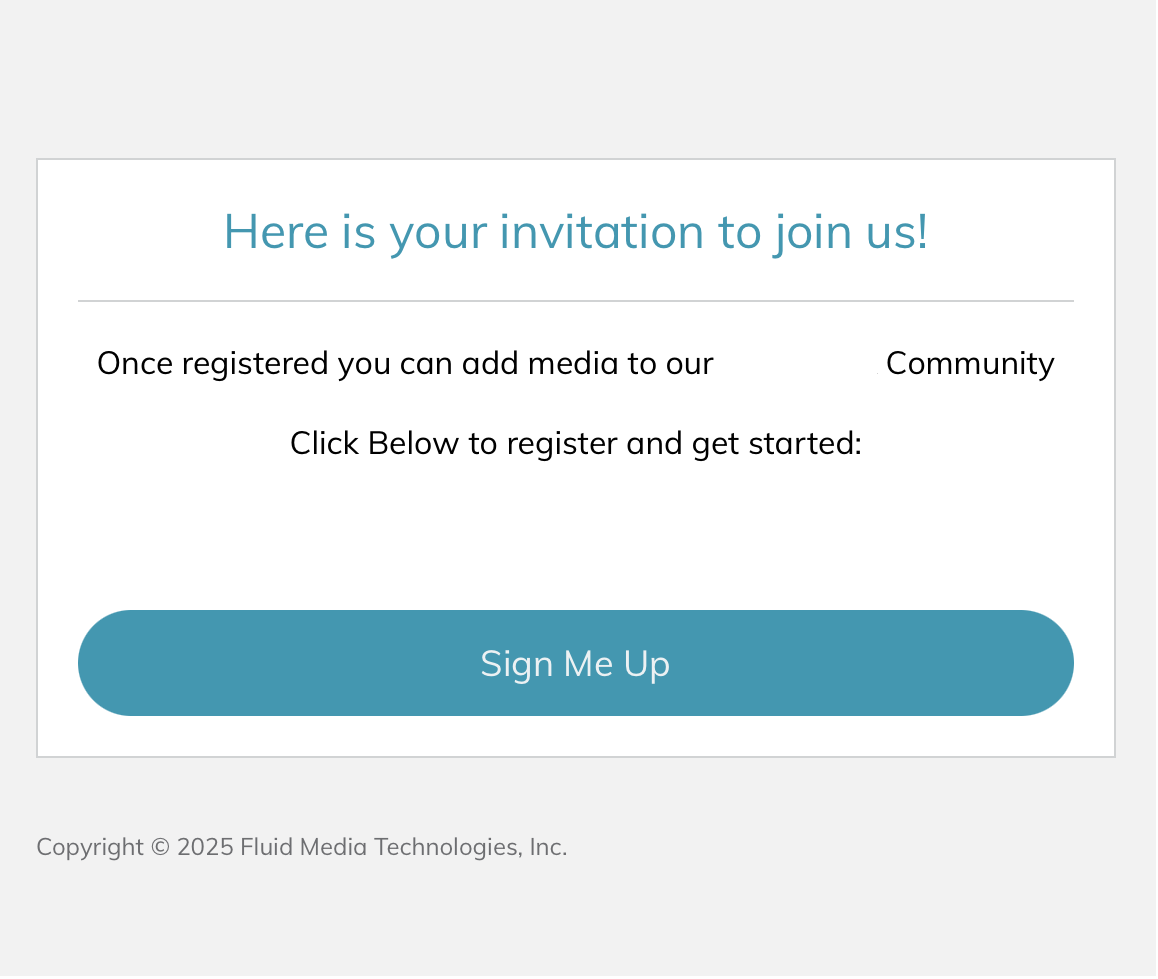
Click Sign Me Up, create your account, and start your yearbook journey!
Yearbook Section Layout Examples
Below are examples of yearbook section layouts to help you get started with your yearbook.
Example 1:
- Cover
- Letter Form
- Graduate Photos
- Group/Class Photos
- Baby Photos
- Clubs/Teams/Groups
- Collage pages/Events
- Year in Review
- Signatures
Example 2:
- Cover
- Table of Contents
- Letter From
- Admin and Staff Portraits
- School Portraits
- Graduate Portraits
- Group/Class Photos
- Clubs/Teams/Groups
- Collage pages/Events
- Ads/Booster Pages
- Year in Review
- Signatures
Other Section/Pages ideas:
- This Book Belongs To _____
- Cover Contest Runner-Ups
How to Assign Pages/Sections?
Navigate to the Community Activity Stream.
Clicking on the three dots will display a drop-down menu. Click on the Admin Gear.

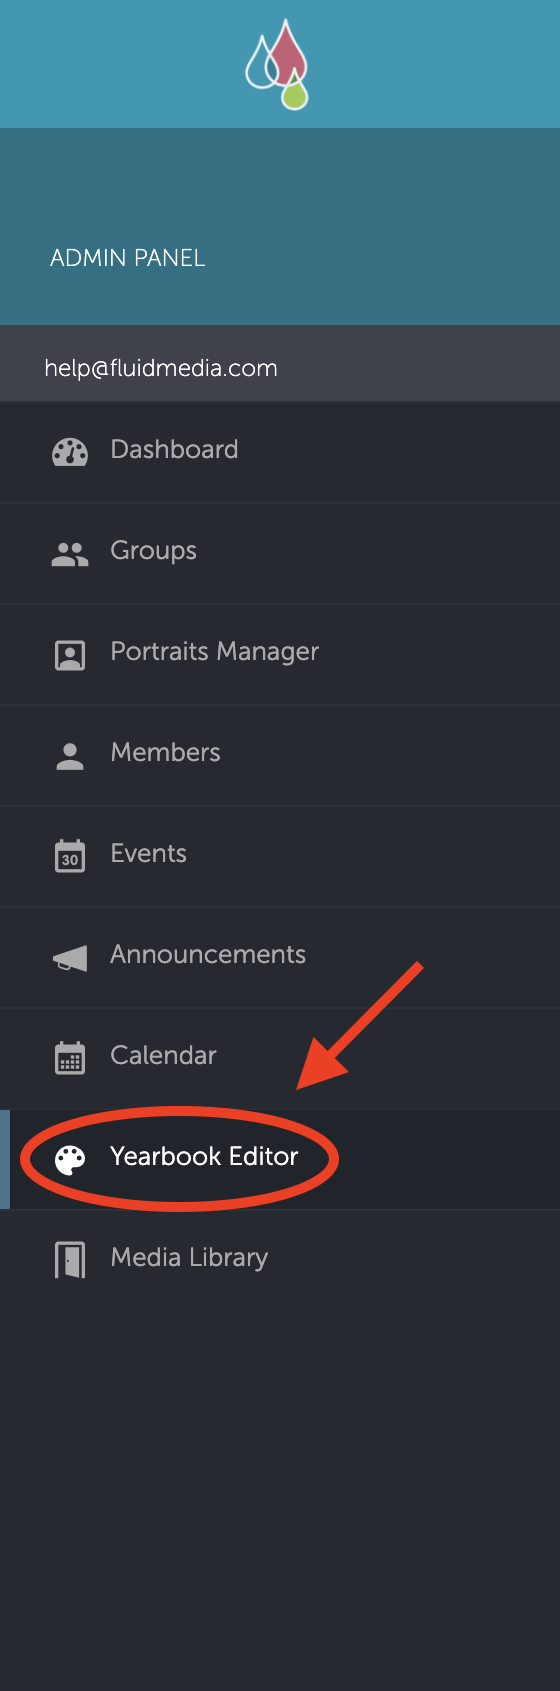
Inside the Admin Panel, please find the Yearbook Editor section.
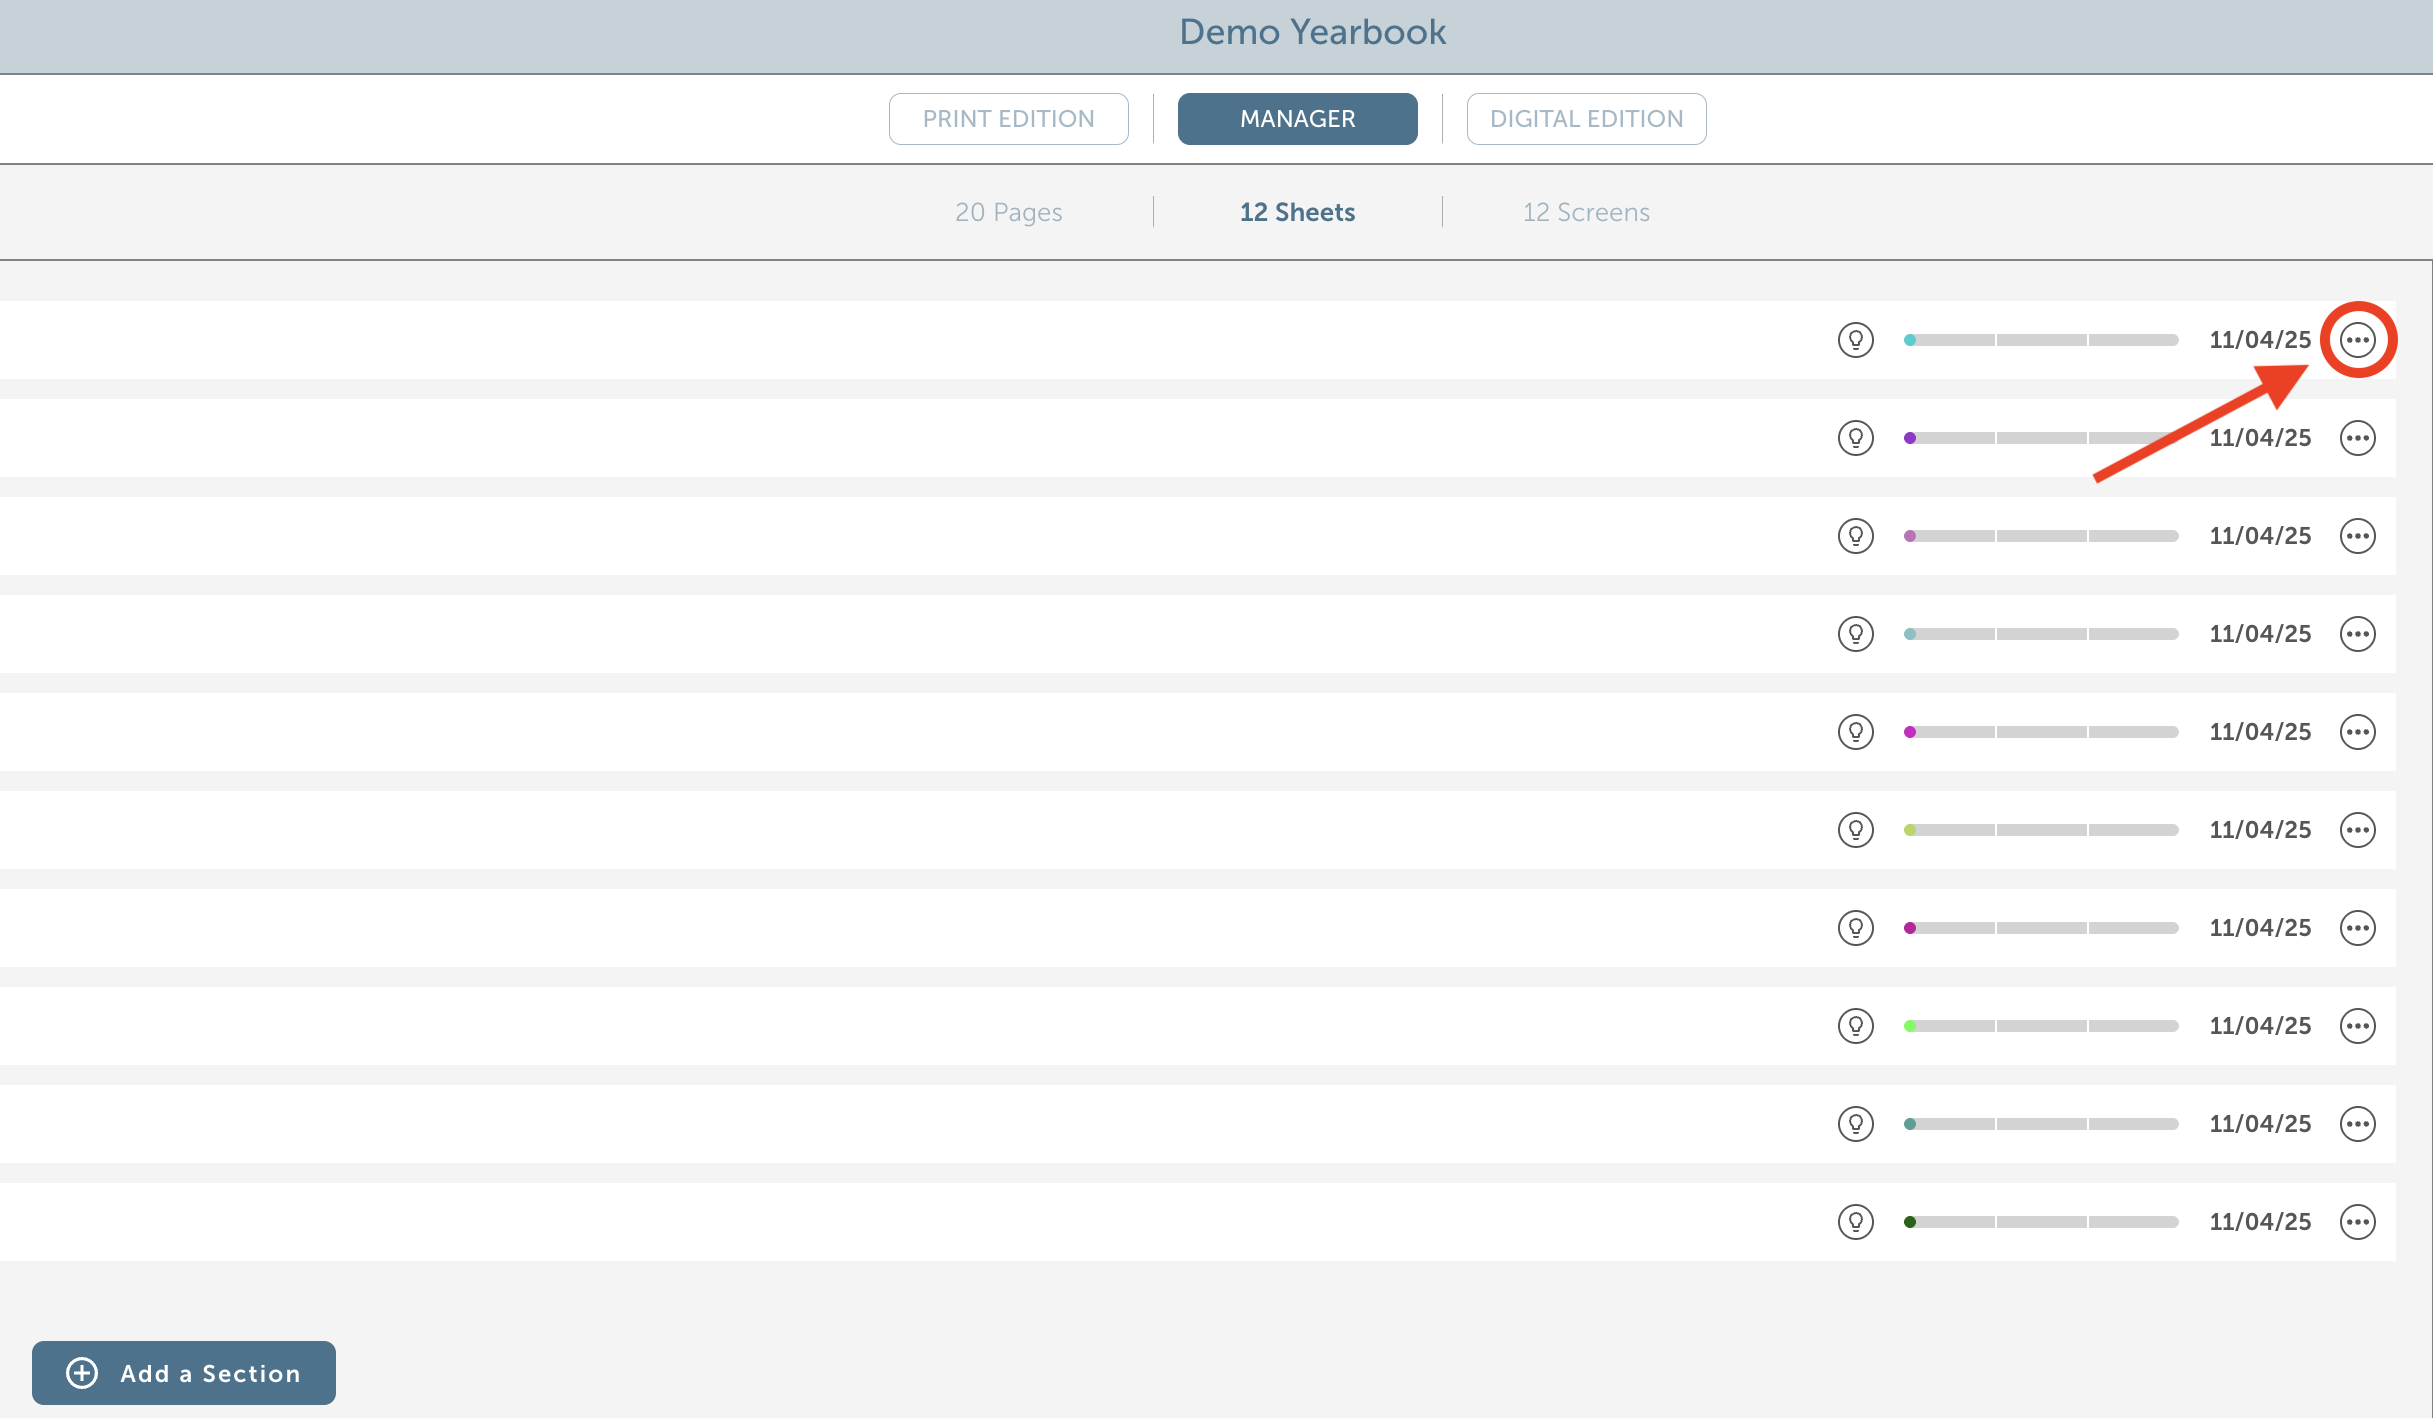
You are able to assign sections by navigating to the Yearbook Manager and clicking on the ellipsis at the end of the section.
From there, select the member you want to assign to the section from the dropdown menu.
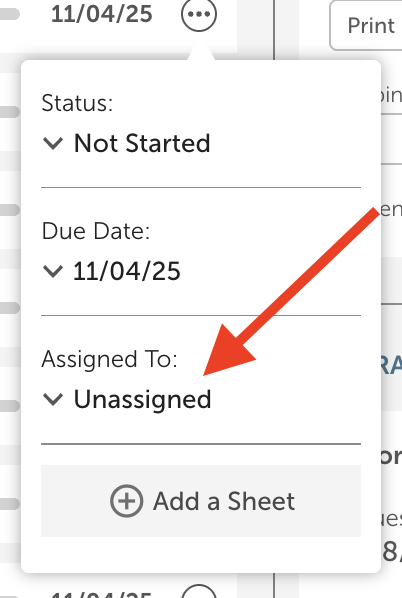
You can also assign a member to a section in the Print Edition by clicking the ellipsis in the top-right corner of a sheet and selecting the member from the drop-down menu.
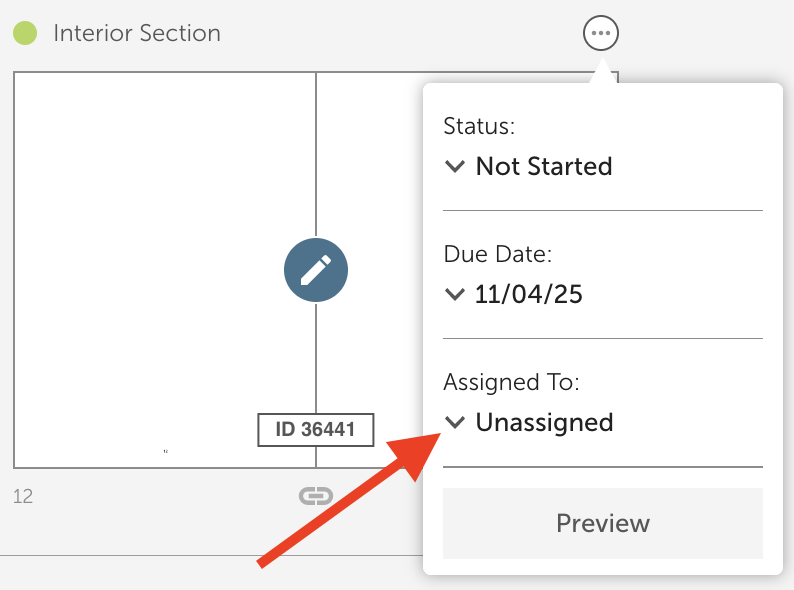
Note: Only one member can be assigned to each section.
How do I access my Yearbook?
Once you are logged in, please click the My Communities button beside your name in the top left corner.

From the drop-down menu, click on your school name. This is your school’s Community!
Once you are in the Community Activity Stream, click on the ellipsis in the left corner.
Clicking on the ellipsis will display a menu. Click on the Admin Gear.

Inside the Admin Panel, please find the Yearbook Editor section.
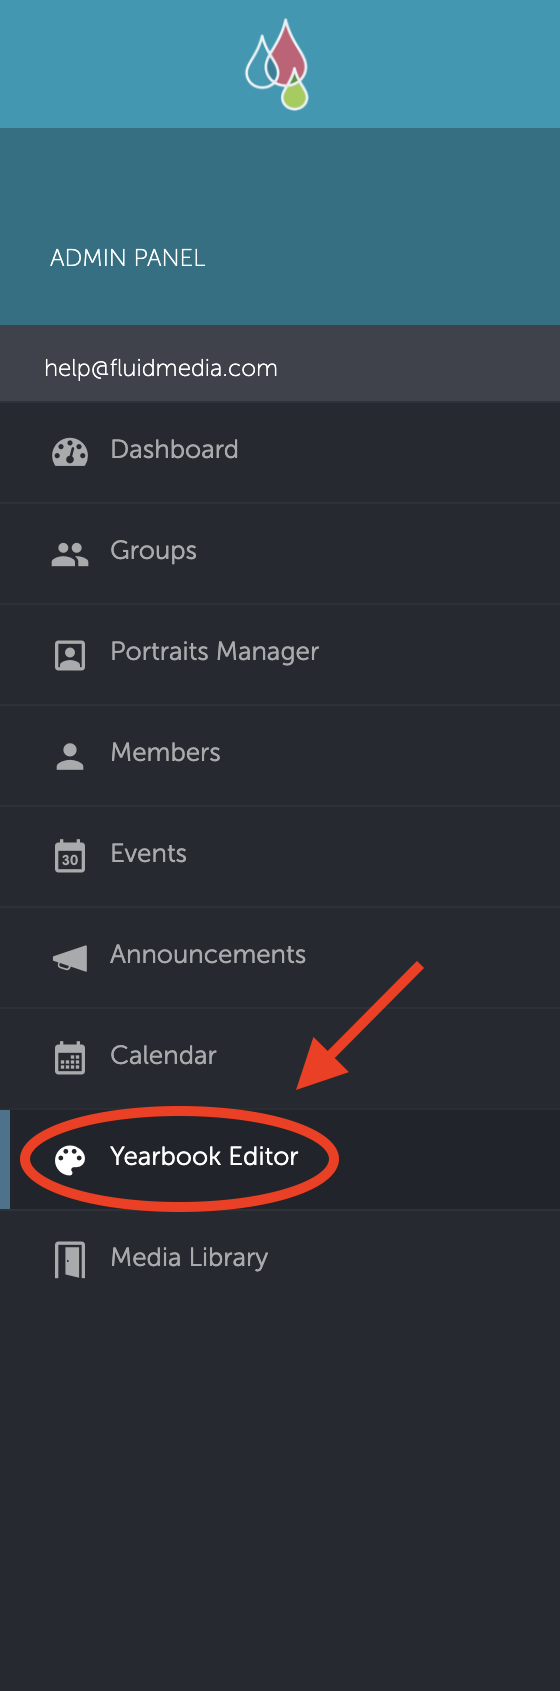
Inside this page, you will be able to see your empty book and begin exploring!
How do I invite members and change their role?
Navigate to the Community Activity Stream and click on the Admin Gear.

Click on the Members tab in the Admin Panel.
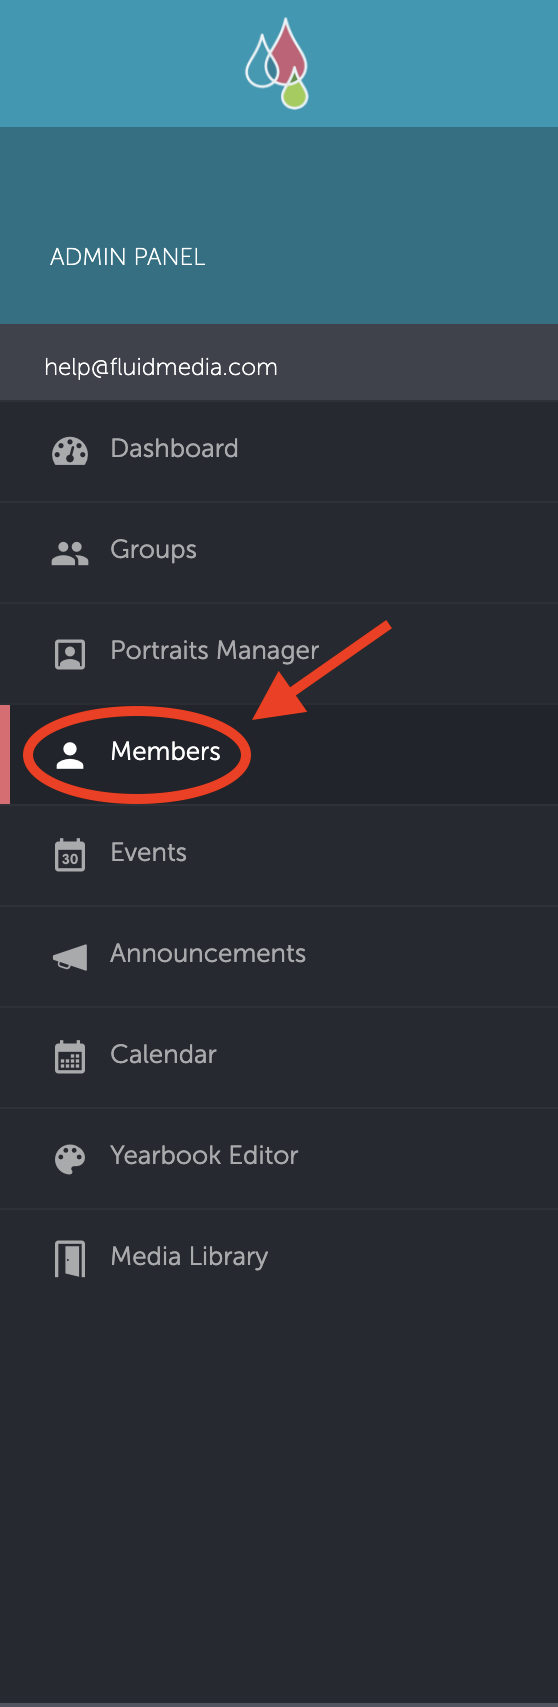
Then click on the small red “+” button at the bottom right corner of the screen.

A window will appear with an invitation selector, then enter the new members details then click Next.
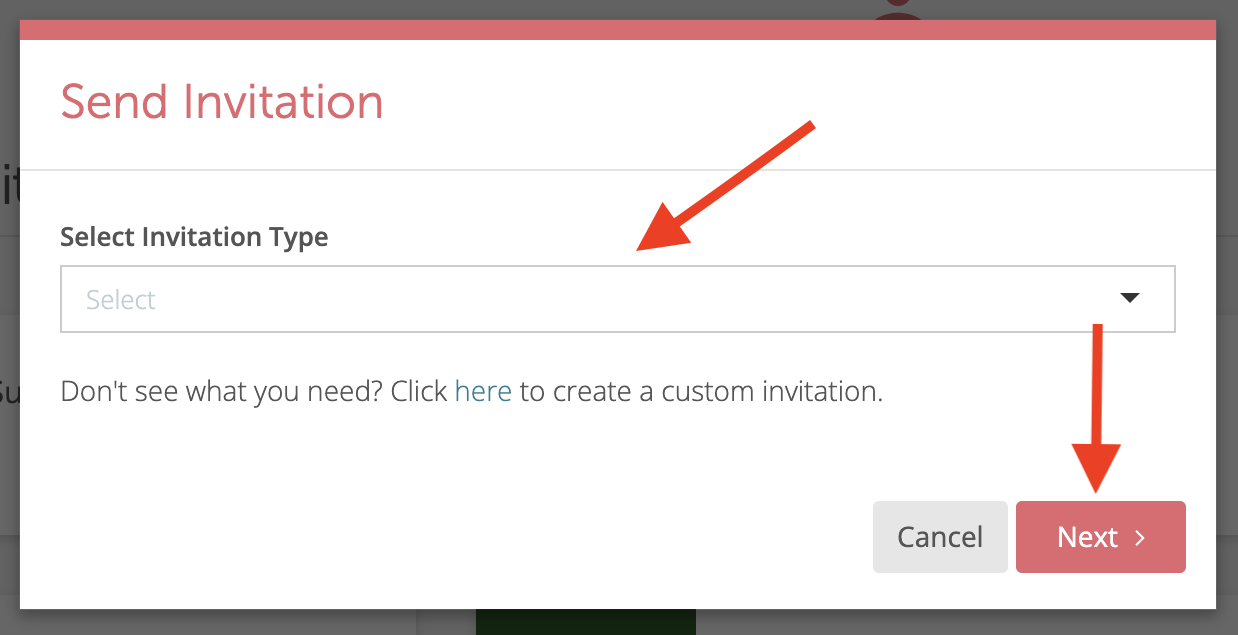
The Send Invitation preview will appear, click the drop-down menu and click on General then click Next.
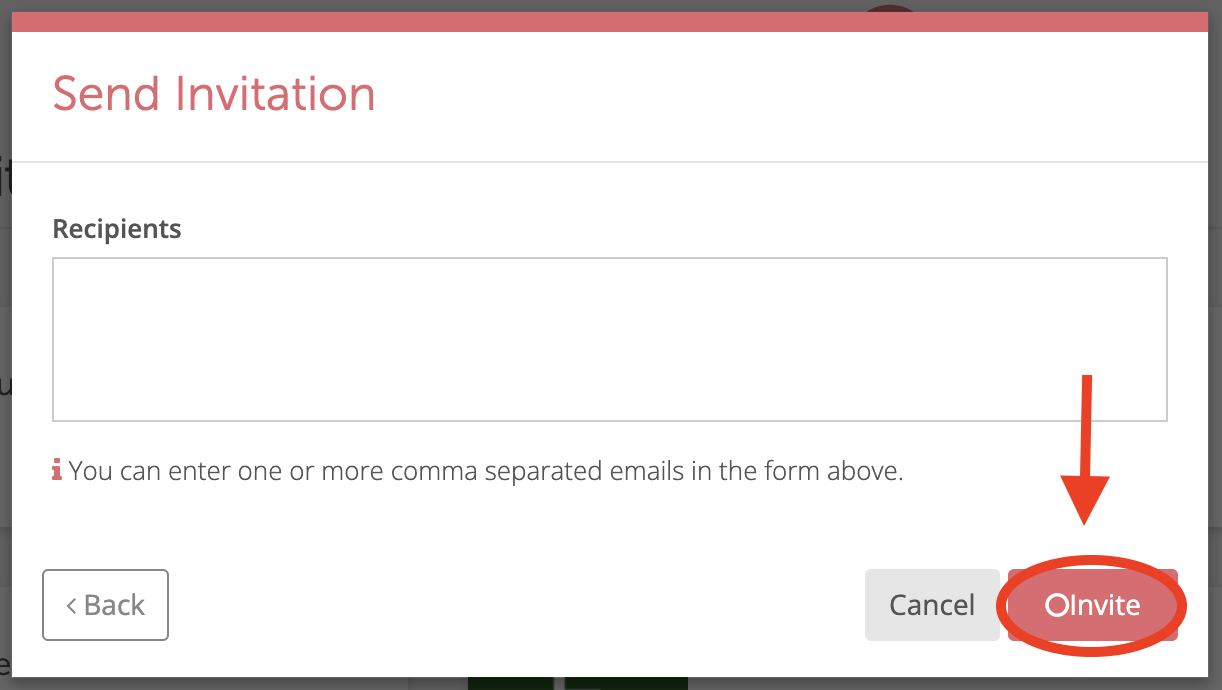
In the recipients section add your member by inputting their emails
Note: if you are adding a lot of members write a comma after each email address.
Click Invite
When someone receives an invitation and joins your Community you will see them show up in the Members Section.
Note: Once you invite a member, they are automatically a Regular member and must be changed in Administration to access the yearbook builder and Admin Panel.
Creating Custom Invitations
Navigate to the Community Activity Stream, click on the Admin Gear.

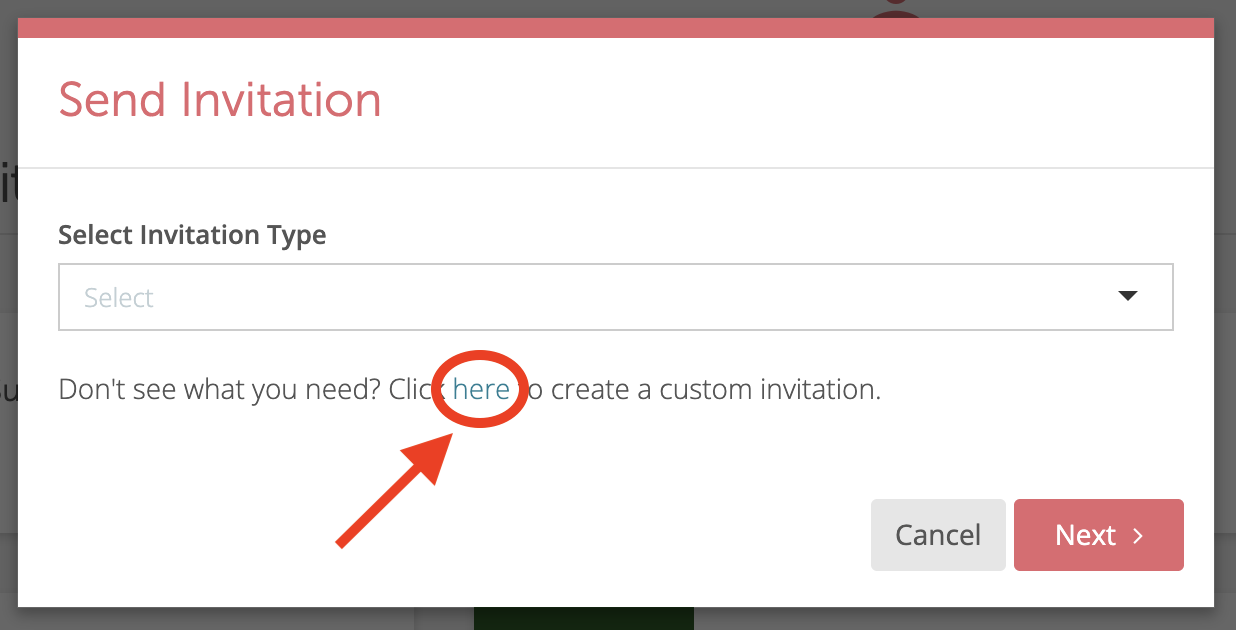
Navigate to the Members; page and click on the plus member button in the bottom right corner.

Then click on the hyperlinked here section to create a custom invitation.
Change Member's Role
Navigate to the Community Activity Stream and click on the Admin Gear.

Then click on the Members tab in the Admin Panel.
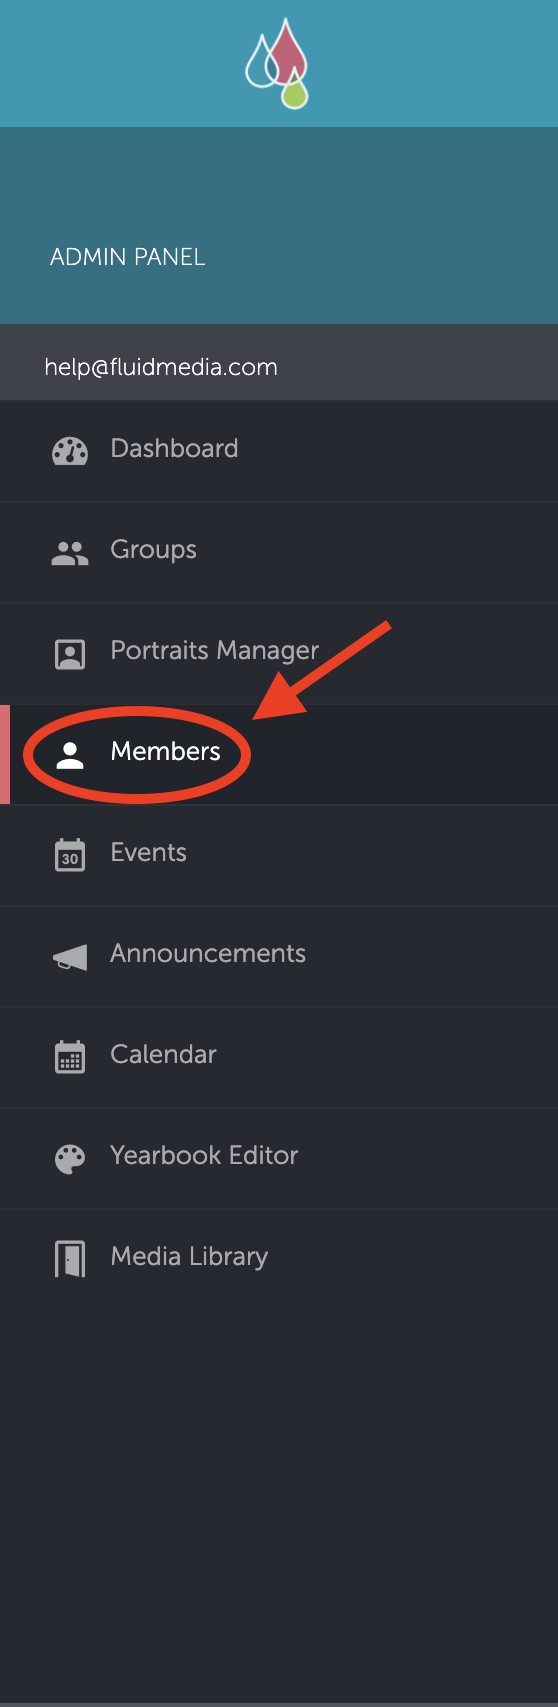
Click on the member you want to promote to administrator.
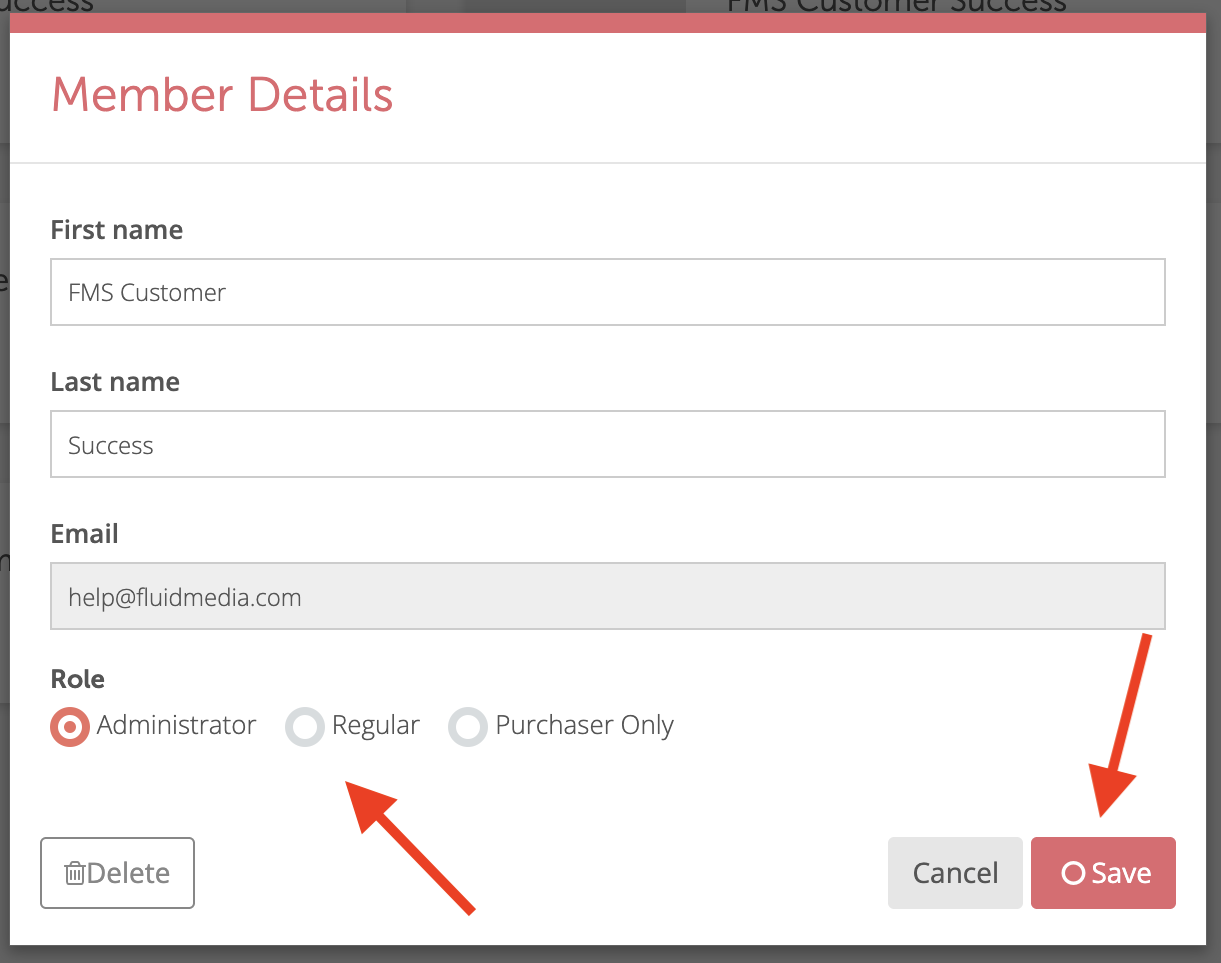
A box will show up and display member details.
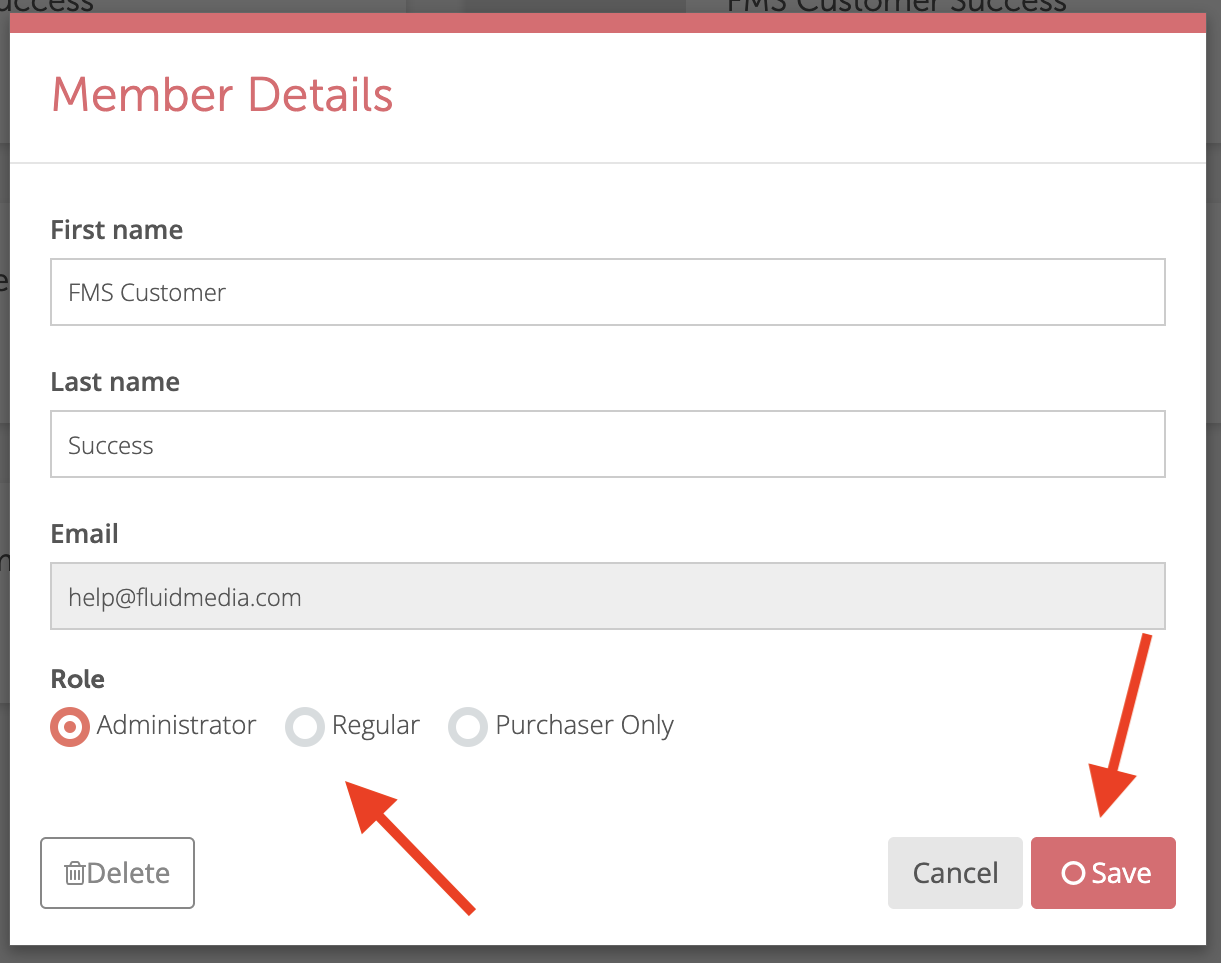
The user’s role will be displayed at the bottom of the box click Administrator and hit save.
How Do I Change My Password?
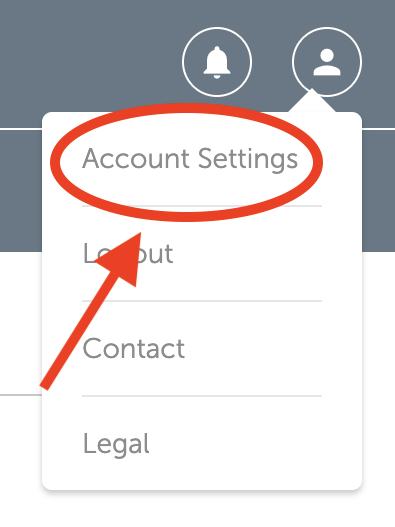
To change your password, navigate to the account icon in the top right corner of the Community Activity Stream, and select the Account Settings option from the dropdown menu.
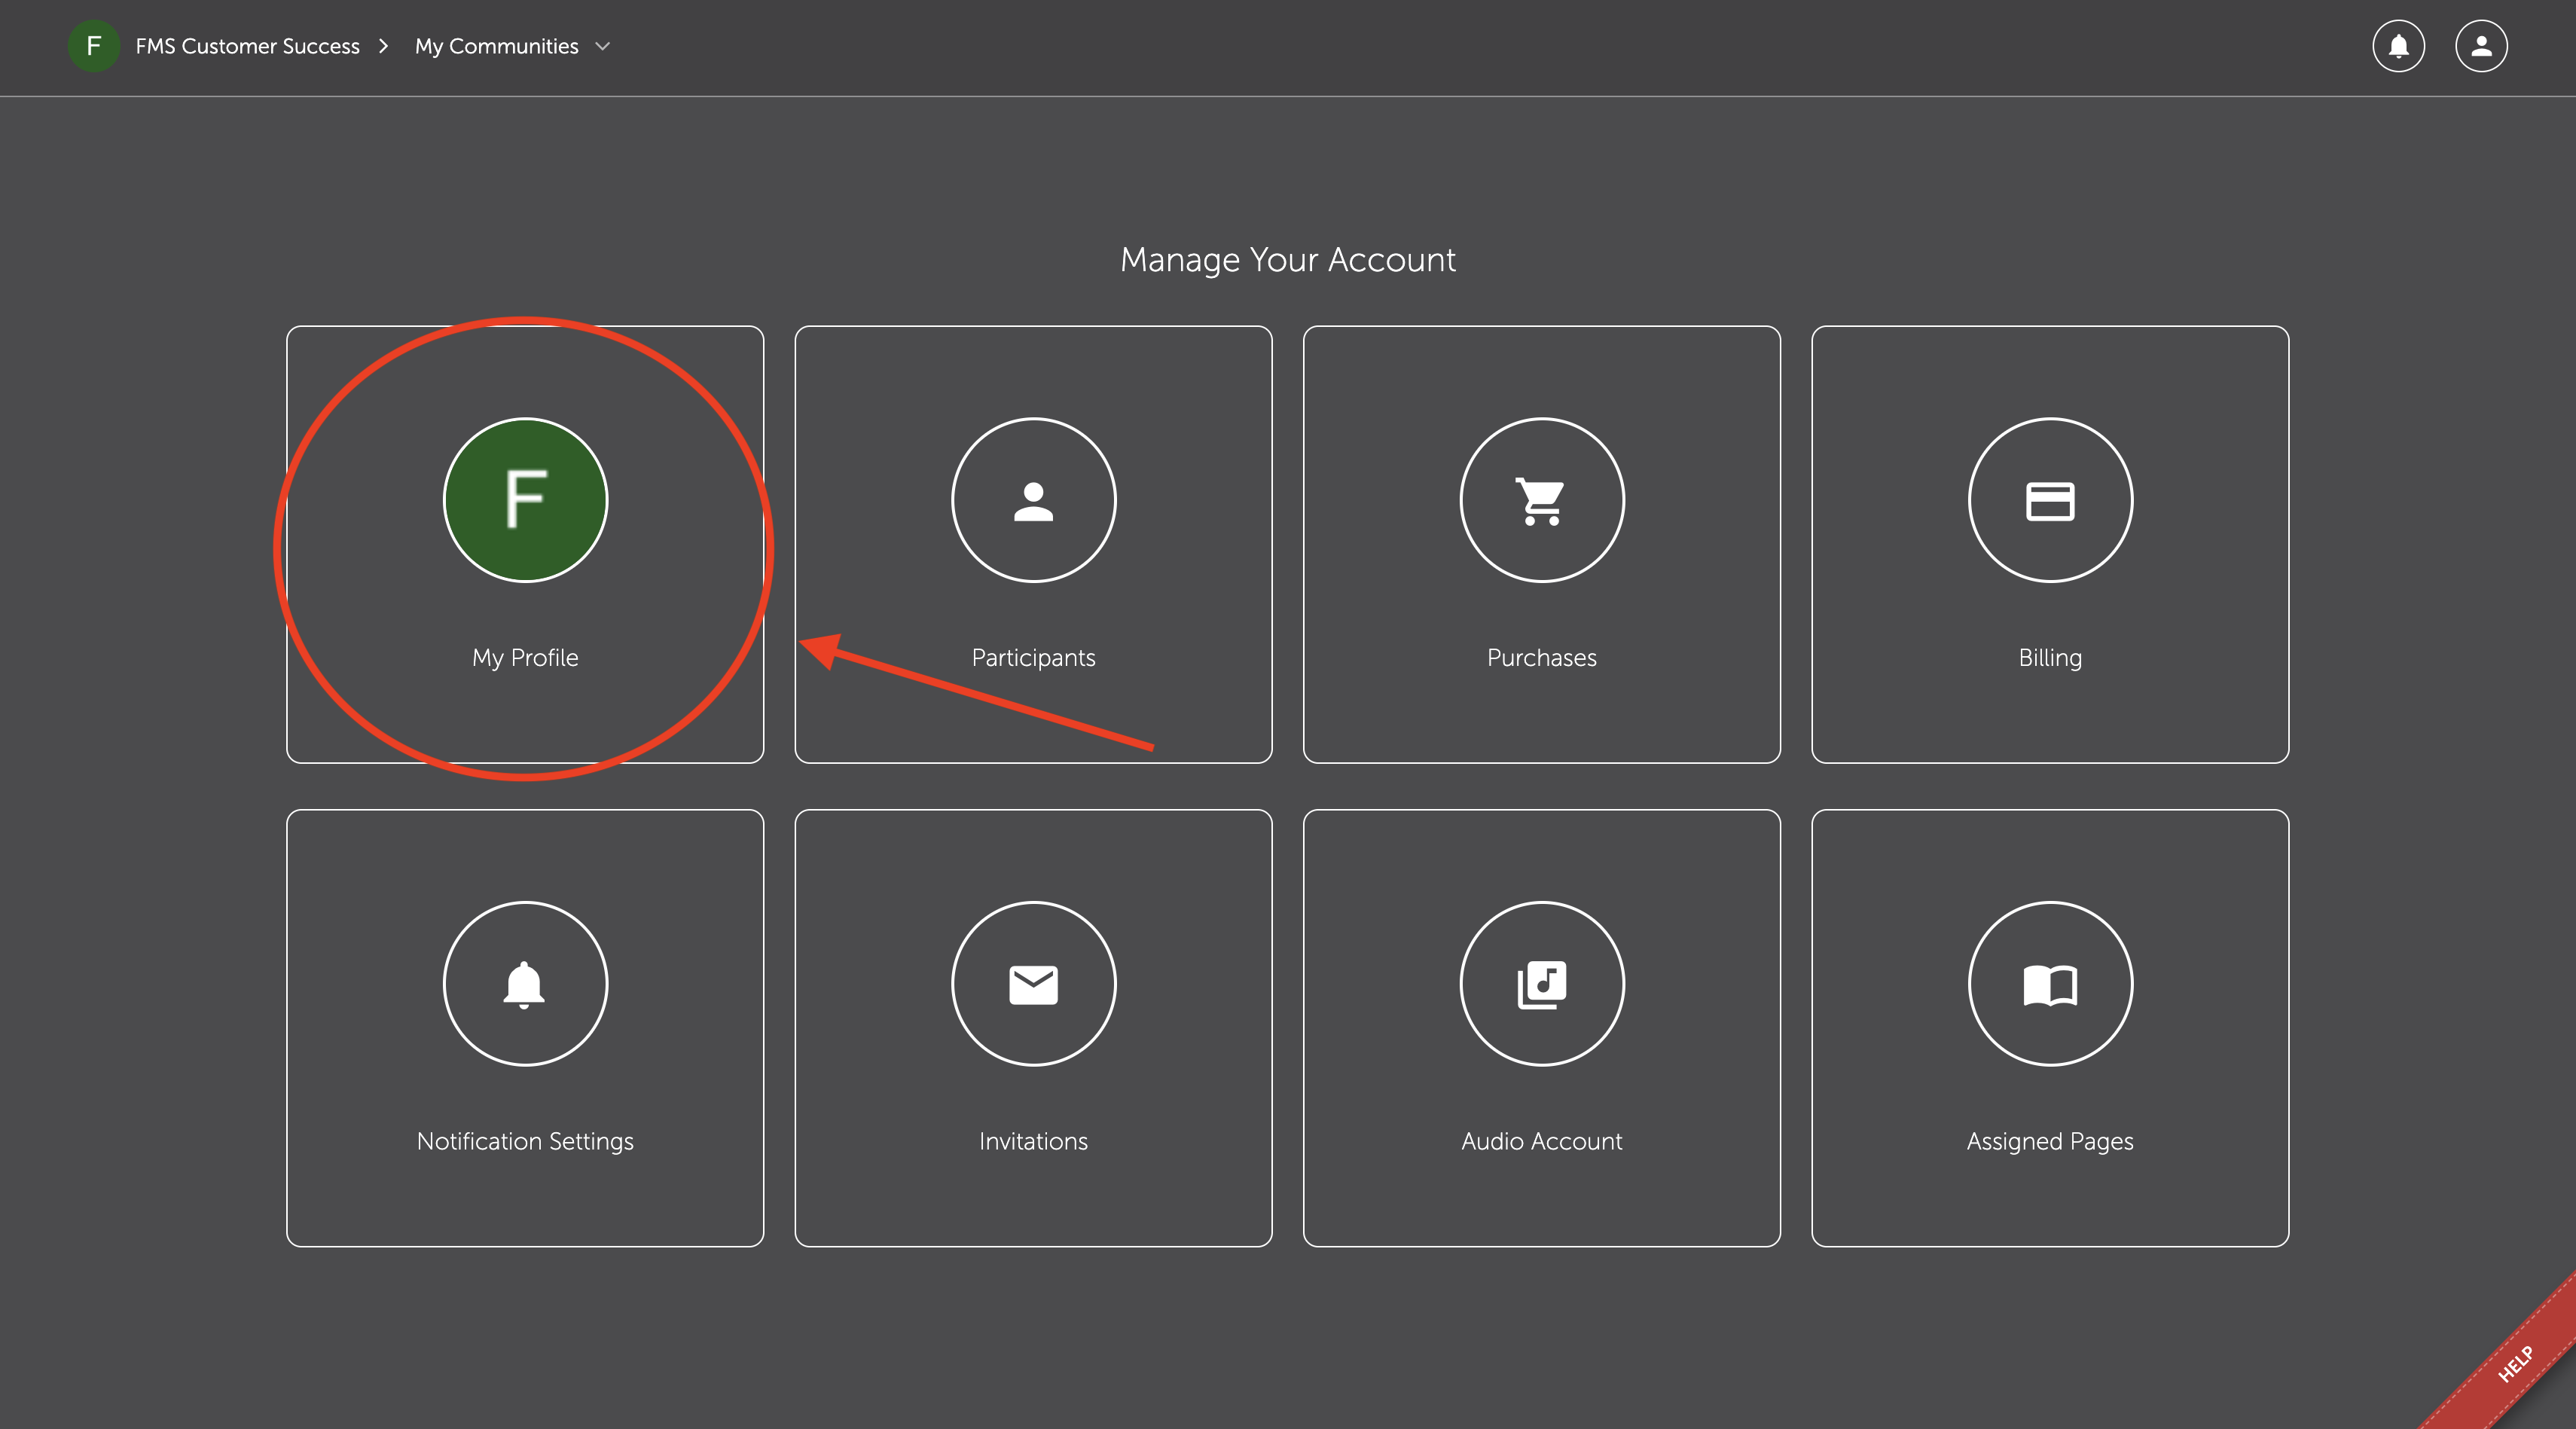
Next, click on the My Profile button.
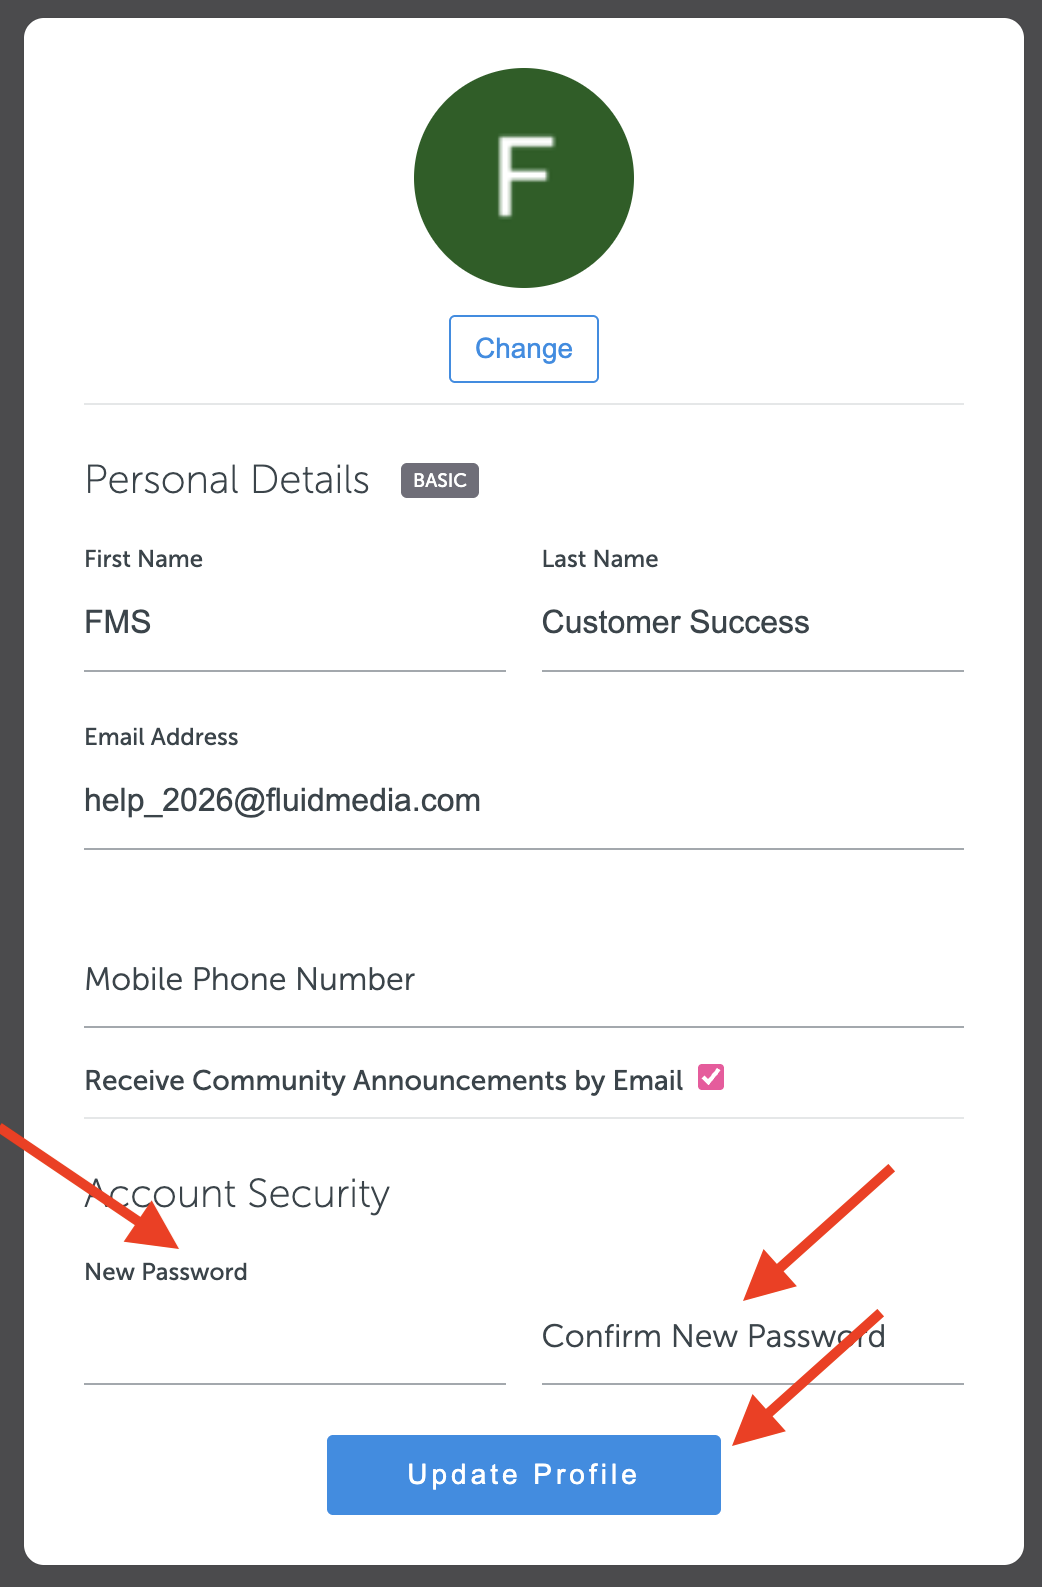
Under Account Activity type in your new password and confirm the password, then click Update Profile.
What is the difference between My Studio and Media Library?
Your My Studio is your personal stream of photos that have been uploaded by you anywhere in the system. Each user has their own My Studio that can only be accessed when logged into their specific account.
The Media Library is where any member in the community will be able to access and upload photos for the specific community that they are in.
To access the Media Library for your school/team/program from My Studio, you can click on the My Communities button beside your name in the upper left corner and select the appropriate community from the dropdown.
Can you add text or images to the inside cover?
This page is reserved as the backing for the front cover. No text or images can be added to the inside cover. You can, however, modify the page that is attached to the inside cover.
How do I create an event?
Note: Only Administrative Members have access to the Admin Panel and Yearbook Editor. To request Administrative access, please contact your Yearbook Advisor or a member of the Fluid Media Customer Success Team.
Navigate to the Community Activity Stream and click on the Admin Gear.

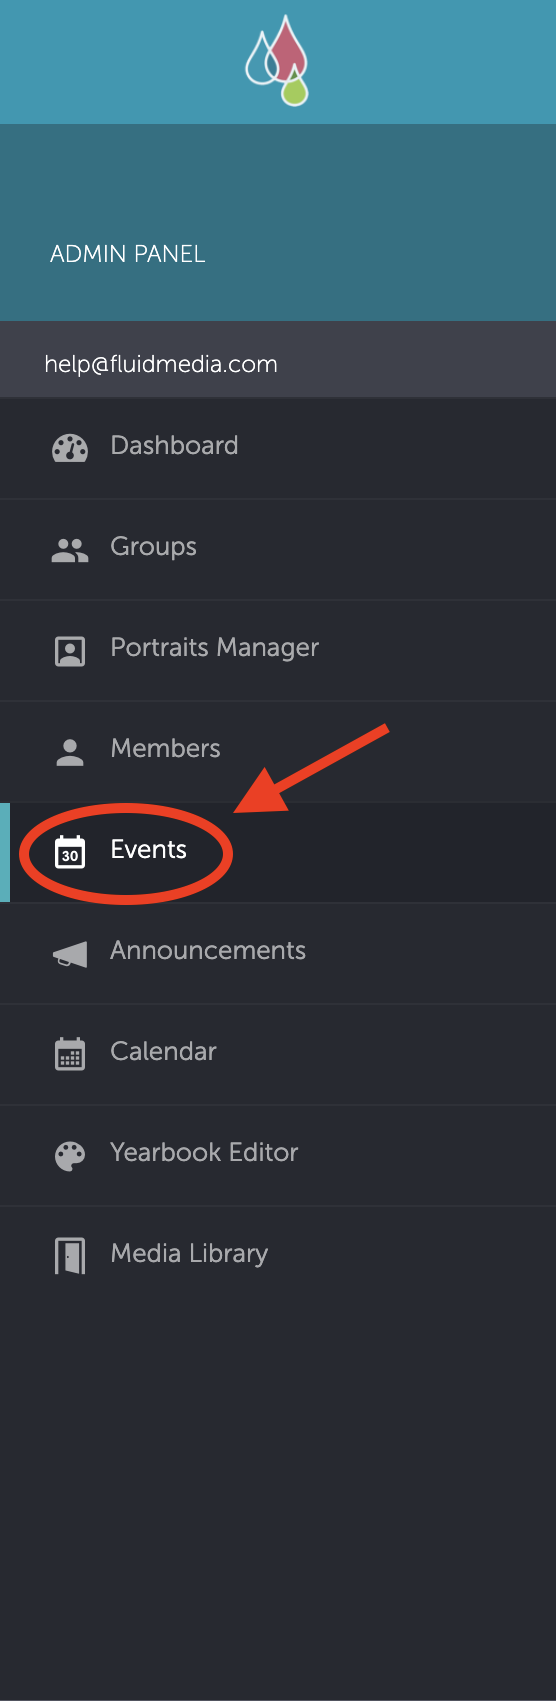
Click the Events tab in the Admin Gear.
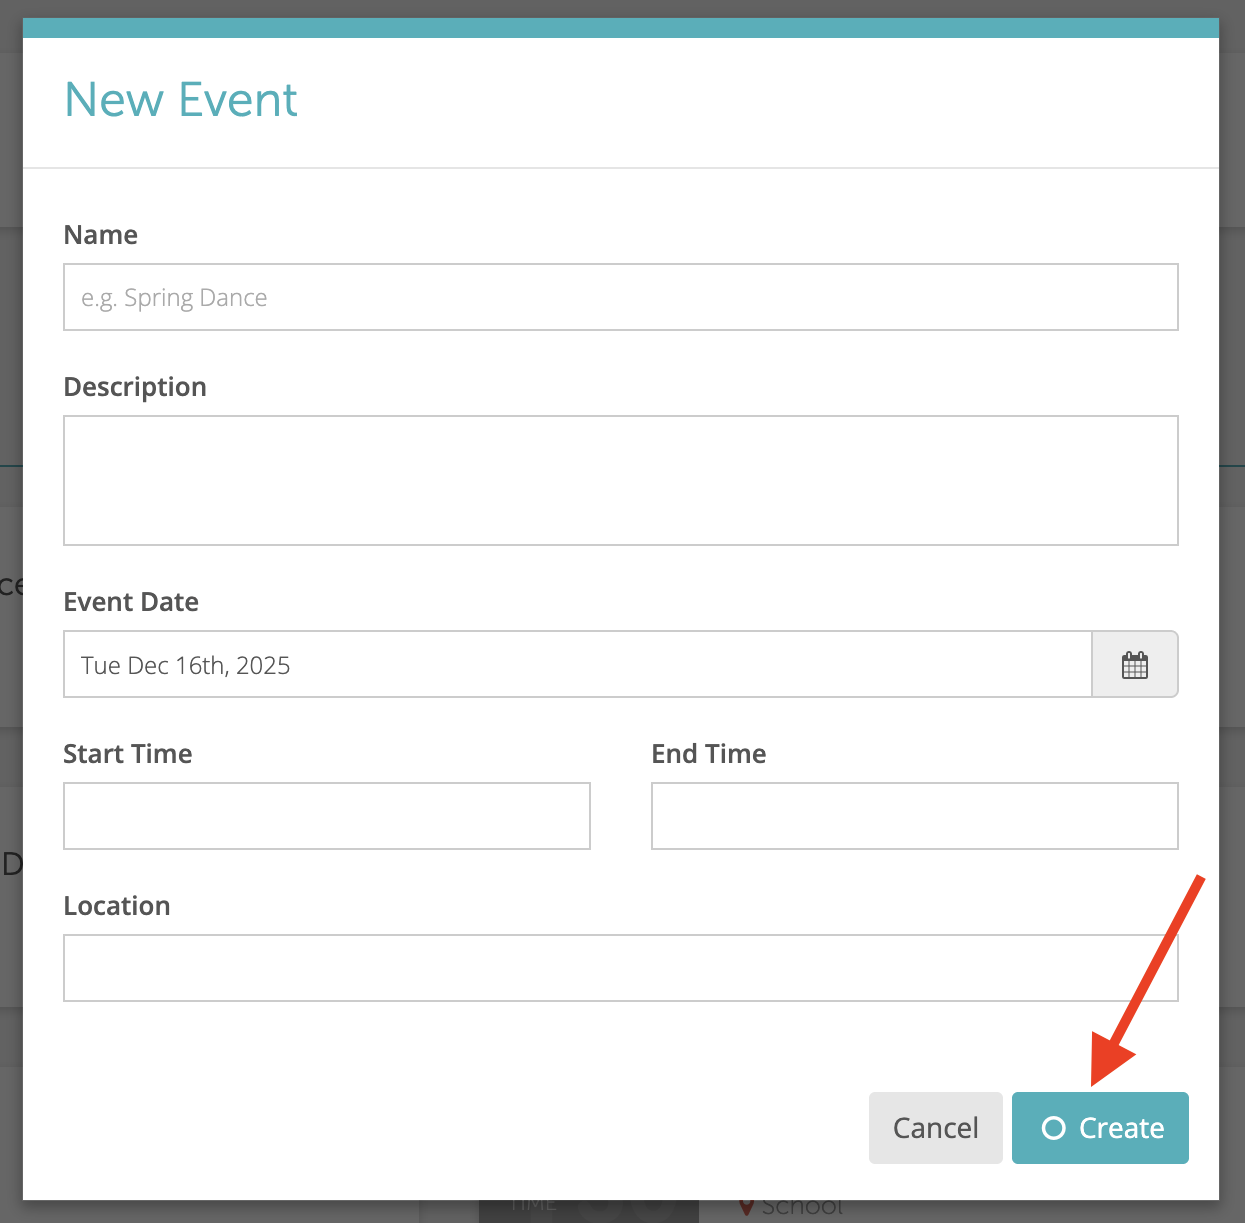
There will be a blue plus button at the bottom of the events page.

Another page will appear where you can enter your event details.
Note: You must include a name, date, and location to create the event.
Once all fields are filled in, click the Create button.
Now that your event is created, you should see the album folder in your Media Library!
You can now begin adding photos to the event from the Media Library!
How do I get help?
There is a red Help ribbon at the bottom right of the screen.

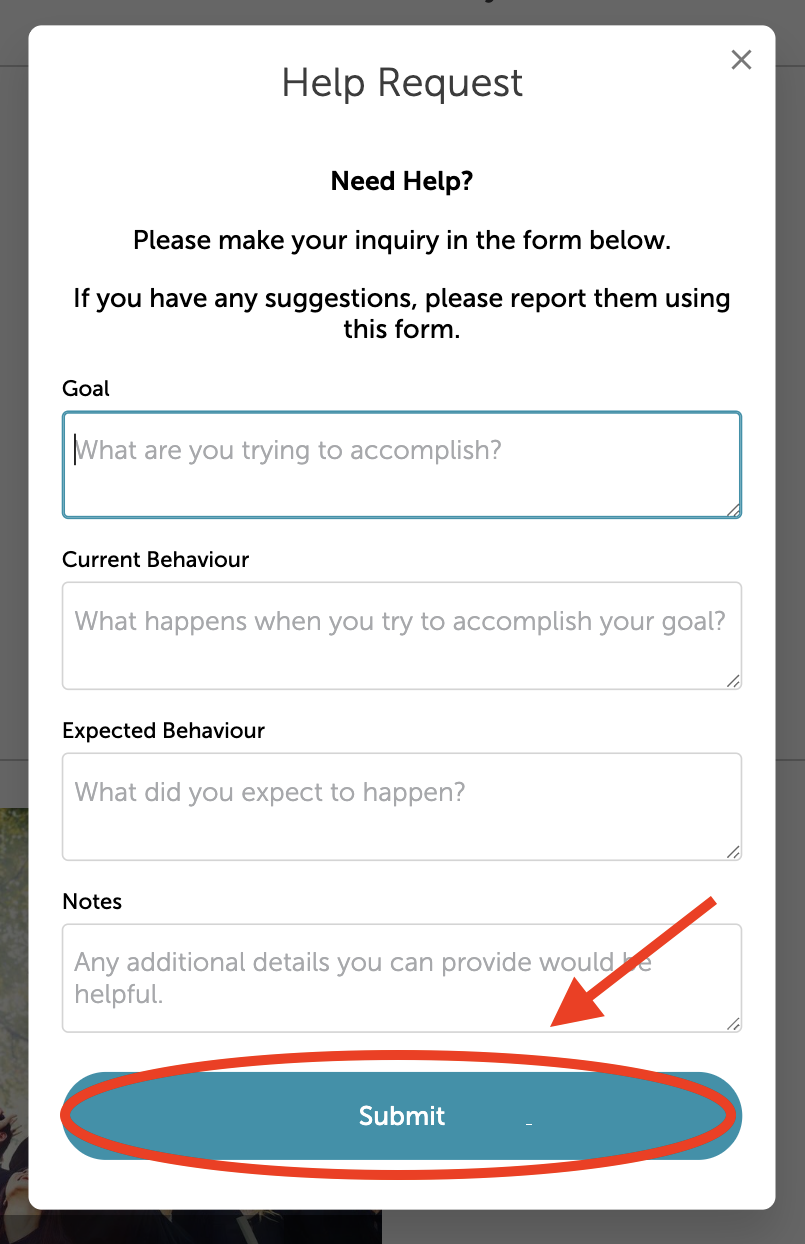
When you click on the ribbon a Help Request page will pop up.
From there you can type in what you need help with than click Submit.
For additional support, please contact the fluid media customer success team via email at help@fluidmedia.com.
What is Copyright?
Copyright is the exclusive right to use a piece of literature, art, music, and other artistic work. When working on your yearbook, please be mindful of the media that you are, including as it may be protected by copyright.
What is protected by copyright law?
Cartoon characters: Cartoon Characters, unless drawn by a student, are likely protected by copyright law. Examples include minions, Tinker Bell and SpongeBob.
Brand logos: Brand Logos are no exception. Nike, TikTok, Snapchat, etc., are all examples of logos that cannot be used.
Song lyrics and literature: Using quotes from a song or book is considered copyright infringement.
Photos of celebrities: Using photos of influencers and celebrities are prohibited.
Public domain
Free to use: You have full ability to use public domain artistic works.
Copyright has an expiry date: the copyright of an author at last for their lifetime +70 years after their death or 95 years after creation for corporation-made publications.
Fair use:
Permits the use of copyrighted material in limited amounts: copyrighted material can be used in small amounts without permission in the context of critique, commentary, news, scholarship, or education. Year-in-Review pages in yearbooks are protected by fair use as it is used under the context of news reporting and education.
For more information on Fair Dealing in Canada, please visit: http://fairdealingdecisiontool.ca/
Yearbook tips
Before using photos from social media (ex. Facebook, Twitter, Pinterest, Instagram), make sure to ask permission from the owner.
Use artwork, music, and media from the public domain and royalty free resources.
If you're using Google to source copyright free images make sure there are no watermarks on the images as they indicate that the image is protected.
If you would like to use an image with a watermark, please request consent - or purchase the rights to the material.
Who uploads school portraits?
The support team/photographers will upload all of the portraits for the year. This includes the portraits from the photo day and photo retake day.
How to request a PDF of your book?
You are able to request a PDF by entering the print edition and clicking on the ellipsis in the upper right corner of one of the sheets. From the drop-down, select PDF and a download link will be sent to the email address associated with your account.
Note: depending on the size of your book, it may take up to 8 hours to receive the PDF; however, reach out to our team if you have not received the PDF after eight hours.
How do I get a proof of my yearbook?
If you are finished with your project and are ready to see a proof of your yearbook, please contact your Fluid Media advisor or email help@fluidmedia.com. A member of our team will follow up with your proof.
How to approve your proof
Click on the link included in the email to access your proof. Double click into the covers proof and full proof separately.
Once you have reviewed your full yearbook proof, click on the “click here to approve or reject” button in the upper left-hand corner of the page.
Identify yourself with an email in order to approve or reject the proof.
Choose whether you would like to approve your proof with no edits (green), or reject the proof and make further changes (red).
Once you have selected your preferred option, please send us an email to notify us of your approval, and we will submit your yearbook to print.
If you’d like to make changes to your yearbook, please note the page numbers you’ve edited in the Yearbook Editor and send them to us. We’ll update and resend your proof accordingly.
How to add portraits to the Portraits Manager?
Click on the Admin Gear to access the Admin Panel.

Once you are in the Admin Panel, locate the Portrait Manager.
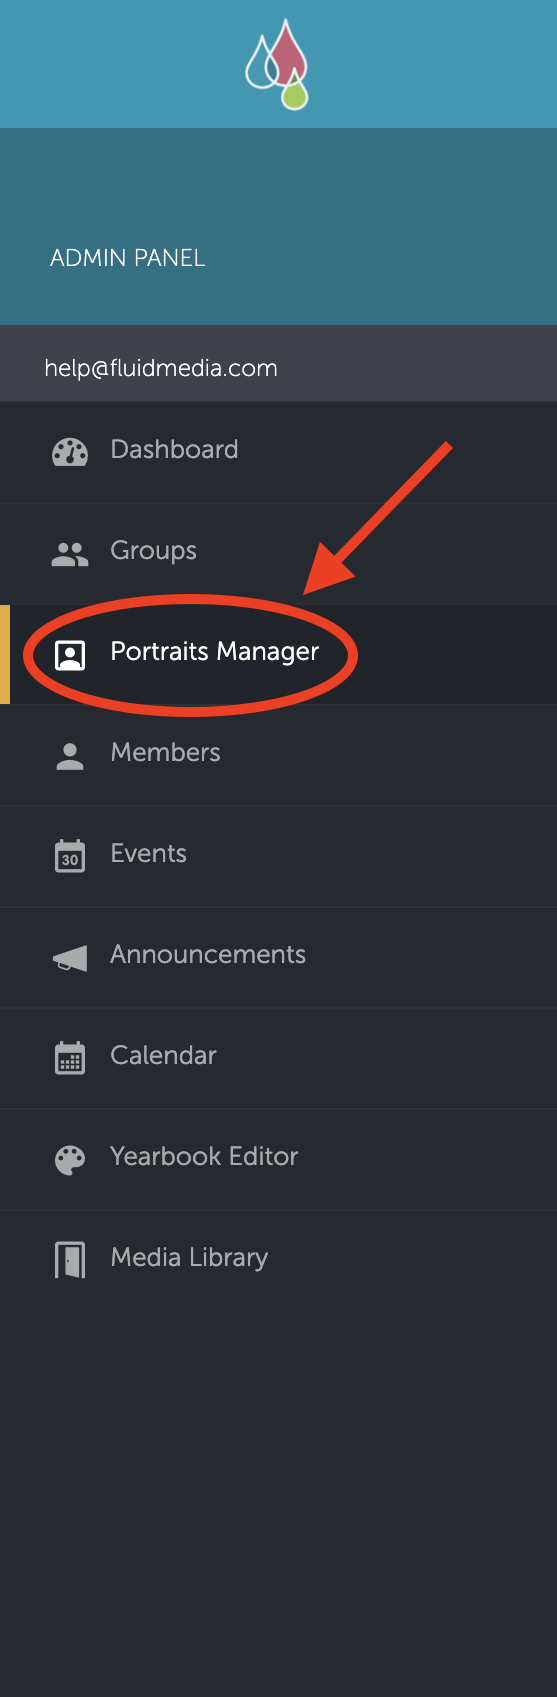
Navigate to the Portraits Manager and scroll to the collection that you would like to add the portrait to.
From there, click on the Add Portraits button.
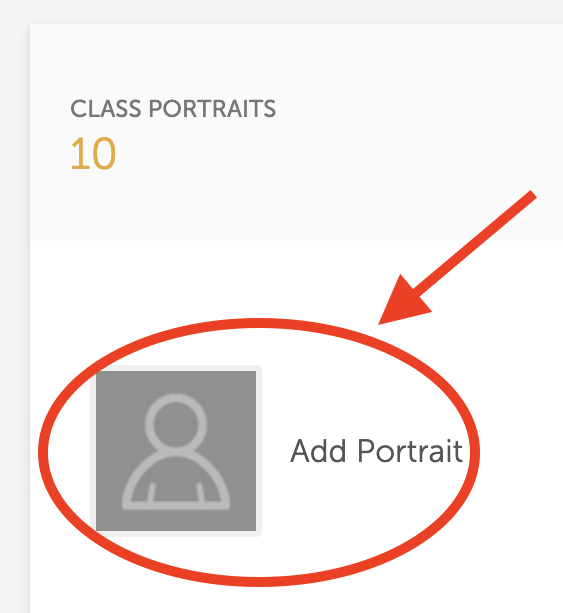
Next, add a first and last name. You can click into the grey placeholder icon to add a portrait, or drag and drop the portrait into the grey placeholder icon box. Then click Save.
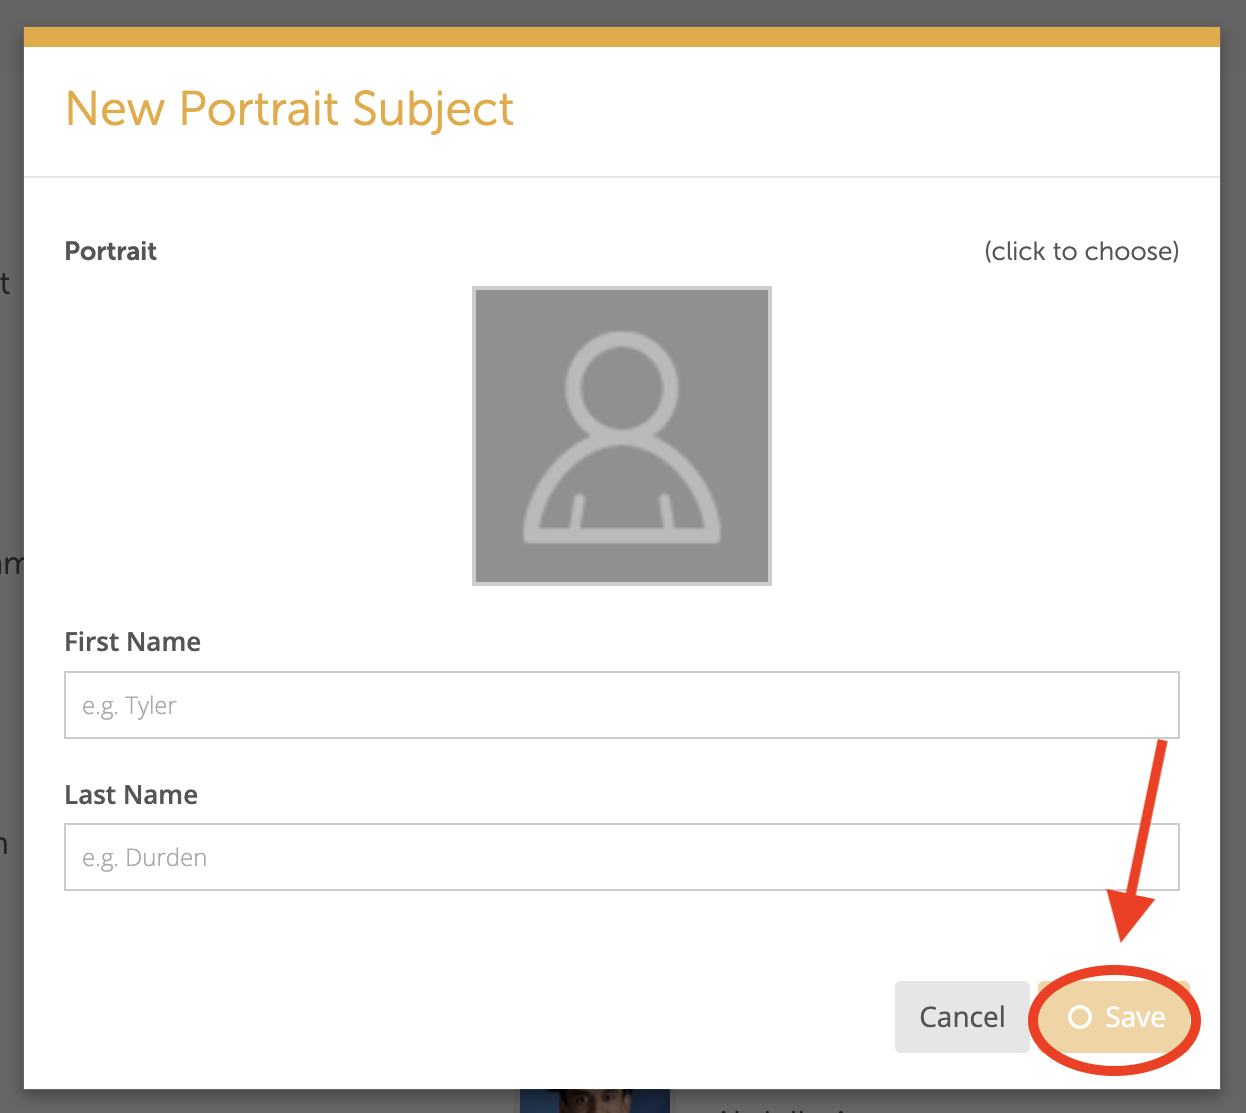
You have now successfully added a new portrait to the Portraits Manager!
Assigning Member Roles: Administrative or Regular
Click on the Admin Gear to access the Admin Panel.

Once you're in the Admin Panel, locate the Members tab in the left menu.
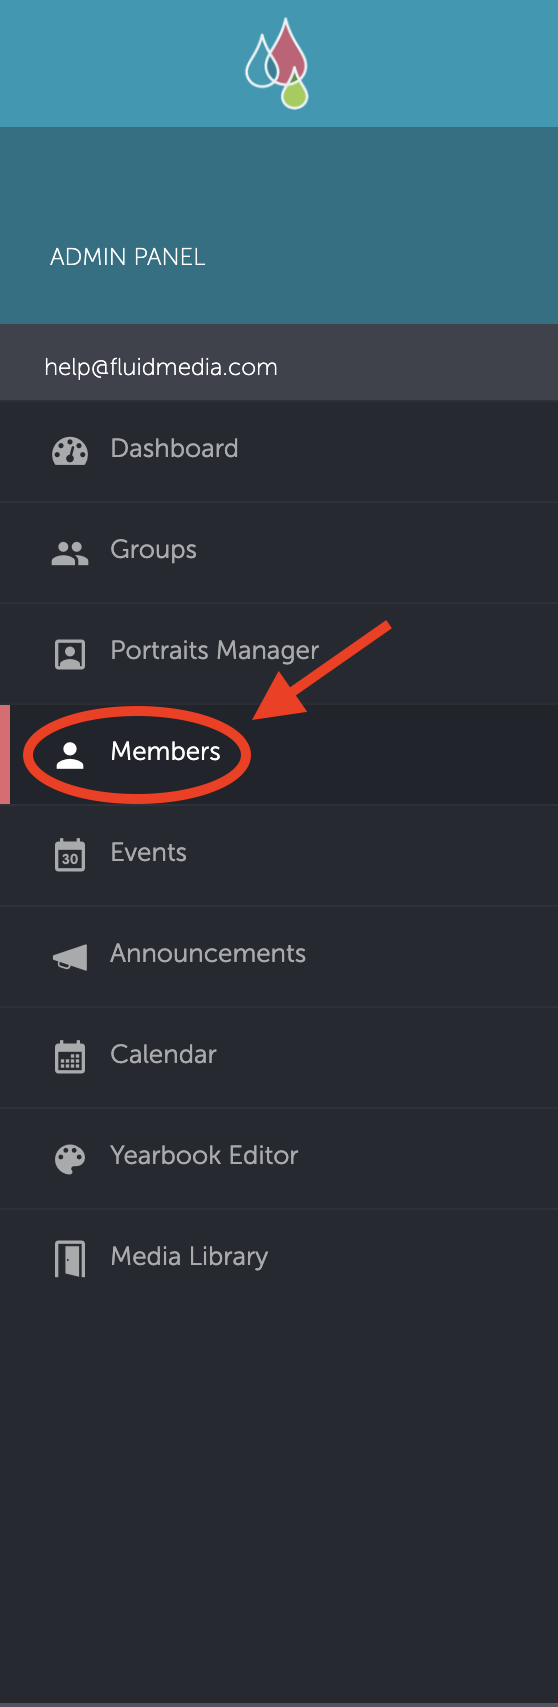
From here, you will be able to view all of the active members in your community.
There are two levels for members: Administrative or Regular.
Admin members have access to the Admin Panel, Yearbook Editor, and Media Library.
In contrast, Regular members only have access to the Media Library.
If an Admin member assigns a page to a Regular member, that member will only be able to edit their assigned pages.
The membership level of a user will appear under their name.
To change the membership level click on the member’s name. The member details window will allow you to switch their roles.
How to Edit the Portrait Collections?
Click on the Admin Gear to access the Admin Panel.

Once you're in the Admin Panel, locate the Members tab in the left menu.
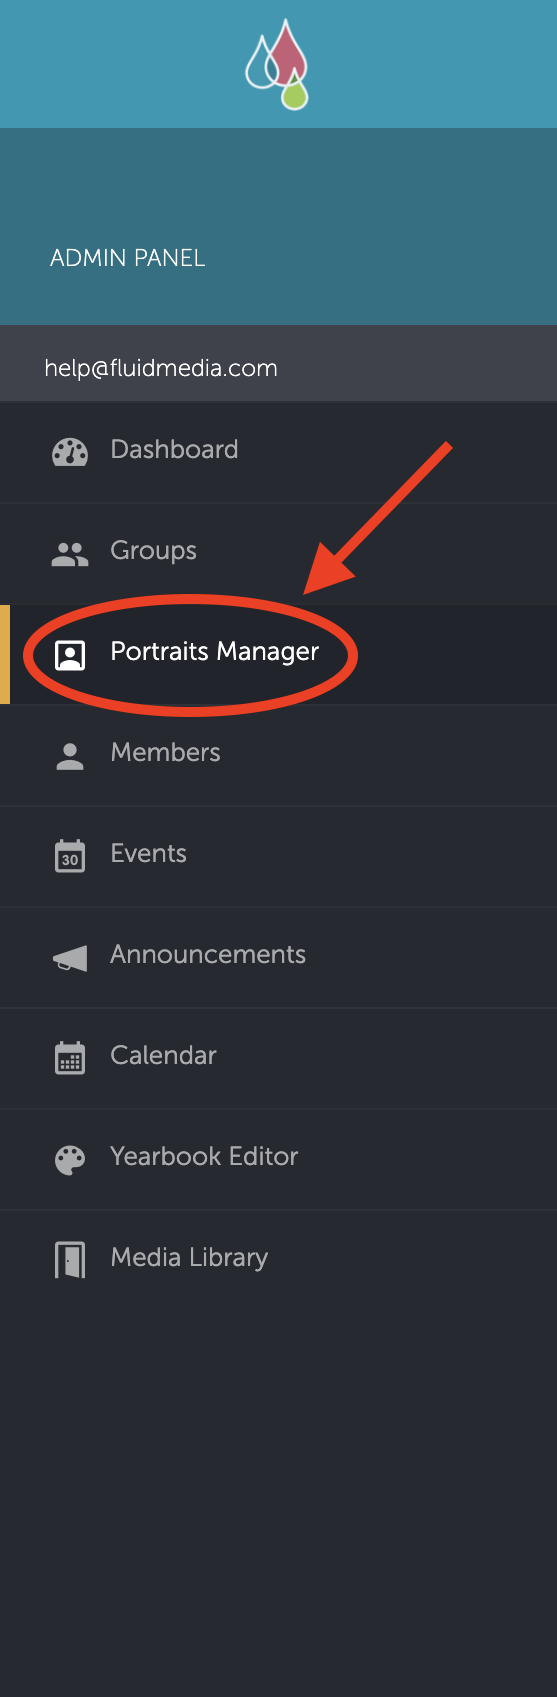
From here, you will be able to view all of the portraits that have been uploaded. They are saved into collections based on either classrooms, grade, or alphabetical spelling.
If you would like us to change the way the collections are sorted, please contact a member of the Customer Success Team and we would be happy to assist!
To edit the names of the Collection, click on the ellipsis at the top-left of each collection and click Edit. It will open up a Collection Details window that will allow you to edit the collection information.
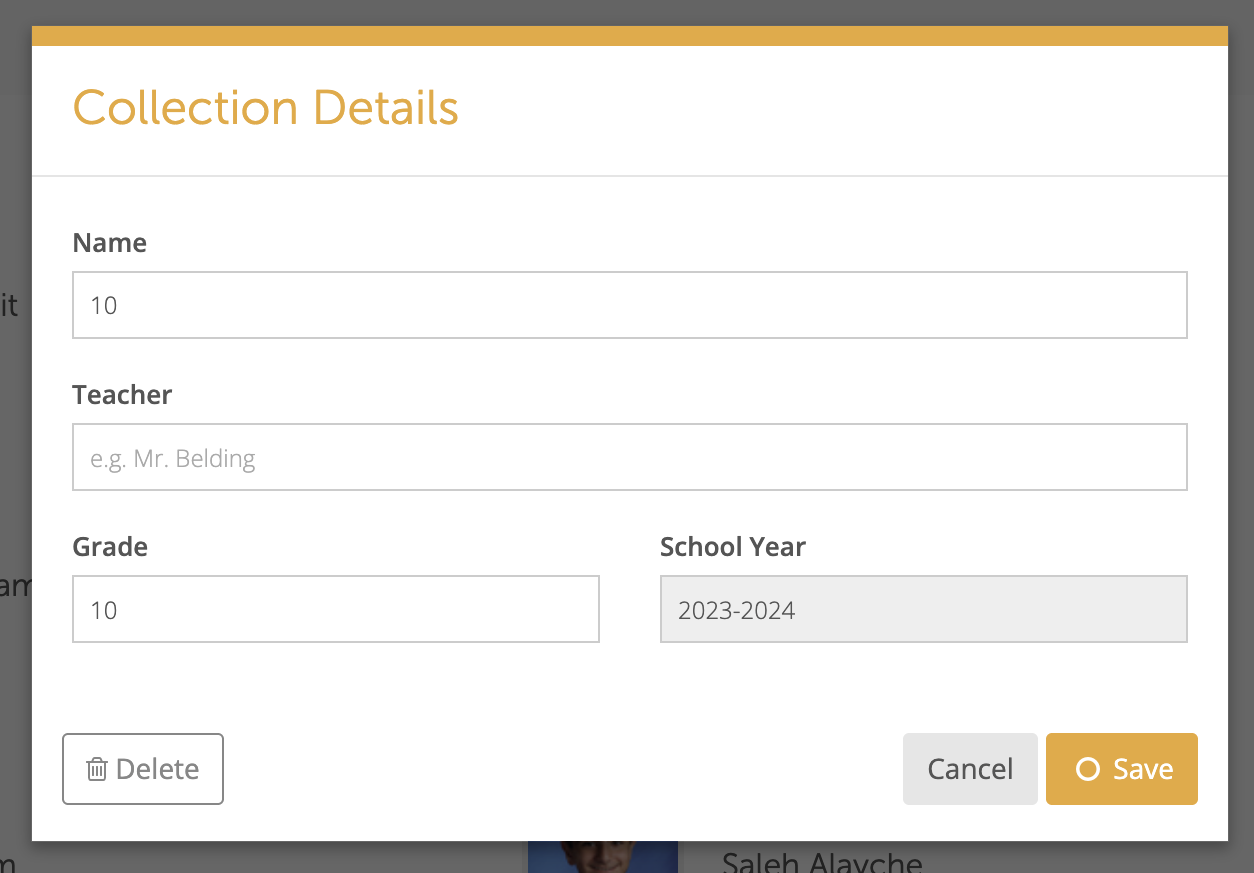
You can change the collection’s name to display the Teacher Name, Grade, or whatever you prefer!
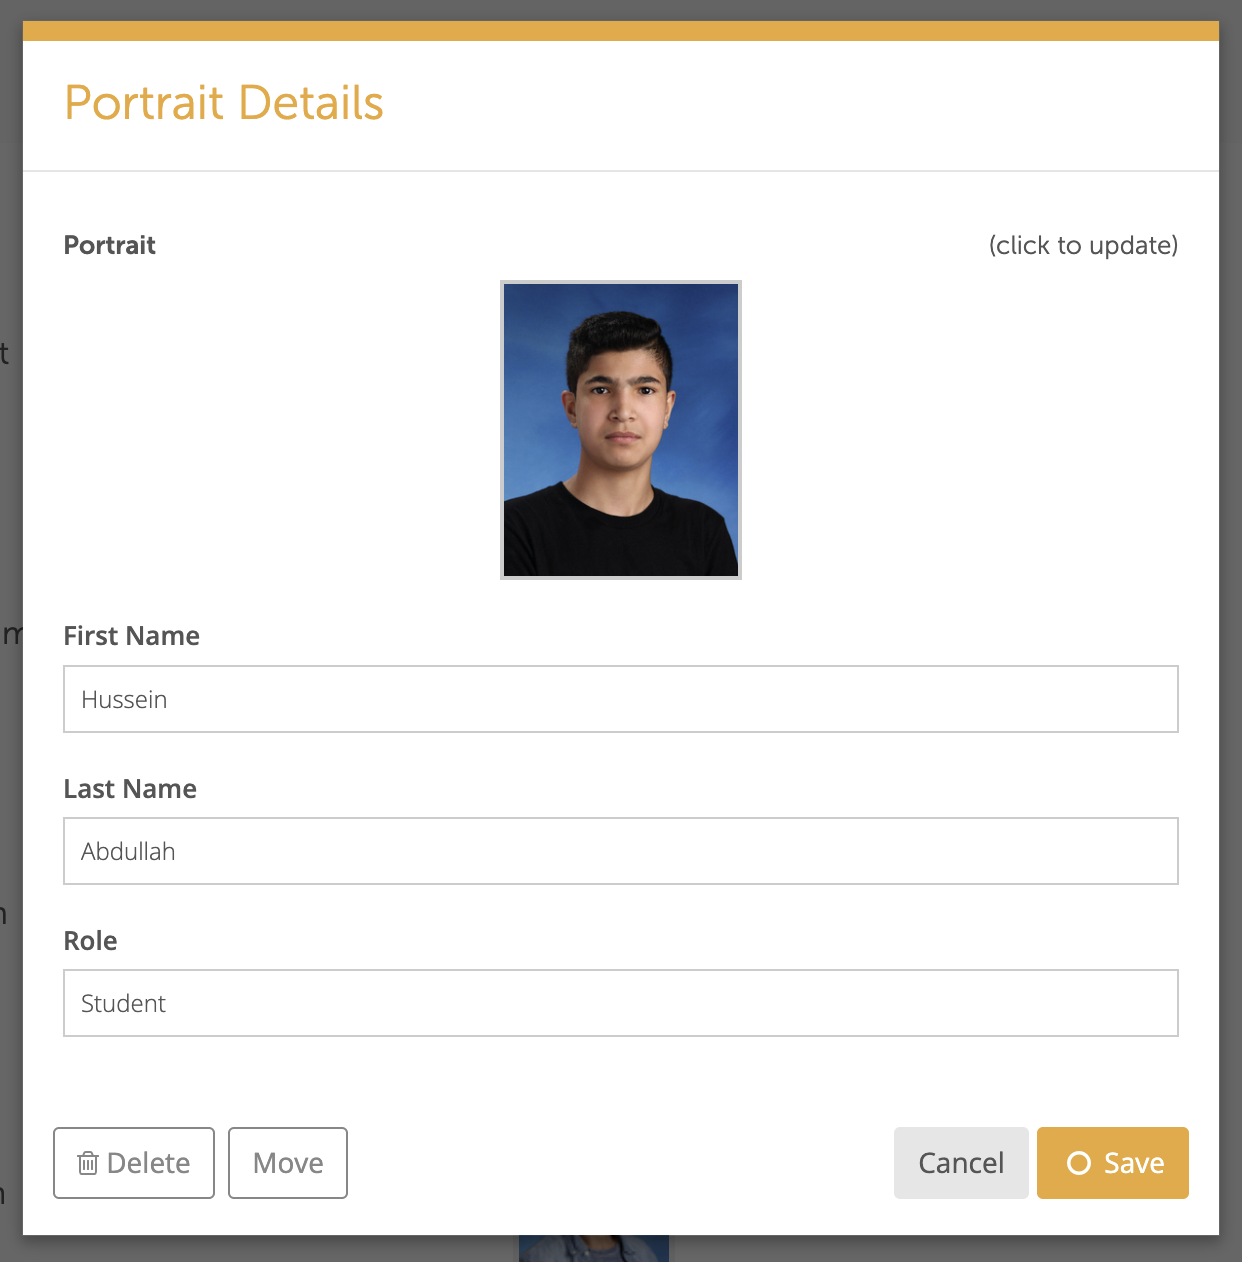
Next, you can edit the Portraits in the Portraits Manager, to do this, click on the student that you would like to edit.
You can modify their name, photo, or move them to a different collection.
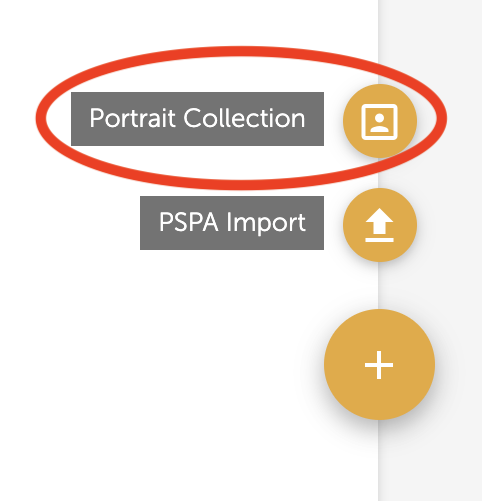
You can create a new collection by clicking on the + in the bottom right corner and then click on Portraits Collection.
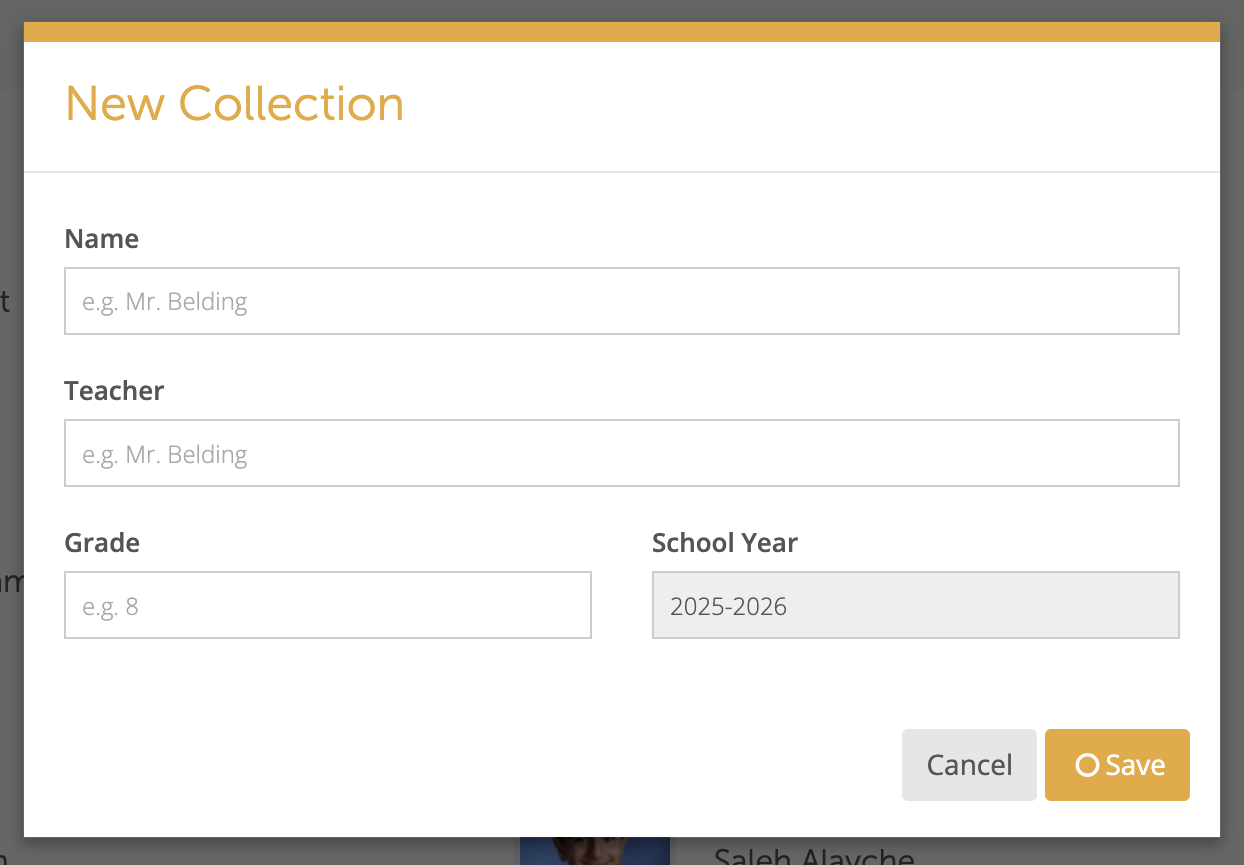
From there, you can fill out the information in the pop-up window.
You can now add or move portraits from other collections into the new collection!
How to Delete a Sheet/Spread?
Click on the Admin Gear to access the Admin Panel.

Once you're in the Admin Panel, locate the Yearbook Editor tab in the left menu.
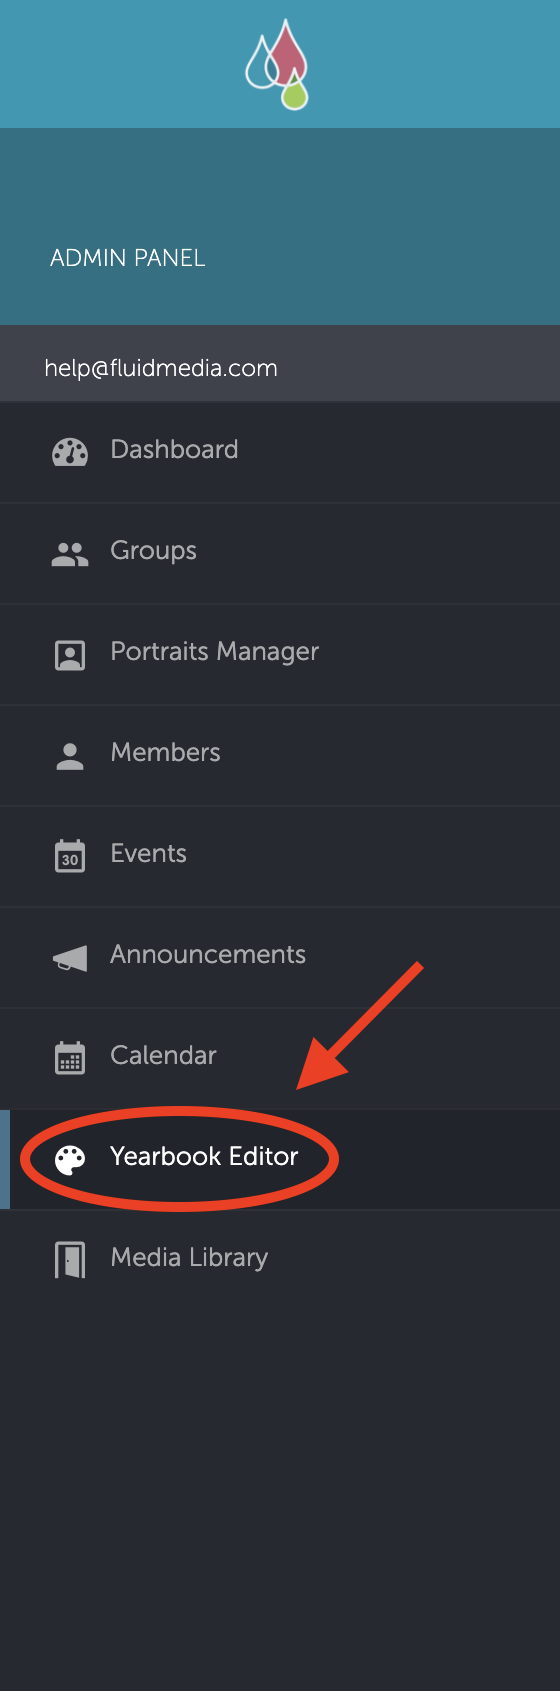
From there, click into the section that contains the sheet/spread that you wish to delete.
Click on the ellipsis button in the top right corner of the sheet.
Then select Delete This Sheet.
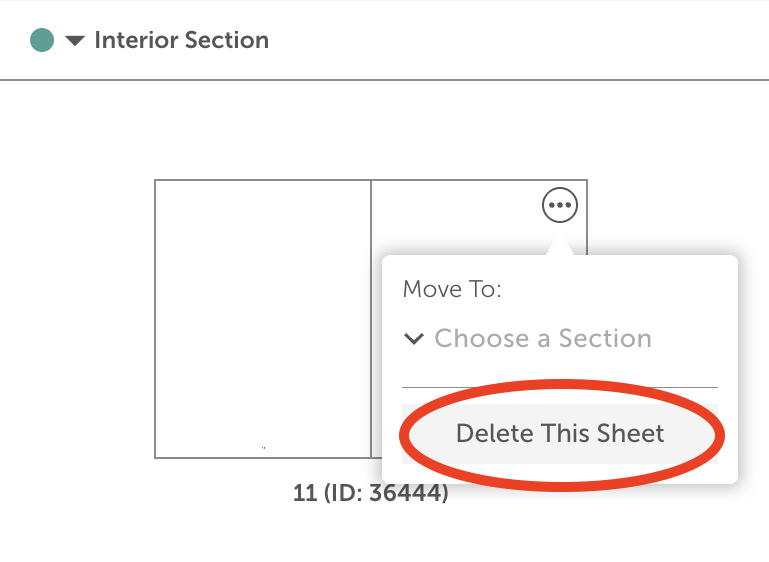
Note: that pages deleted through this process may not be retrievable.
How to move a Sheet/Spread?
Click on the Admin Gear to access the Admin Panel.

Once you're in the Admin Panel, locate the Yearbook Editor tab in the left menu.
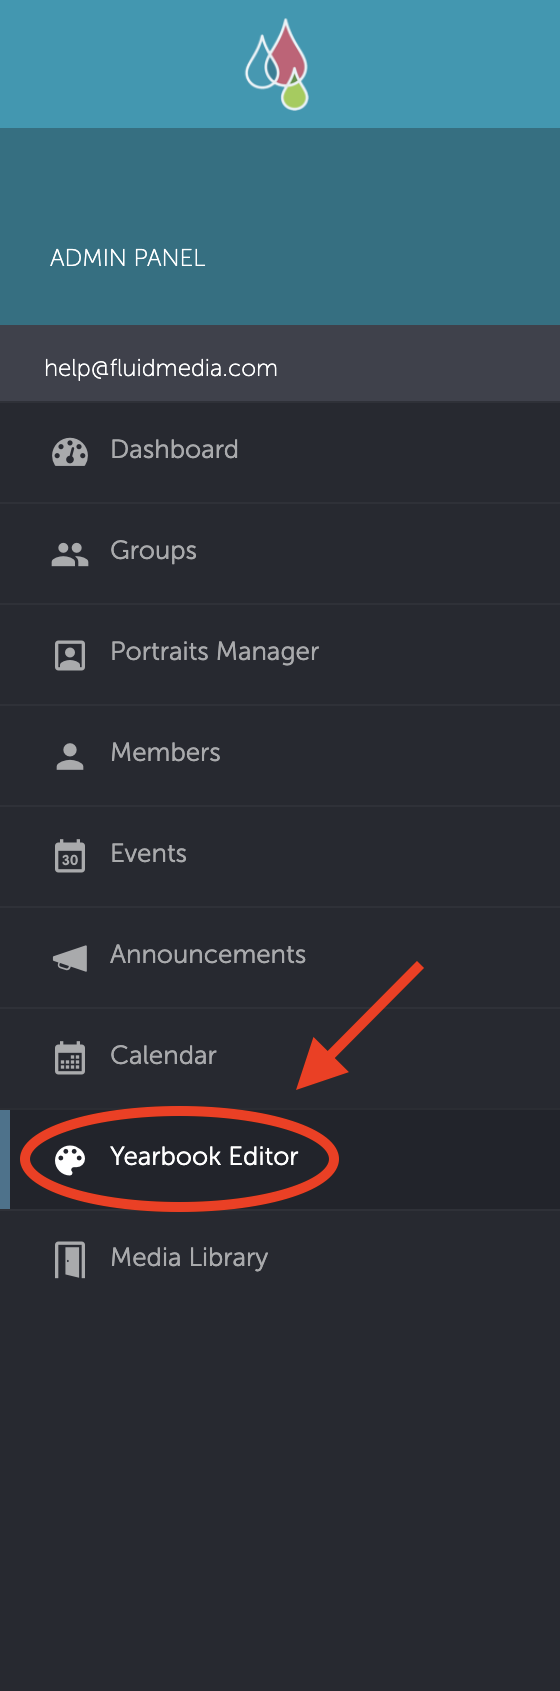
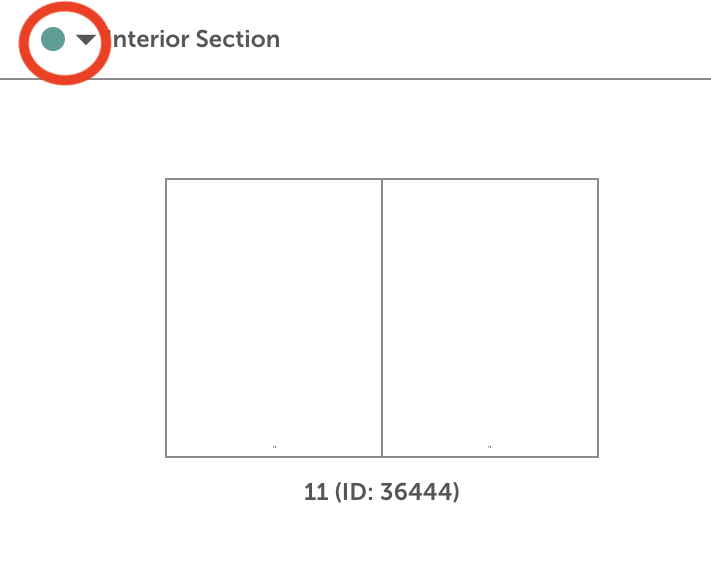
Go to the Manager in your Yearbook Editor and expand the section that the page is in.
To expand a section, click on the arrow:
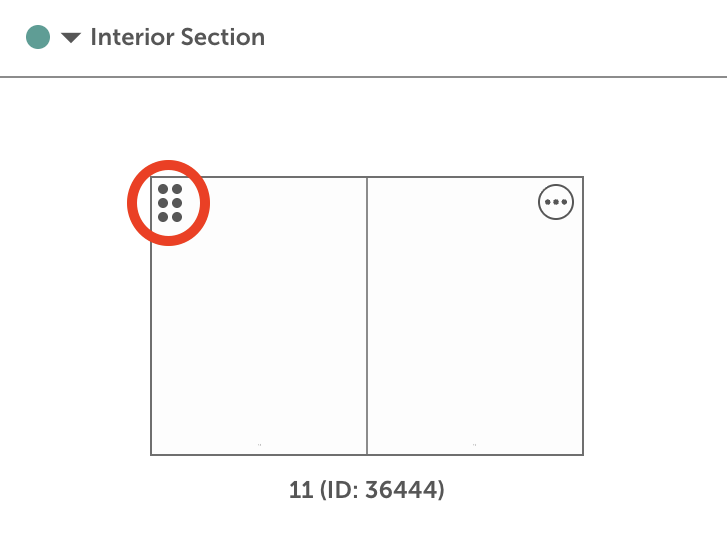
Once there, hover over the spread, click on the 6 dots in the upper left corner of the thumbnail then drag and drop the spread to whichever location you prefer.
How do I add page numbers?
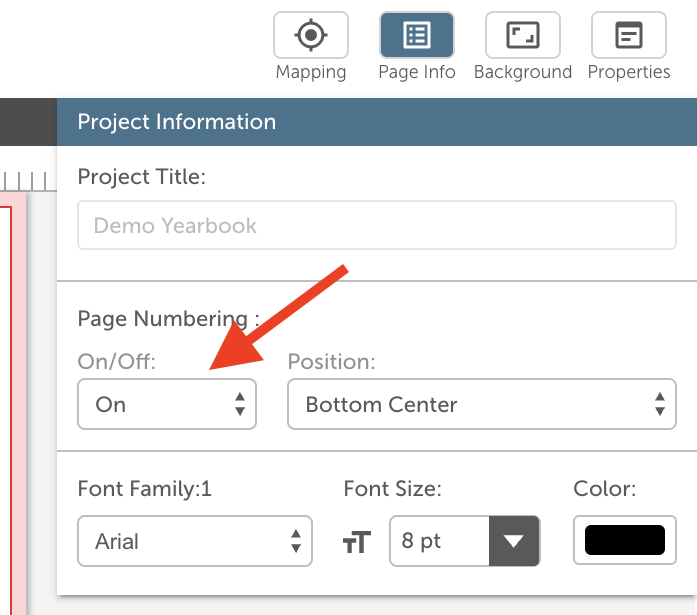
To add page numbers to the yearbook, navigate to the cover pages and click on Page Info in the top left cover.
Click On/Off: On and choose the page number specifications.
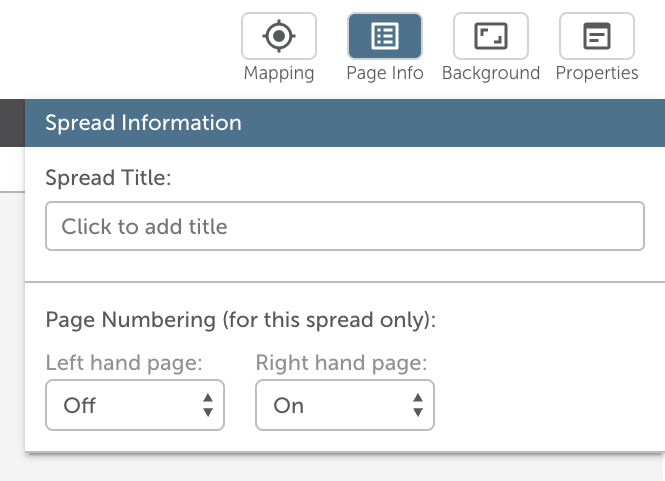
You are now able to go into the spread that you would like to have page numbers appear on, and toggle this on the left and/or right side of the spread.
How do I Create an Account?
Full Bleed
For a full bleed image (from edge to edge of the page) add one image box that spans across the entire spread. From there you can drag and drop an image from the left margin into the image box.
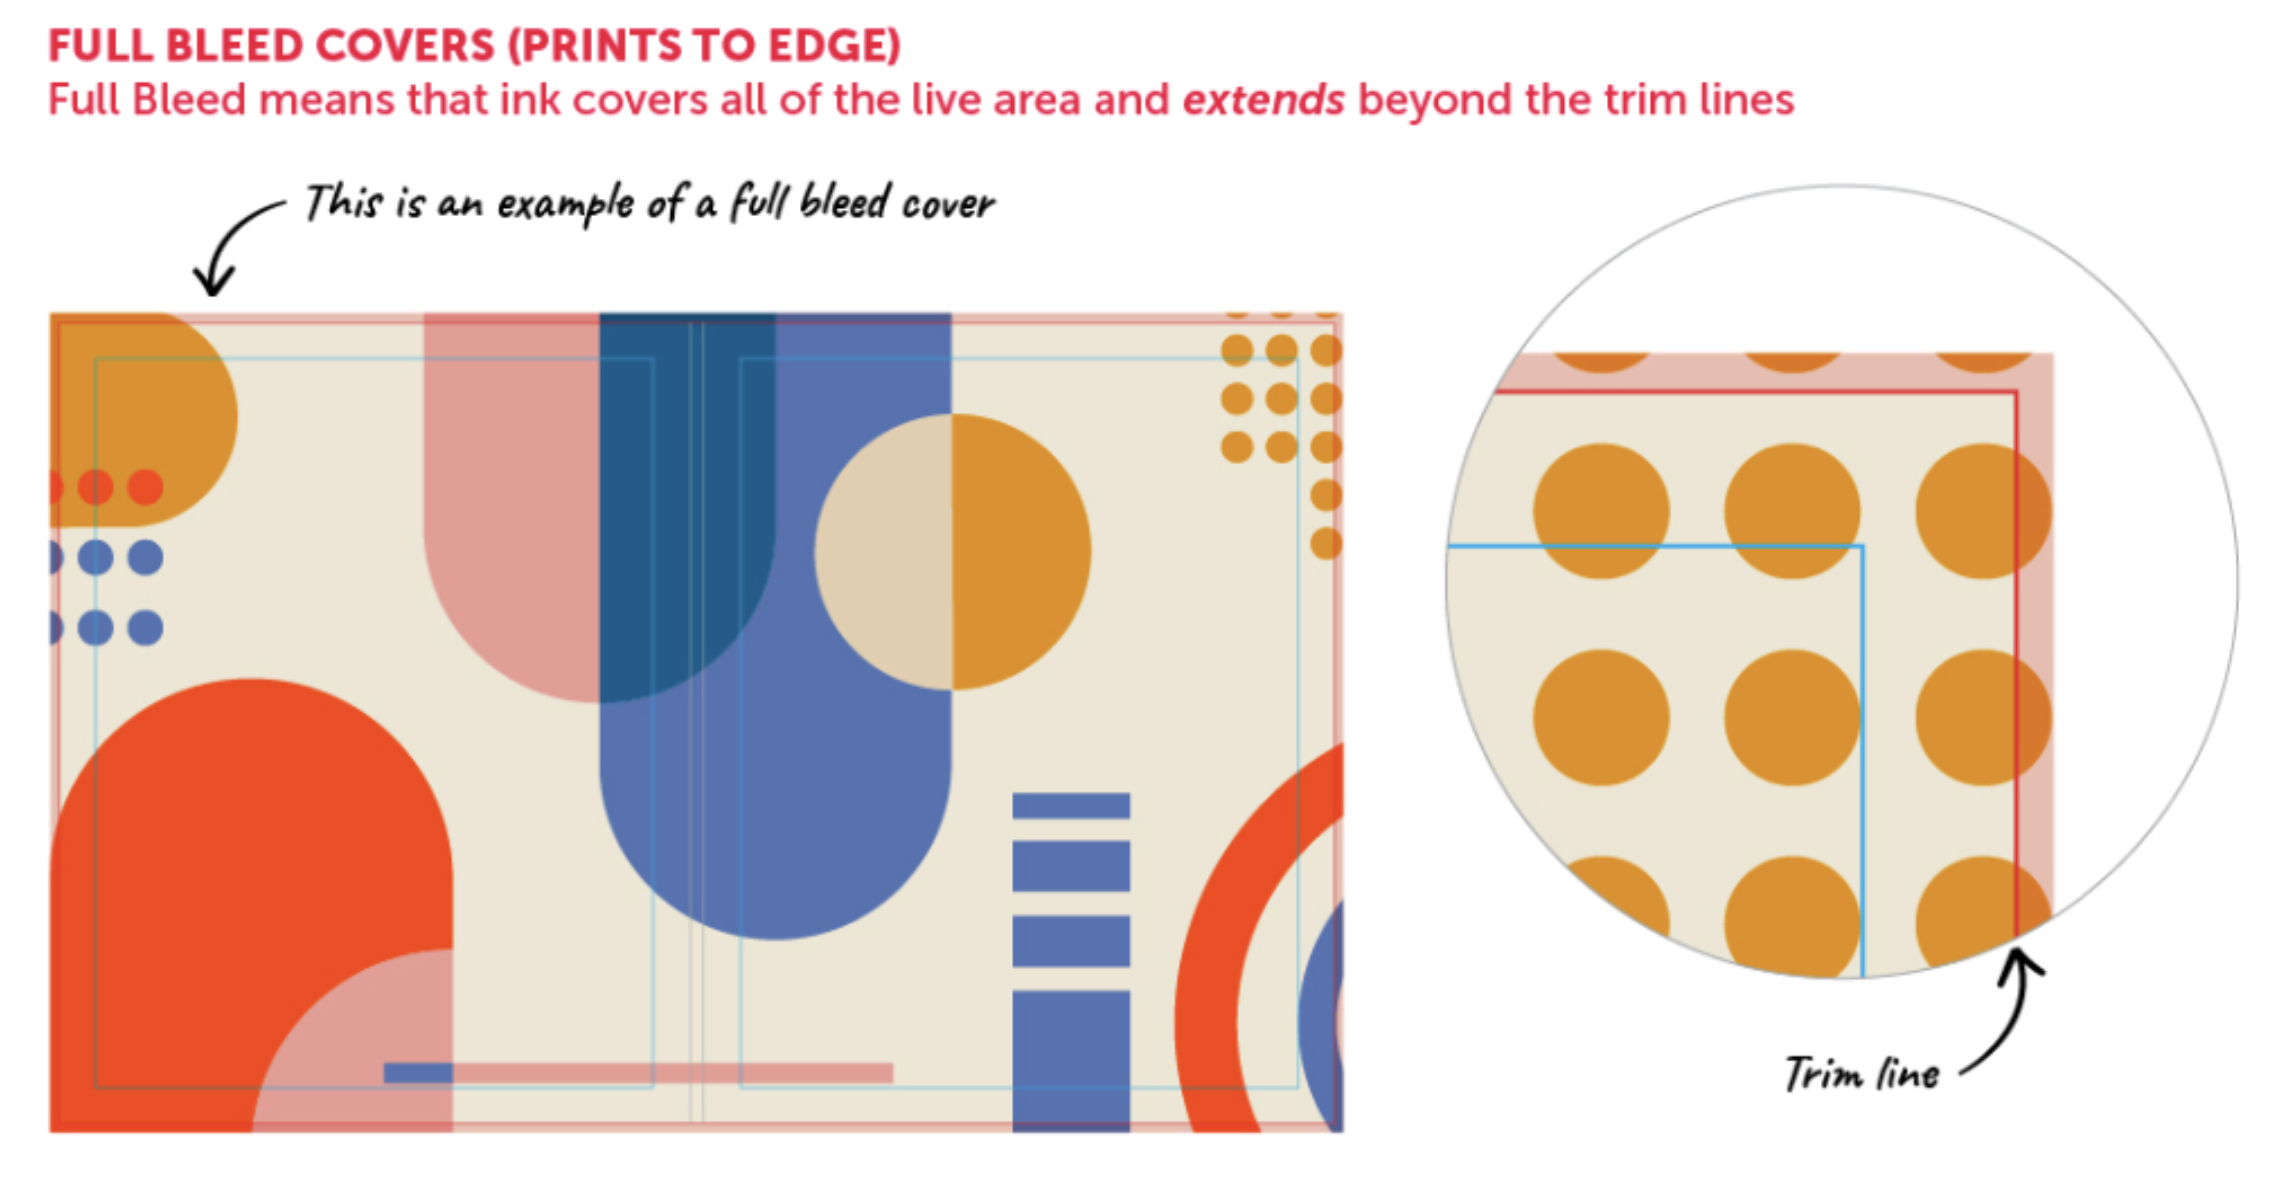
Image with a border:
If you would like to have a border around the image, add an image box that's within the area of the blue safety line. From there, you can drag drop an image from the Photos Tab onto the image boxes.
Can I edit a Layout?
A template is just a custom arrangement of image palettes, text boxes, and clipart. You can edit a template in the same way that you would edit any other page.
Note: that when you add a template to any page, it removes any previous assets or design on the page.
How to Save and Access Layouts?
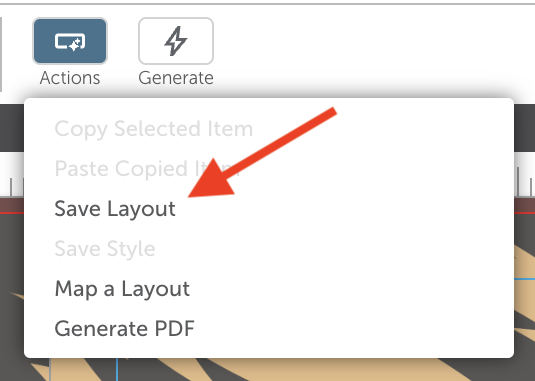
You can save a layout by clicking on the Actions button in the tool bar at the top of the page and selecting Save Layout.
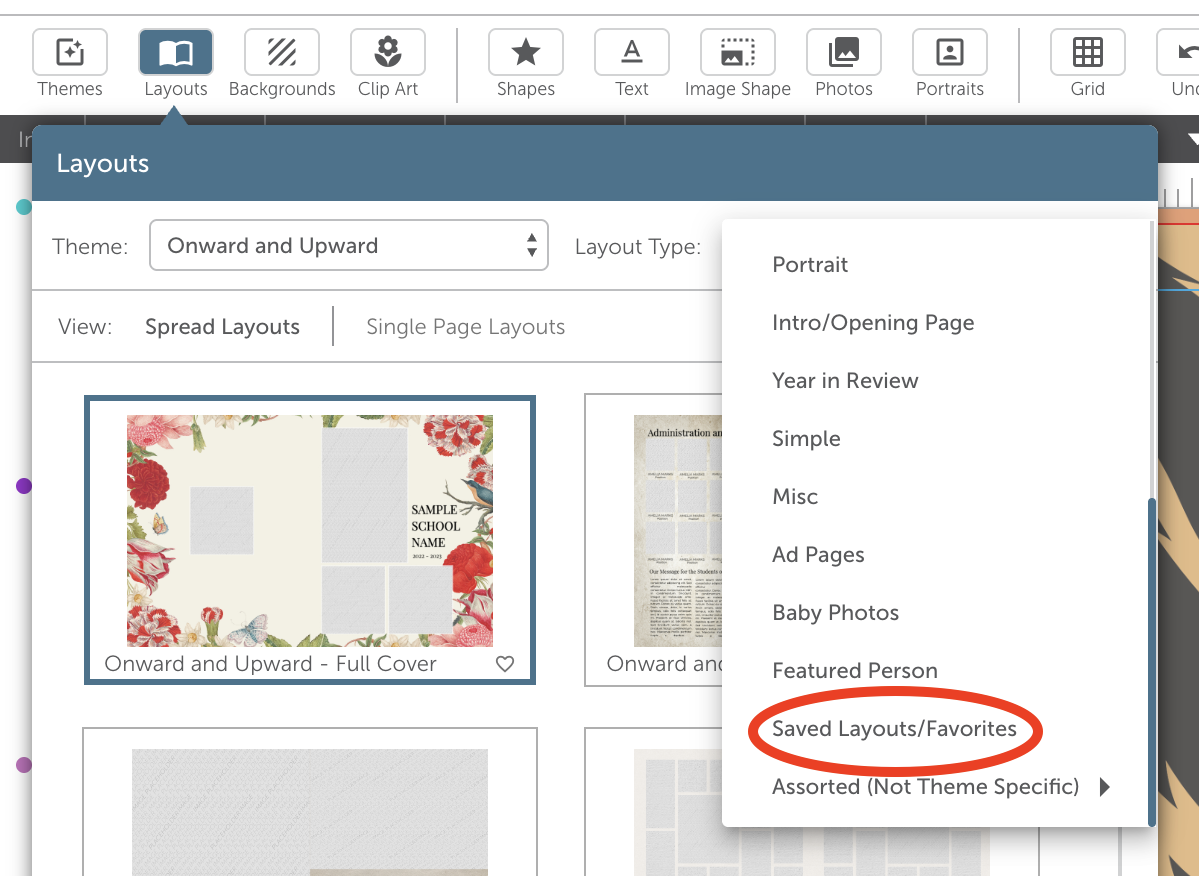
You will then be able to use your saved layout by going to the Layouts button on the left of the toolbar and selection Saved Layouts/Favorites under Layout Type.
Adding students and staff to Portraits Manager without a photo
Note: Only Administrative Members have access to the Admin Panel and Yearbook Editor. To request Administrative access, please contact your Yearbook Advisor or a member of the Fluid Media Customer Success Team.
To find the Portrait Manager in the Admin Panel, click on the ellipsis button in your Media Library.
You will now see multiple buttons appear. Click on the Admin Gear to access the Admin Panel.

Once you are in the Admin Panel, locate the Portrait Manager on the left toolbar.
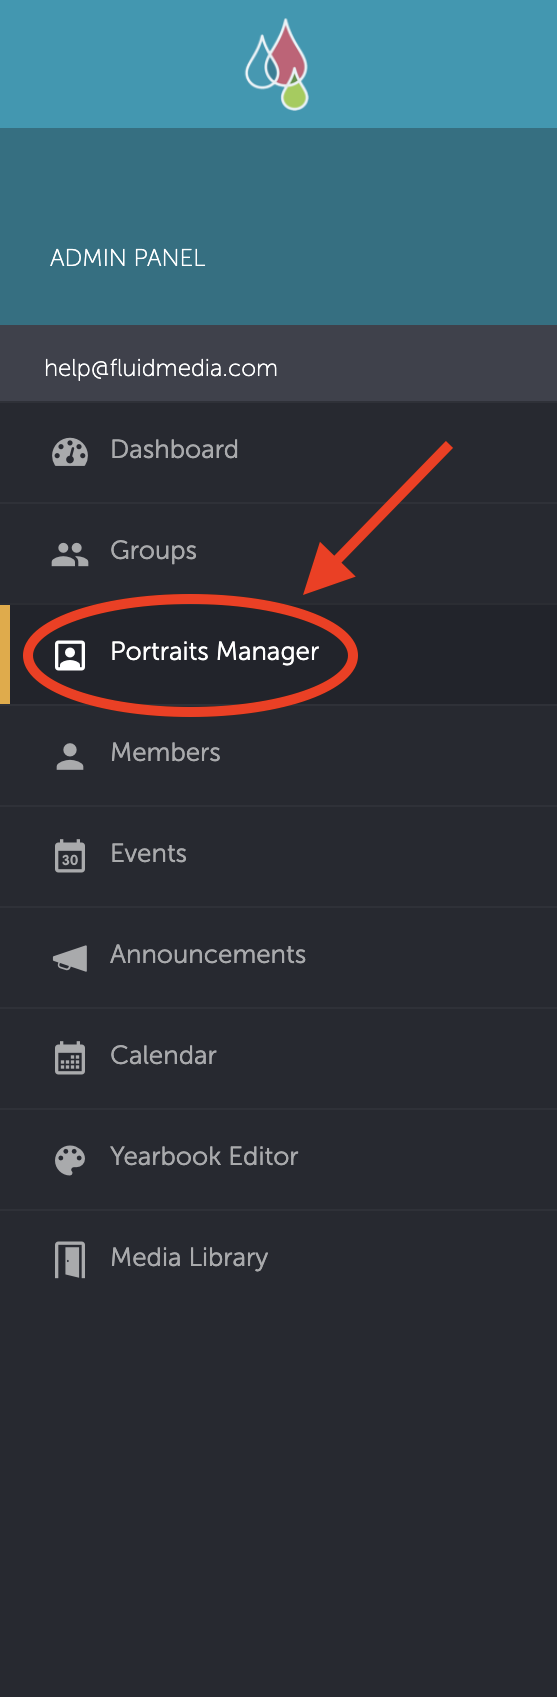
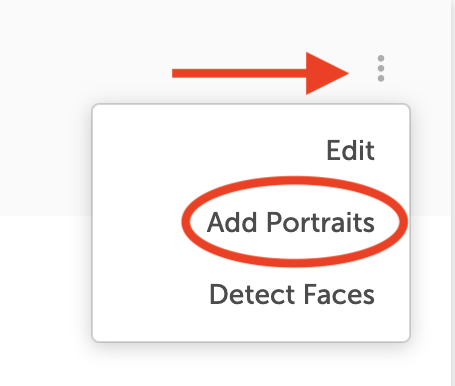
Next, navigate to the portraits collection that you would like the student or staff to be in. Then, click on the ellipsis and select Add Portrait.
You are now able to add a placeholder image by clicking the hyperlinked Select the files from your Computer or dragging and dropping the image to the new window.
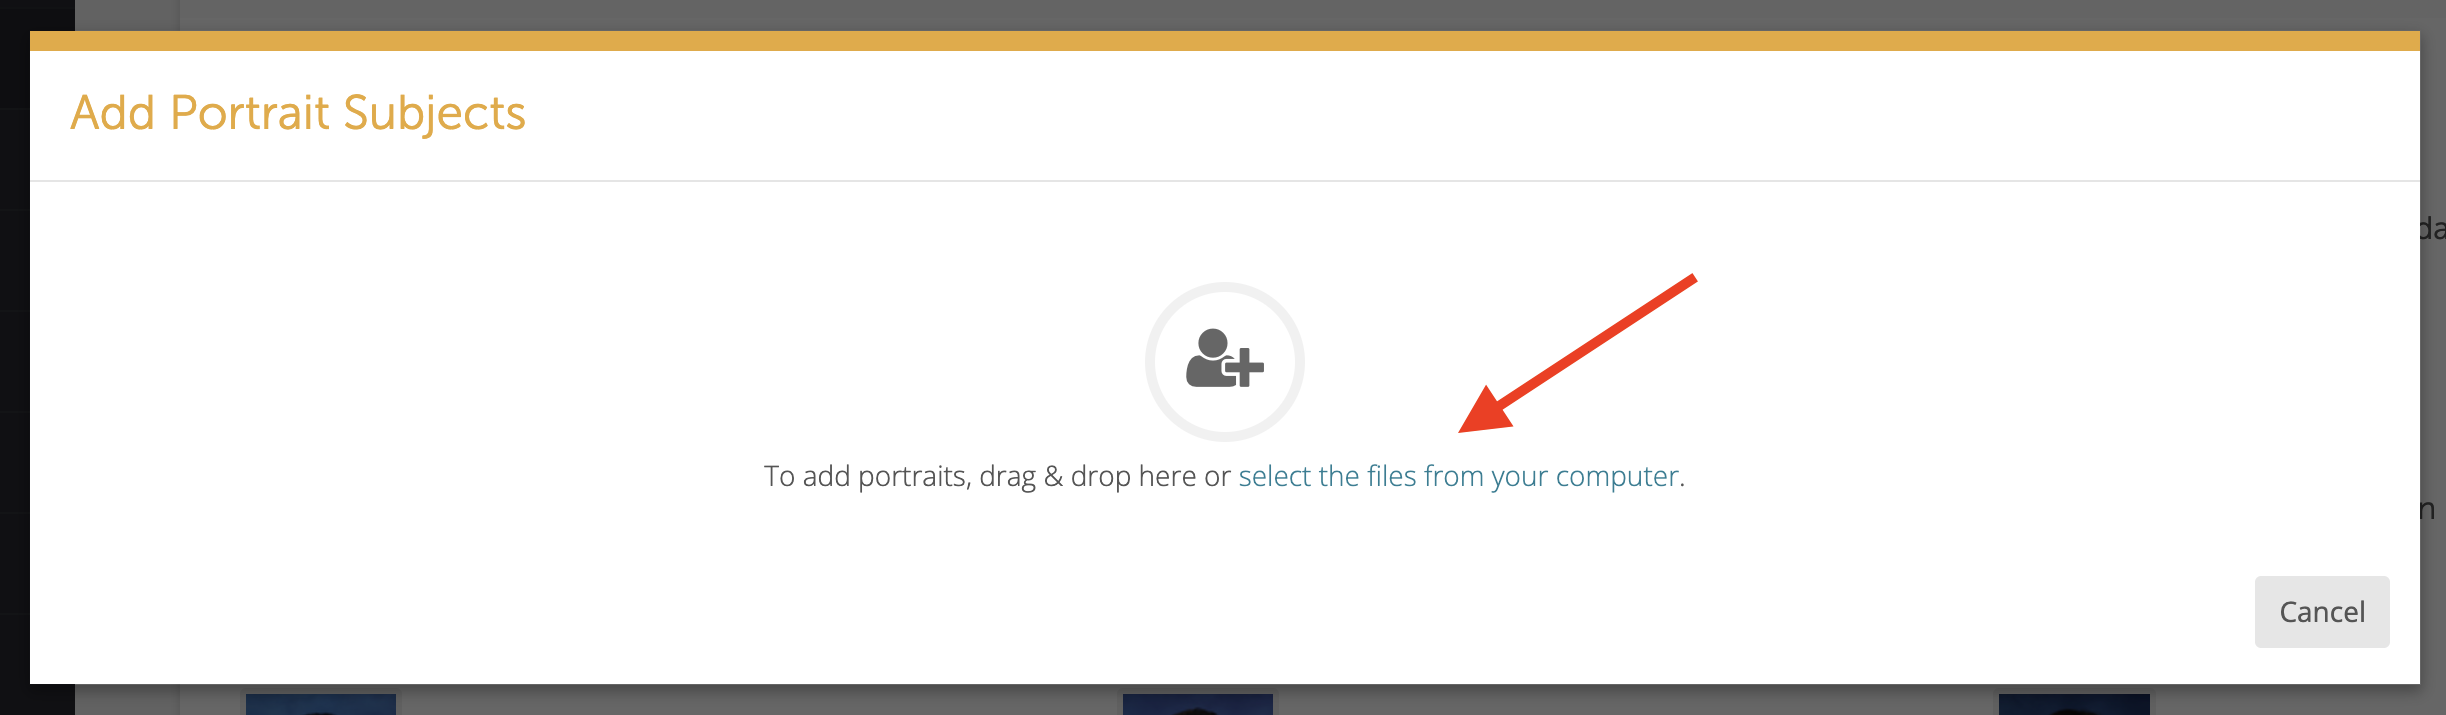
You are then able to add the first and last name to the empty fields.
How to Access Assigned Pages?
To access assigned pages, please ensure you are logged in.
Once you are logged in, please click on the Person icon in the top-right corner of the Community Activity Stream.

After clicking on the icon, click on Account Settings.
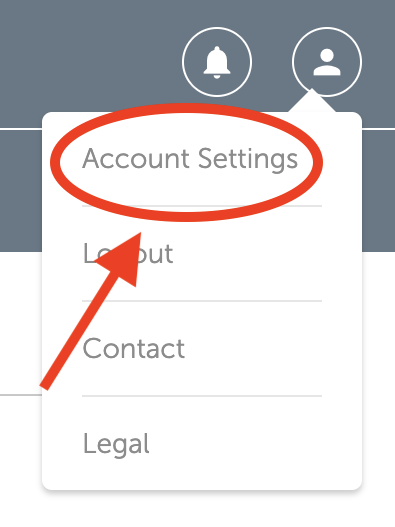
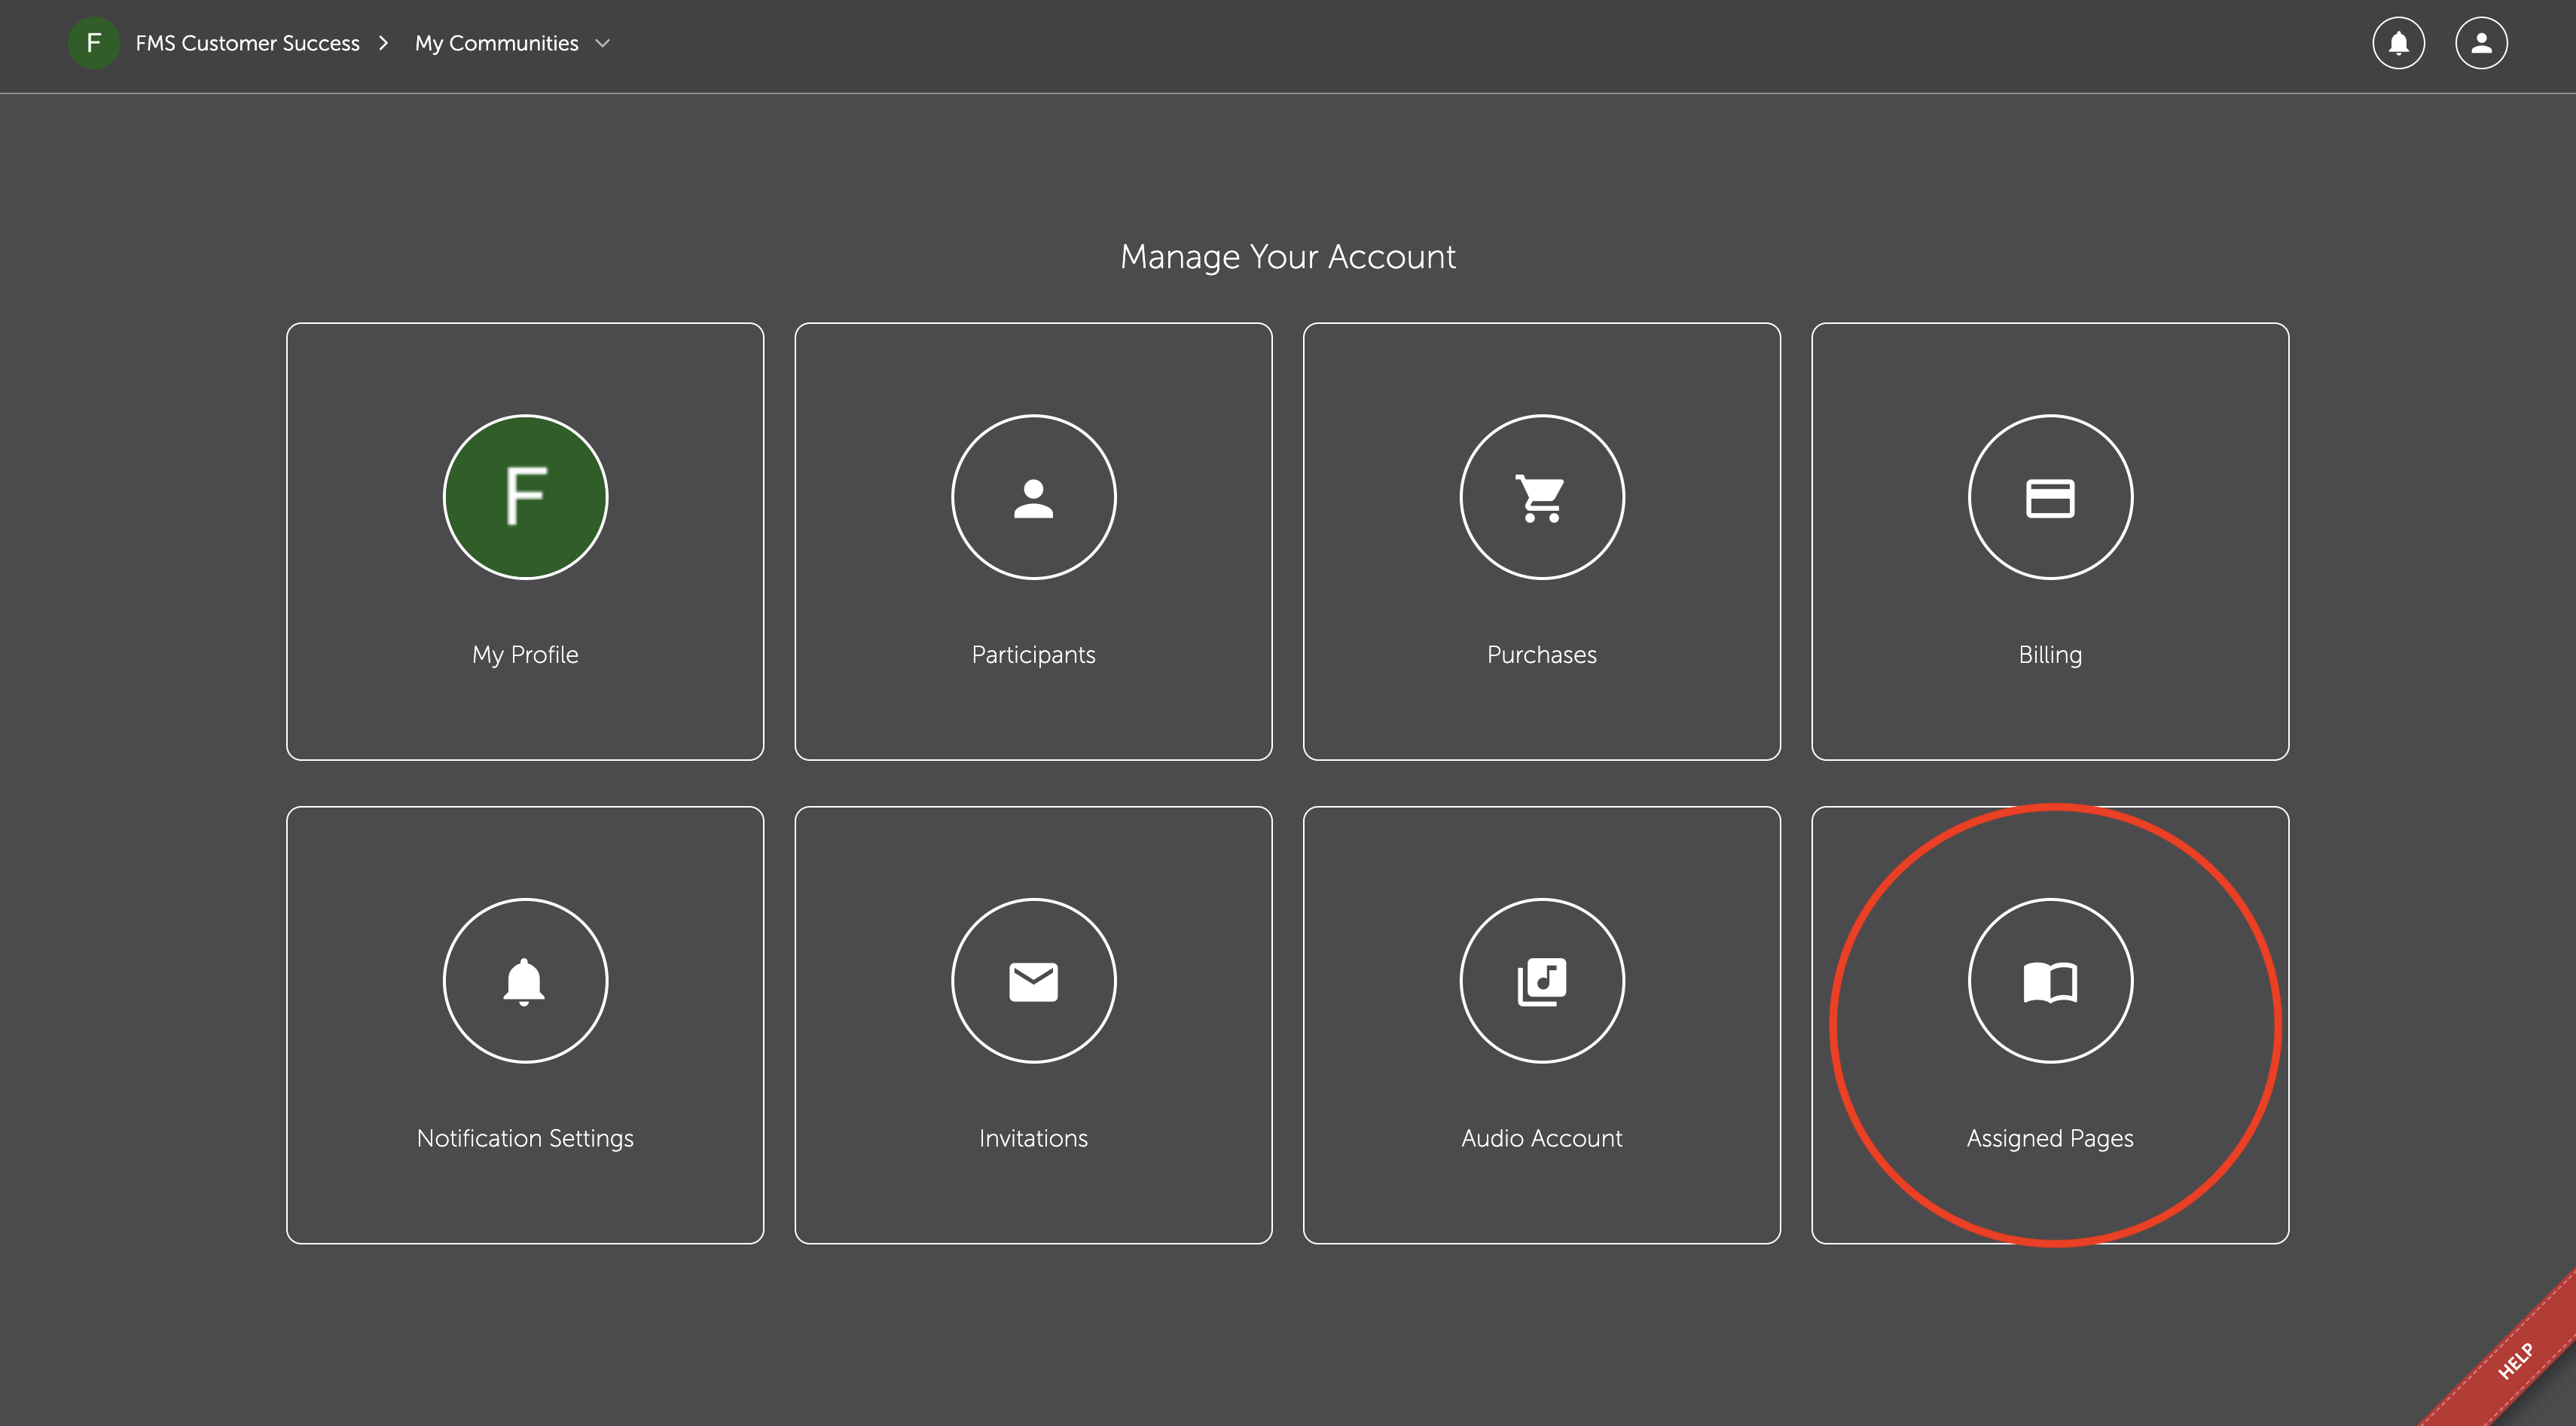
Once you have clicked on Account Settings, click on the Assigned Pages button.
Click the Print Edition in the top menu bar.

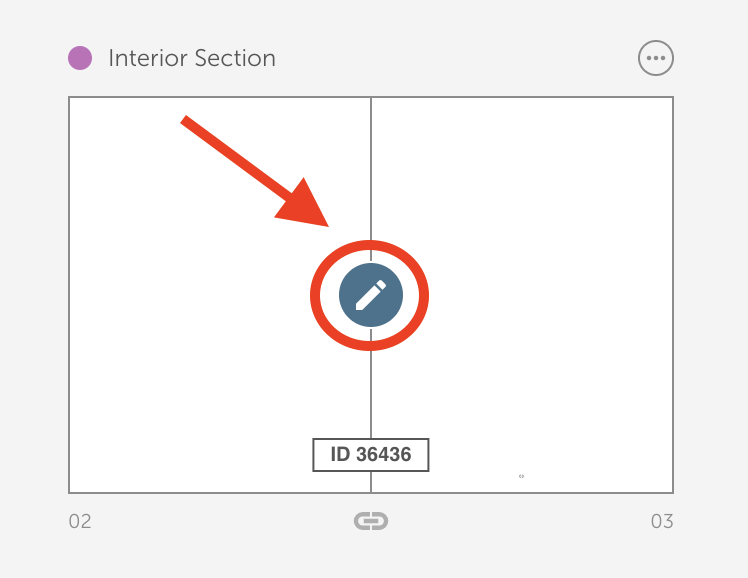
In the print addition, you will be able to scroll down to find your assigned page.
Click on the pencil icon to begin designing.
How to apply a layout to a page or spread?
Click on the Layout button in the top right corner of the page.
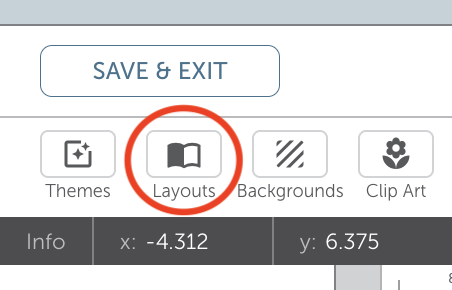
After selecting a layout, you’ll be able to choose from a variety of single and full-spread pages. Click on your desired layout, select it, and it will be applied to the page.
Once the layout is applied, you can freely customize it — including text, backgrounds, image boxes, clip art, and more. All layouts are fully editable.
How to select/group multiple elements?
You can select/group multiple elements by holding the shift key and clicking on multiple elements, or drag, and click over the elements to highlight and group them together.
Once the elements have been grouped, you can delete, copy, paste, and move the group elements.
How to delete elements?
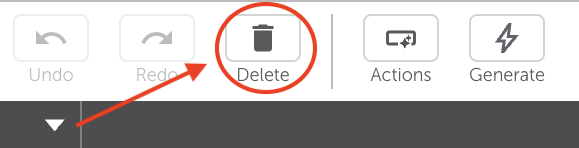
Click on the elements that you would like to delete and click on the Delete button in the tool bar.
Keyboard Shortcuts
On a Mac Computer:
- ⌘+C = Copy
- ⌘+V = Paste
- ⌘+Z = Undo
- ⌘+Shift+Z = Redo
- Shift+click = select multiple elements
On a PC Computer:
- Ctrl+C = Copy
- Ctrl+V = Paste
- Ctrl+Z = Undo
- Ctrl+Y = Redo
- Shift+click = select multiple elements
How to copy and paste elements?
On a Mac Computer:
- ⌘+C = Copy
- ⌘+V = Paste
On a PC Computer:
- Ctrl+C = Copy
- Ctrl+V = Paste
Another way to copy and paste elements is through the Actions button in the toolbar by selection Copy Selected Items or Paste Copied Item.
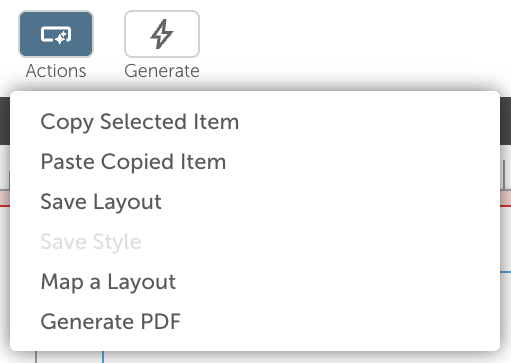
You can also copy and paste multiple elements at one time. To group the elements to be copied or pasted you can either click and drag over multiple elements or hold the shift key and click on multiple elements.
Once the elements have been grouped you can follow the steps above to copy and paste multiple elements.
How to Add Clip-Art?
Select your preferred page that you would like to place the Clip Art on.
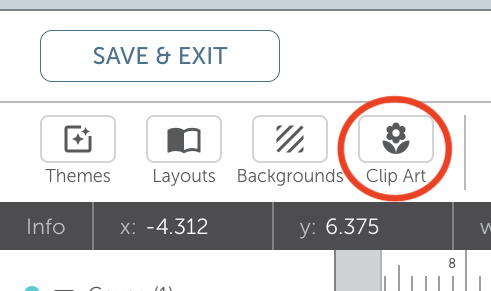
Click on Clip Art, pictured below. This button is located in the top menu toolbar.
Select or search for a category of Clip Art from the drop-down menu.
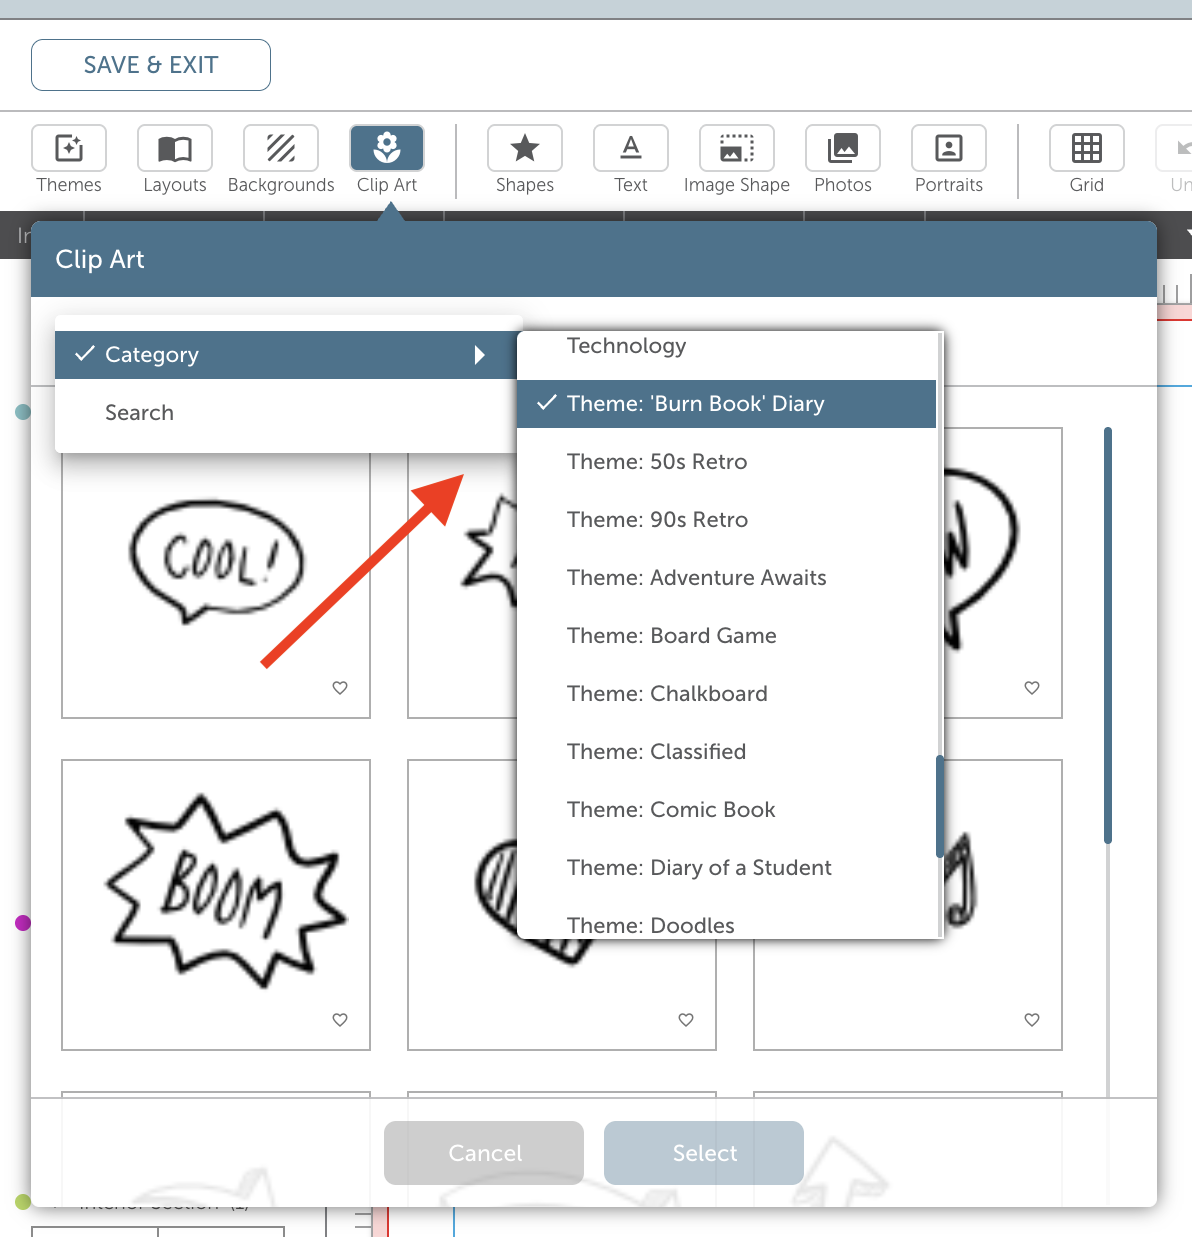
Once you have selected a category, please choose a clip art of your preference. You can choose one or multiple at a time.
Once you have made your clip art selections, your choices should be highlighted blue. Now you can click on Select to apply them to the page.

Your clip art should populate in the centre of your spread. Please feel free to move them to your liking and change the size and orientation by manipulating the drag points.
How do I undo/redo?
You can undo and redo elements on the page by clicking on the Undo or Redo buttons at the top of the page in the toolbar.
Another option for undoing and redoing action is:
On a Mac Computer:
- ⌘+Z = Undo
- ⌘+Shift+Z = Redo
On a PC Computer:
- Ctrl + Z = undo
- Ctrl + Y = redo
How to add a custom cover?
Full Bleed Cover:
For a full bleed cover image (from edge to edge of the page), add an image box the size of the page, or add two separate image boxes if you have two full bleed images.
From there, you can drag and drop an image from the left margin in the photo tab into the image box(es).
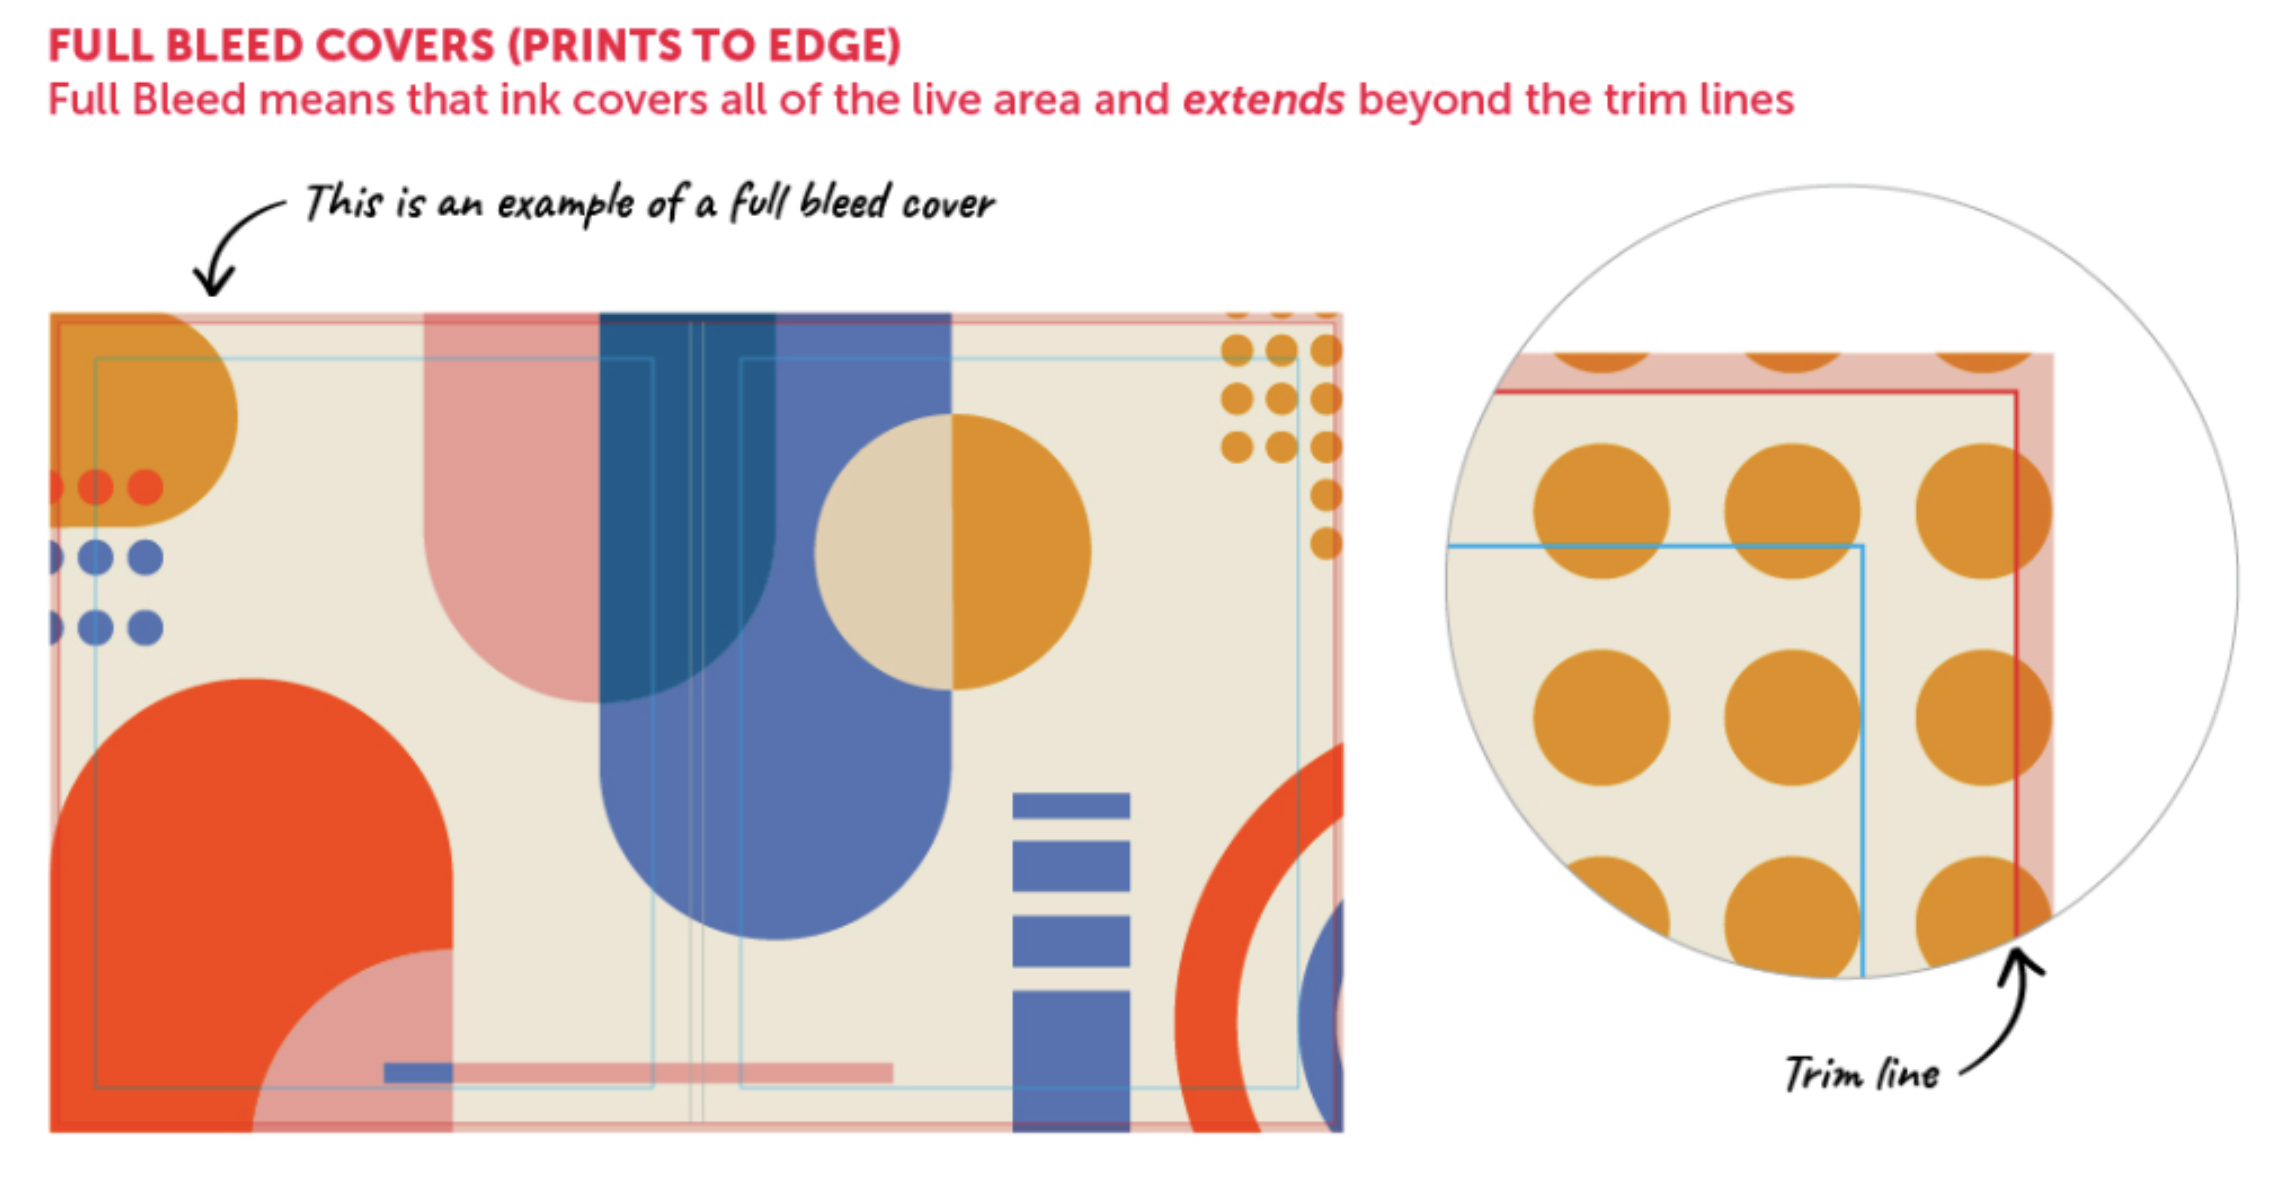
Image with a Border:
For cover images with a border, add an image box that is within the inner area of the blue safety line. From there, you can drop an image from the left margin in the Photos tab into the image box(es).
How do I change the contrast (opacity) of an element?
Click on the element that you want to edit, the frame will become highlighted.
A Properties Window will appear on the right side of the page.
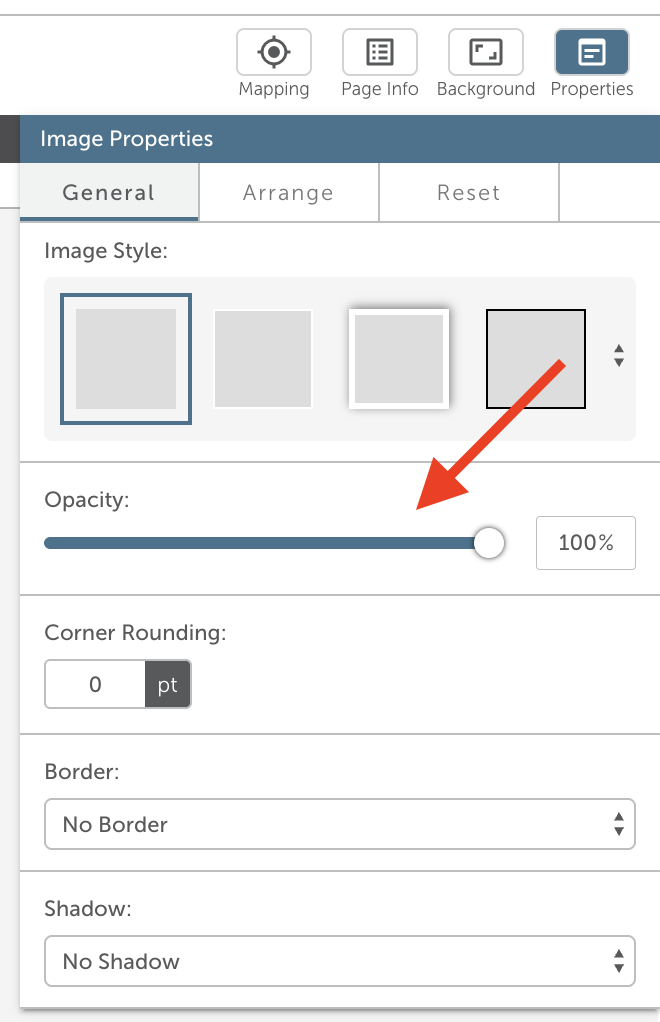
Click and drag on the Opacity Slider to modify the opacity.
How do I rotate/resize a photo?
To rotate or resize a photo in an image box, you can hover over the image once placed onto the page.
When your mouse is hovering over the photo on the lower bottom half of the picture, you will see a Crop Icon.
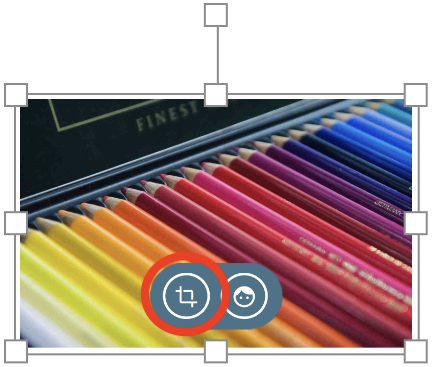
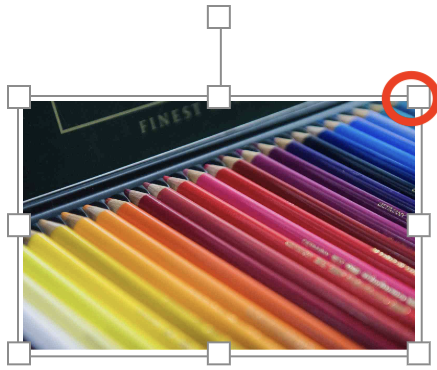
Once you click on this crop icon, you can select it and it will provide you with options to resize/rotate the photo accordingly.
Drag the slider to crop, zoom, and position the photo to your desired outcome.
How do I make a photo round?
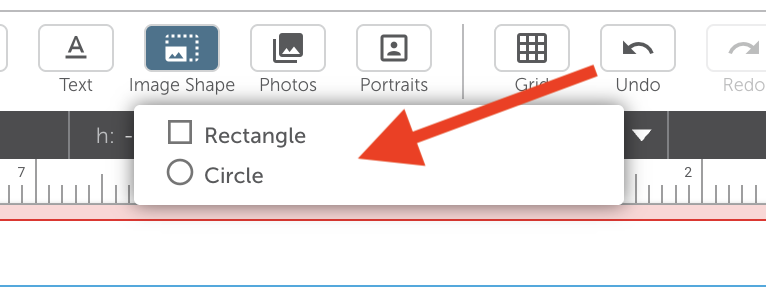
You can select a circle image shaped by clicking on the Image Shape in the top margin and selecting Circle. You can then apply the image shape by clicking anywhere on the page.
You are also able to round the corners of a rectangle image by clicking on the image frame and changing the Corner Rounding in the Image Properties Menu on the right side of the page.
How do I add text to a page?
Click on the Text button in the tool bar, then click and drag anywhere on your page to create a text box.
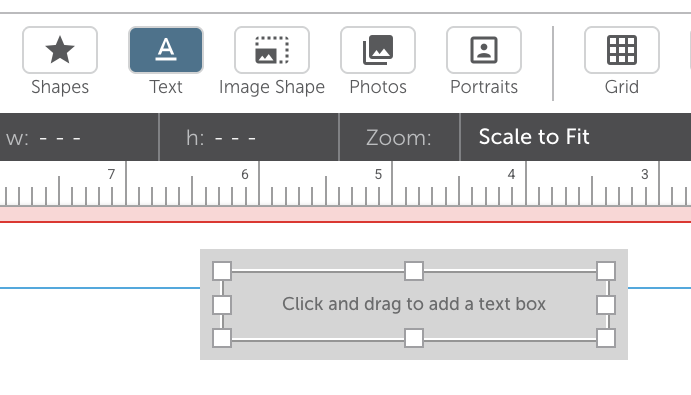
The Text Properties Window will appear on the right side of your page.
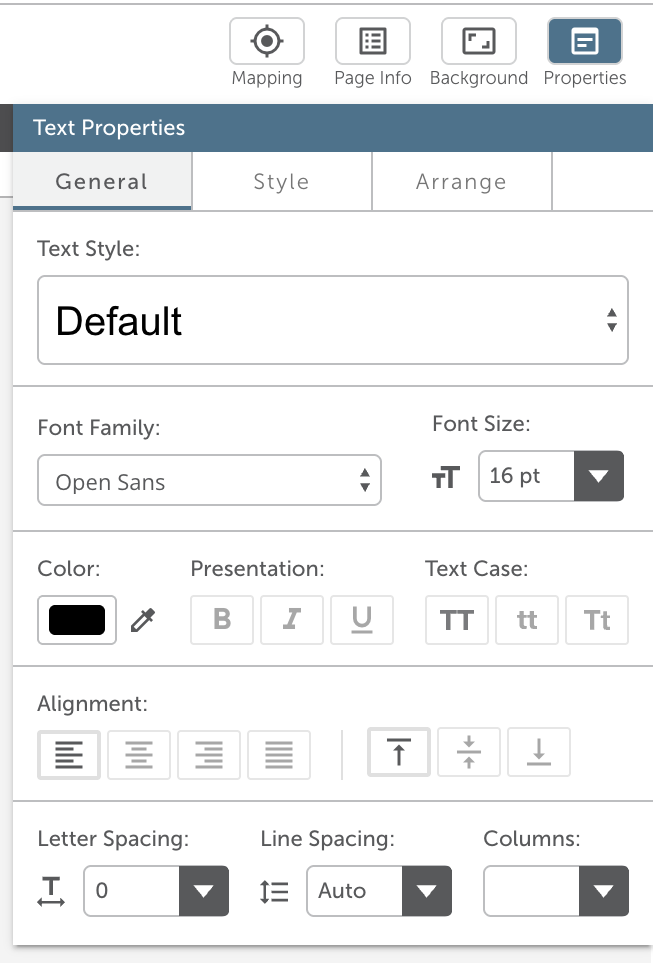
Within the text property window is where you can modify the font, size, color, style, and arrange your text.
How do I remove a background on my page?
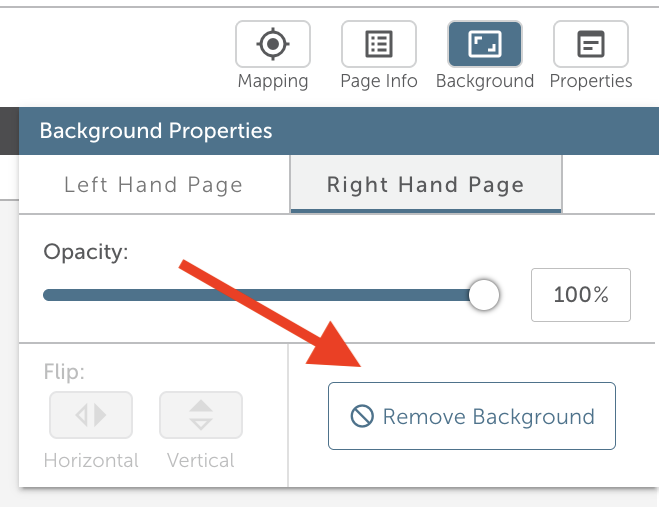
To remove the background on your page, click the Background Button in the top right tool bar.
From there, click on the Remove Background button in the bottom right corner. You can choose whether you want to remove the background from the left-hand page or right hand page.
Why are the photos so grainy? Will they print that way?
Photos you see while working on the yearbook are low resolution placeholders; these low resolution images require less bandwidth and allow the page to load faster. The book will print the original high resolution images.
Please note that the images will appear in the final print resolution in PDFs and the final proof. If the images are appearing grainy/low resolution in the PDF and the final proof, please consider replacing these images with high resolution versions.
How do I create a cover?
Click on the pencil button in the centre of the cover to open the page.
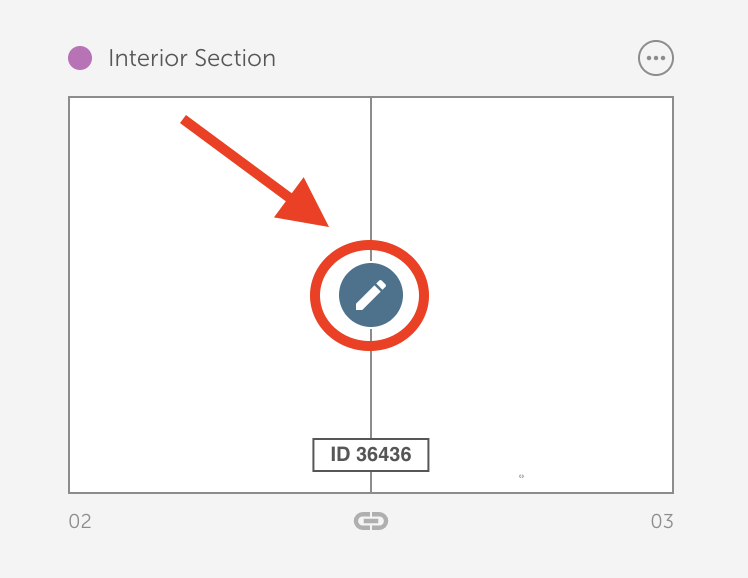
Your cover can be created using templates, a combination of unique designs using our yearbook assets, or you can upload an image of a cover your community has designed.
These are only a few examples of the way to create your cover - for more information, please reach out to the customer success team via help@fluidmedia.com.
Can I make changes to a template?
Yes you can! A template is just a custom arrangement of image palettes, text boxes, and clipart.
You can edit a template in the same way that you can edit any other page.
Please note that when you add a template to any page, it removes any previous assets or designs on that page.
How to move folders from album to event folder?
Firstly, you will select the photos that you would like to add to your category by clicking the arrow on the left corner of the images.
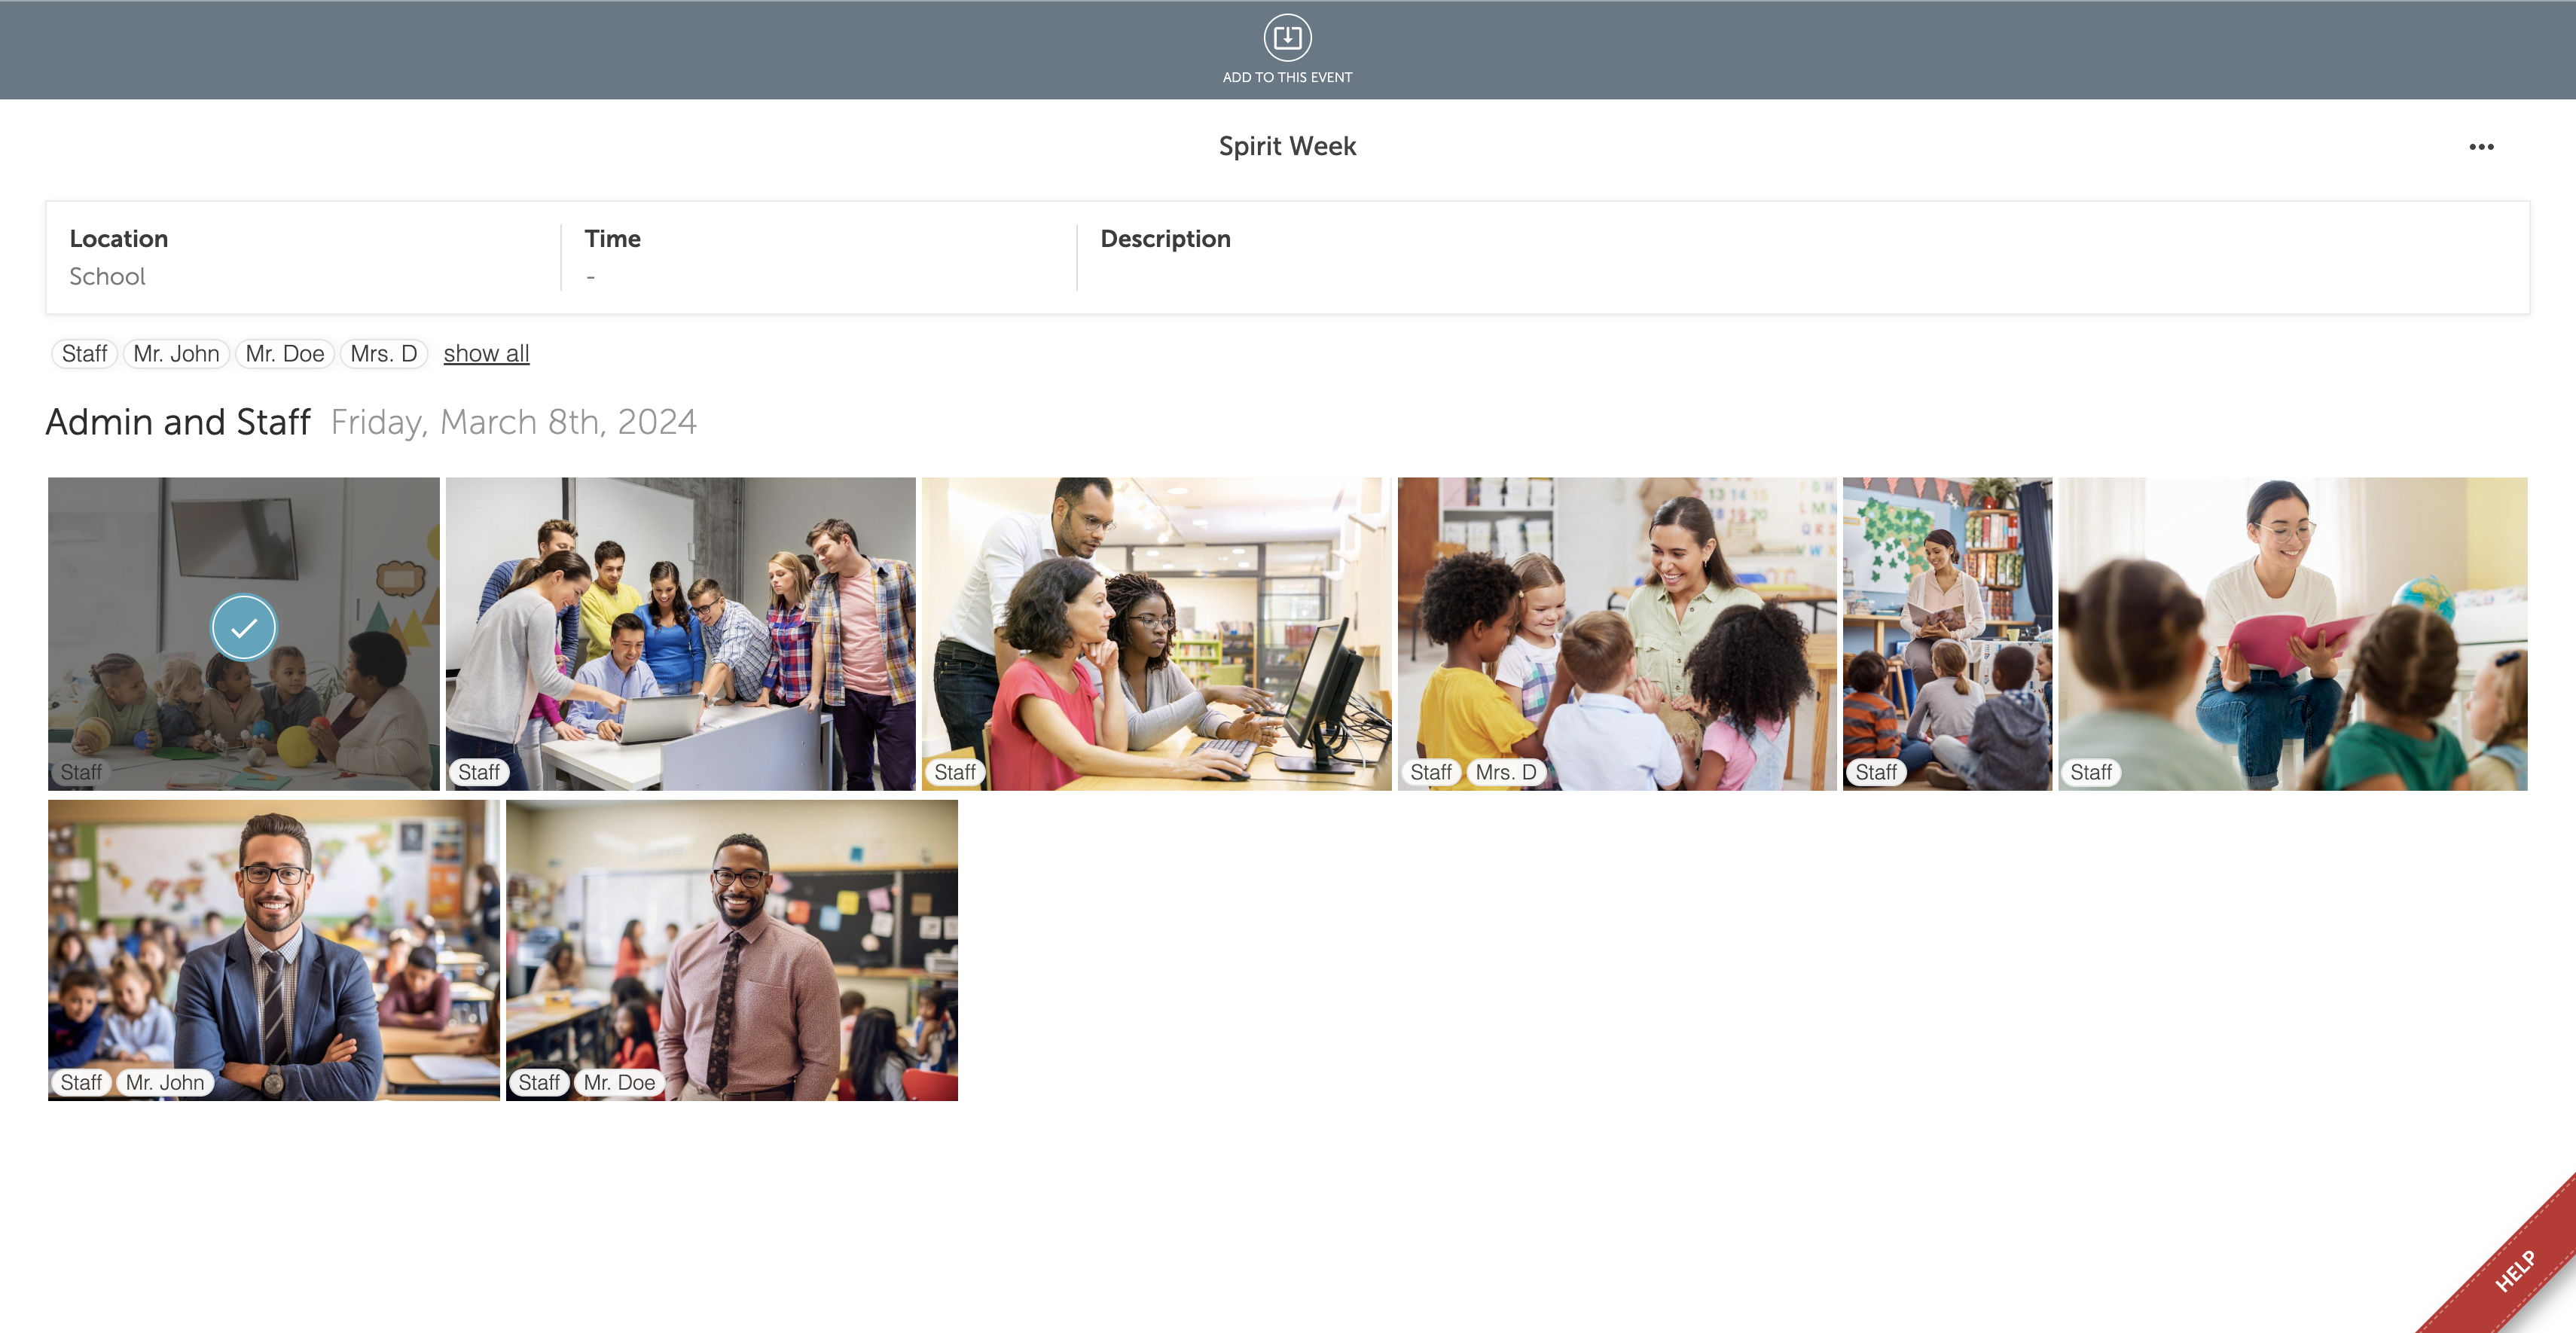
Next, after selecting the images, click collect and tap on the top arrow.
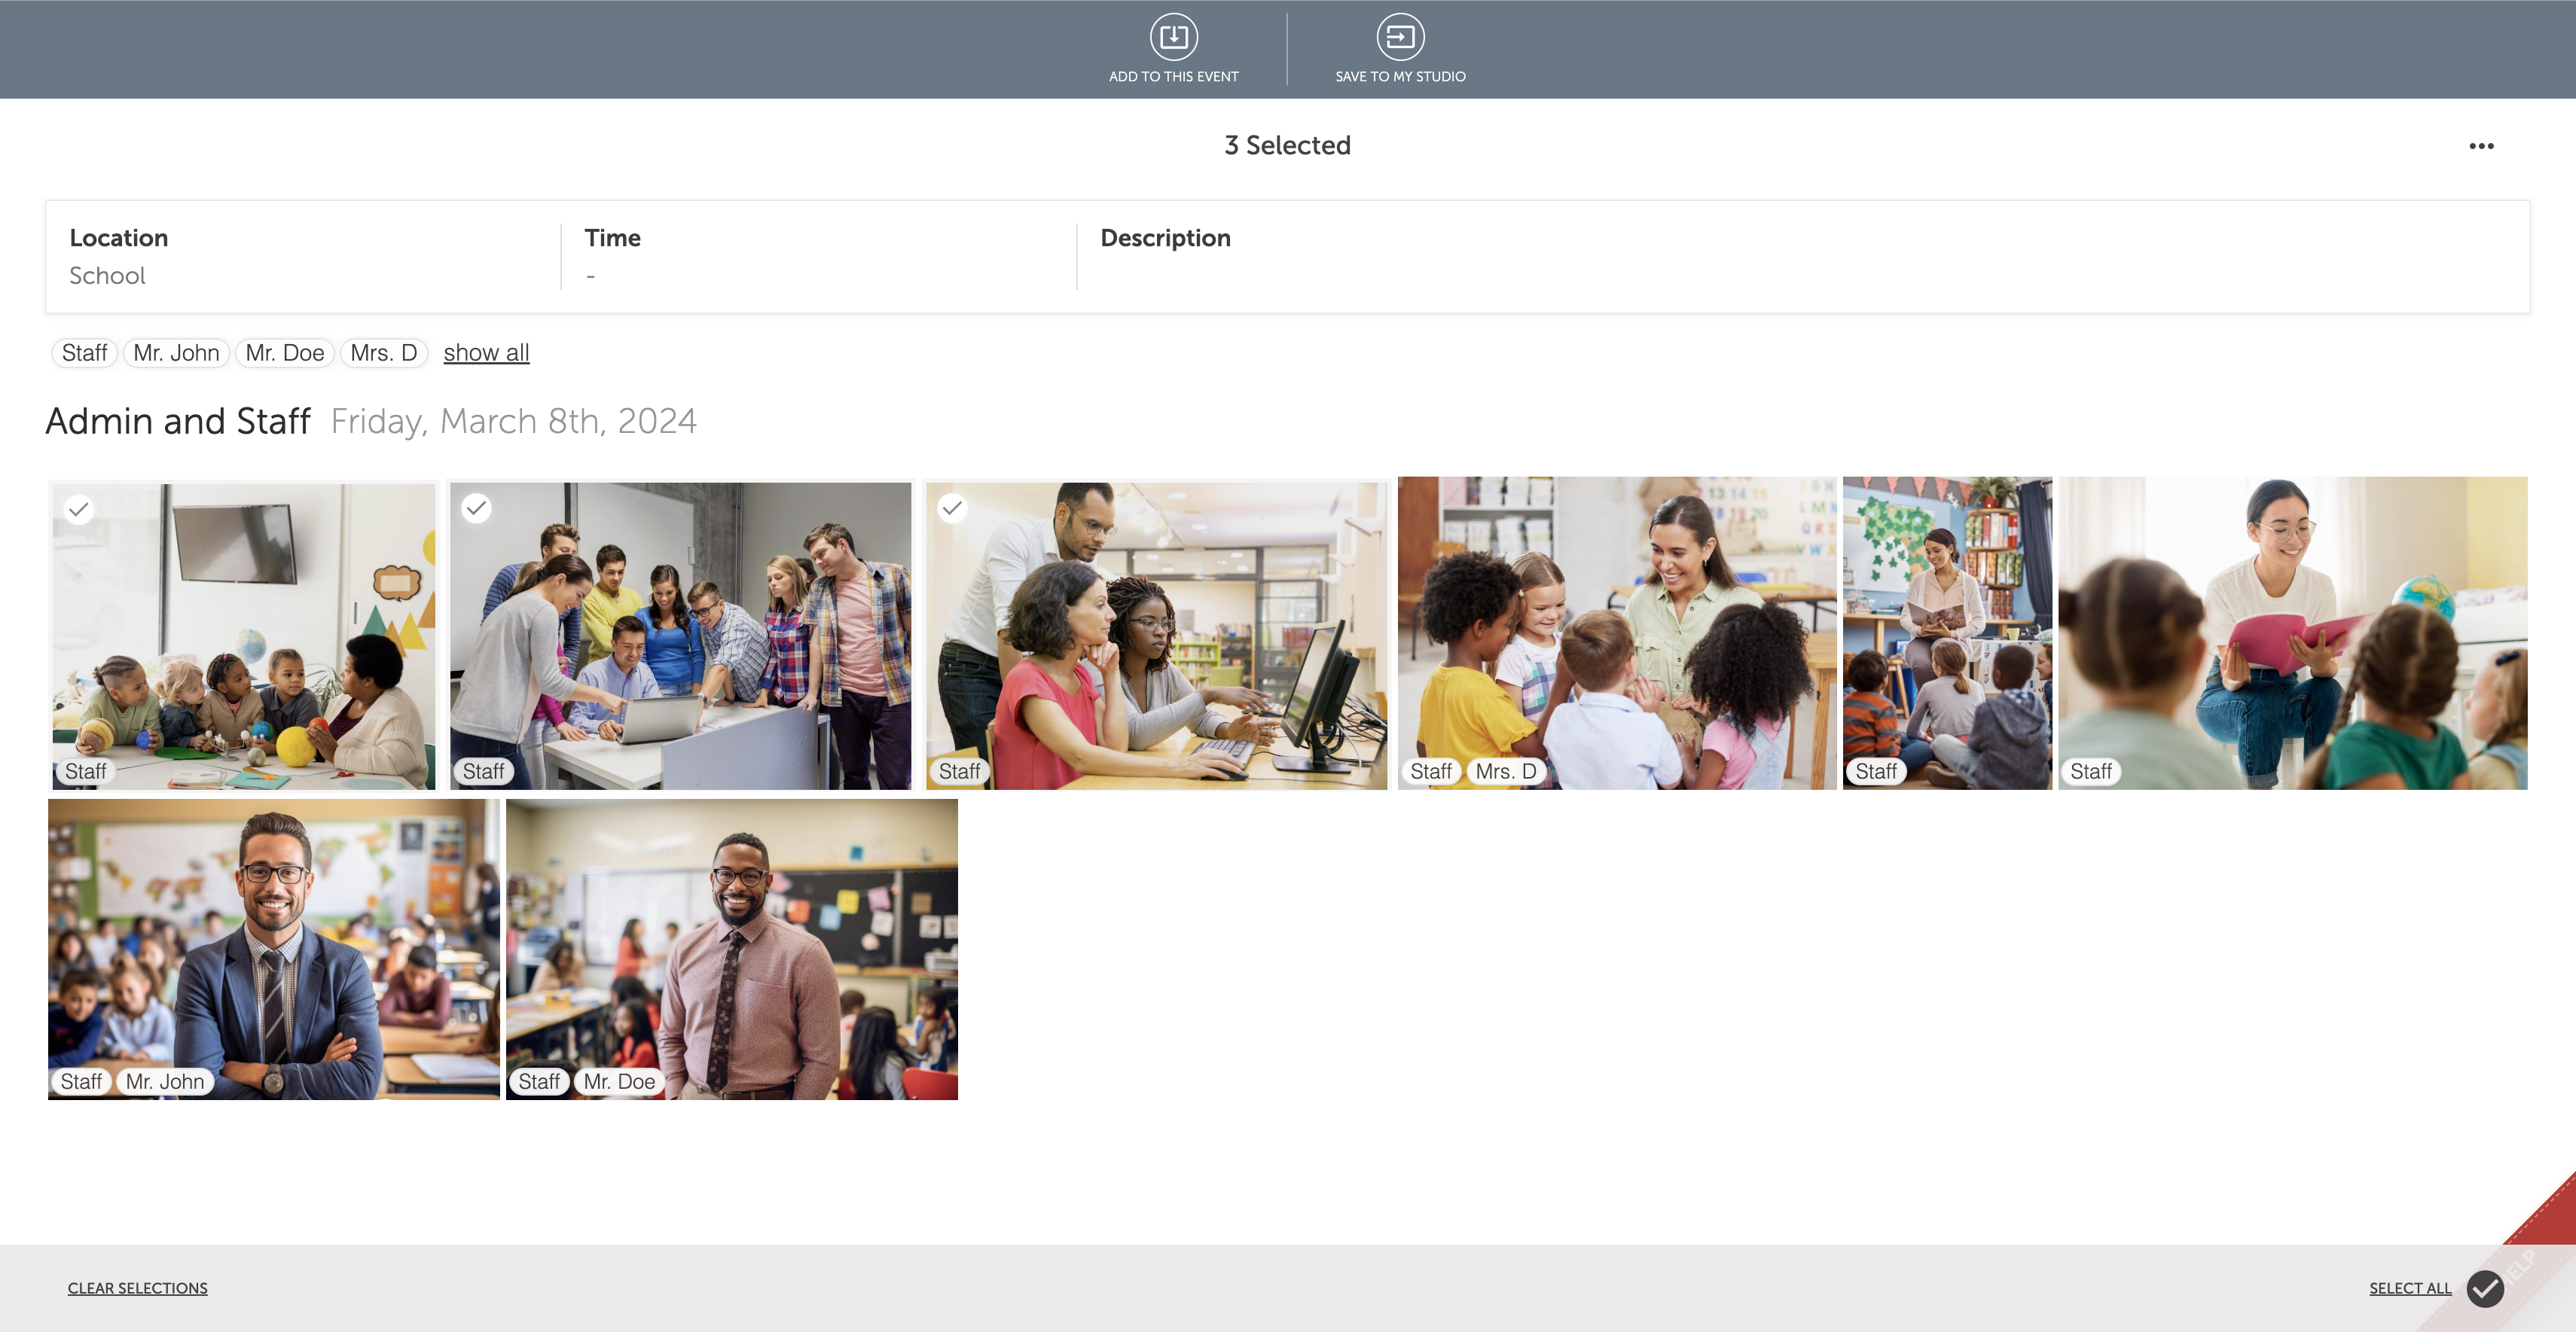
You are collecting these photos in a personal folder in your account. These photos will not appear in your Media Library. Provide a title for the photos like “Baby Photos” and click Save Media.
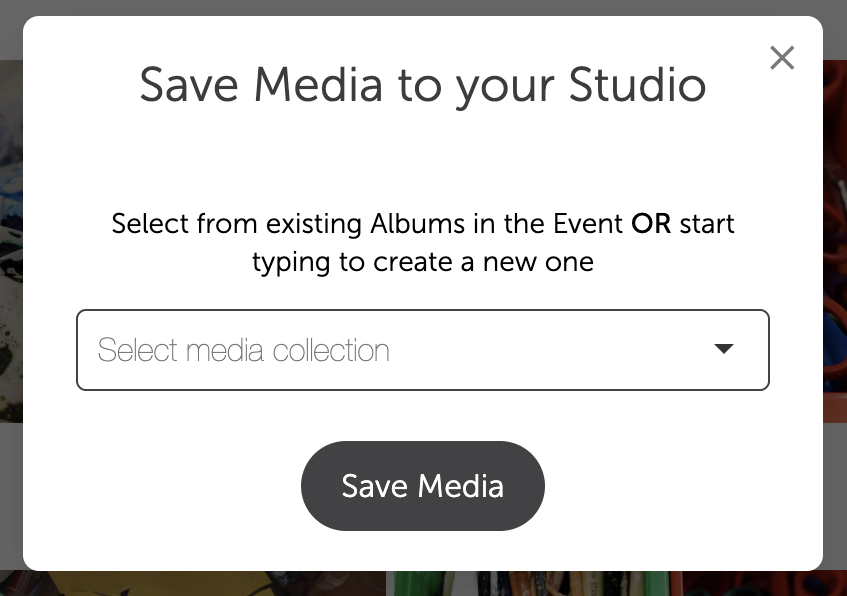
These photos are now saved in a personal folder in your studio. Now to add these photos to your specific categories search the category you want to add these photos to in your Media Library.
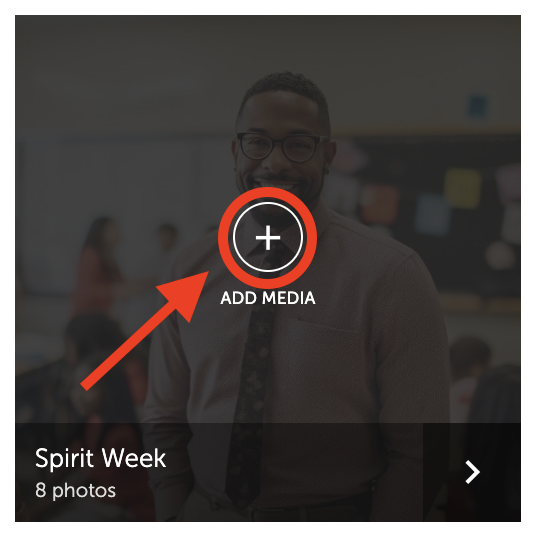
Once you click on Add Media select Access my Studio.
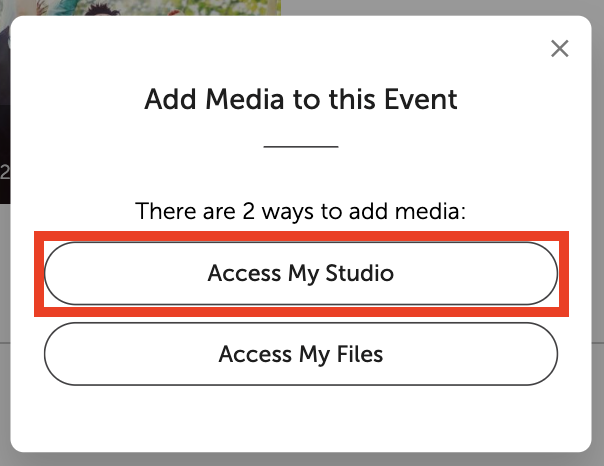
The folder you created should appear on the images you would like to add to your premade category.
Once you have selected the photos, click on the blue arrow upload button in the top right corner.
The photo should now be successfully uploaded to their pre-made Events category.
How to tag photos on the Media Library?
Locate the album that has the image that you would like to tag.
The pictures in the album will appear. Click on the photos you would like to tag.
Click on the Tag icon at the bottom of the page.
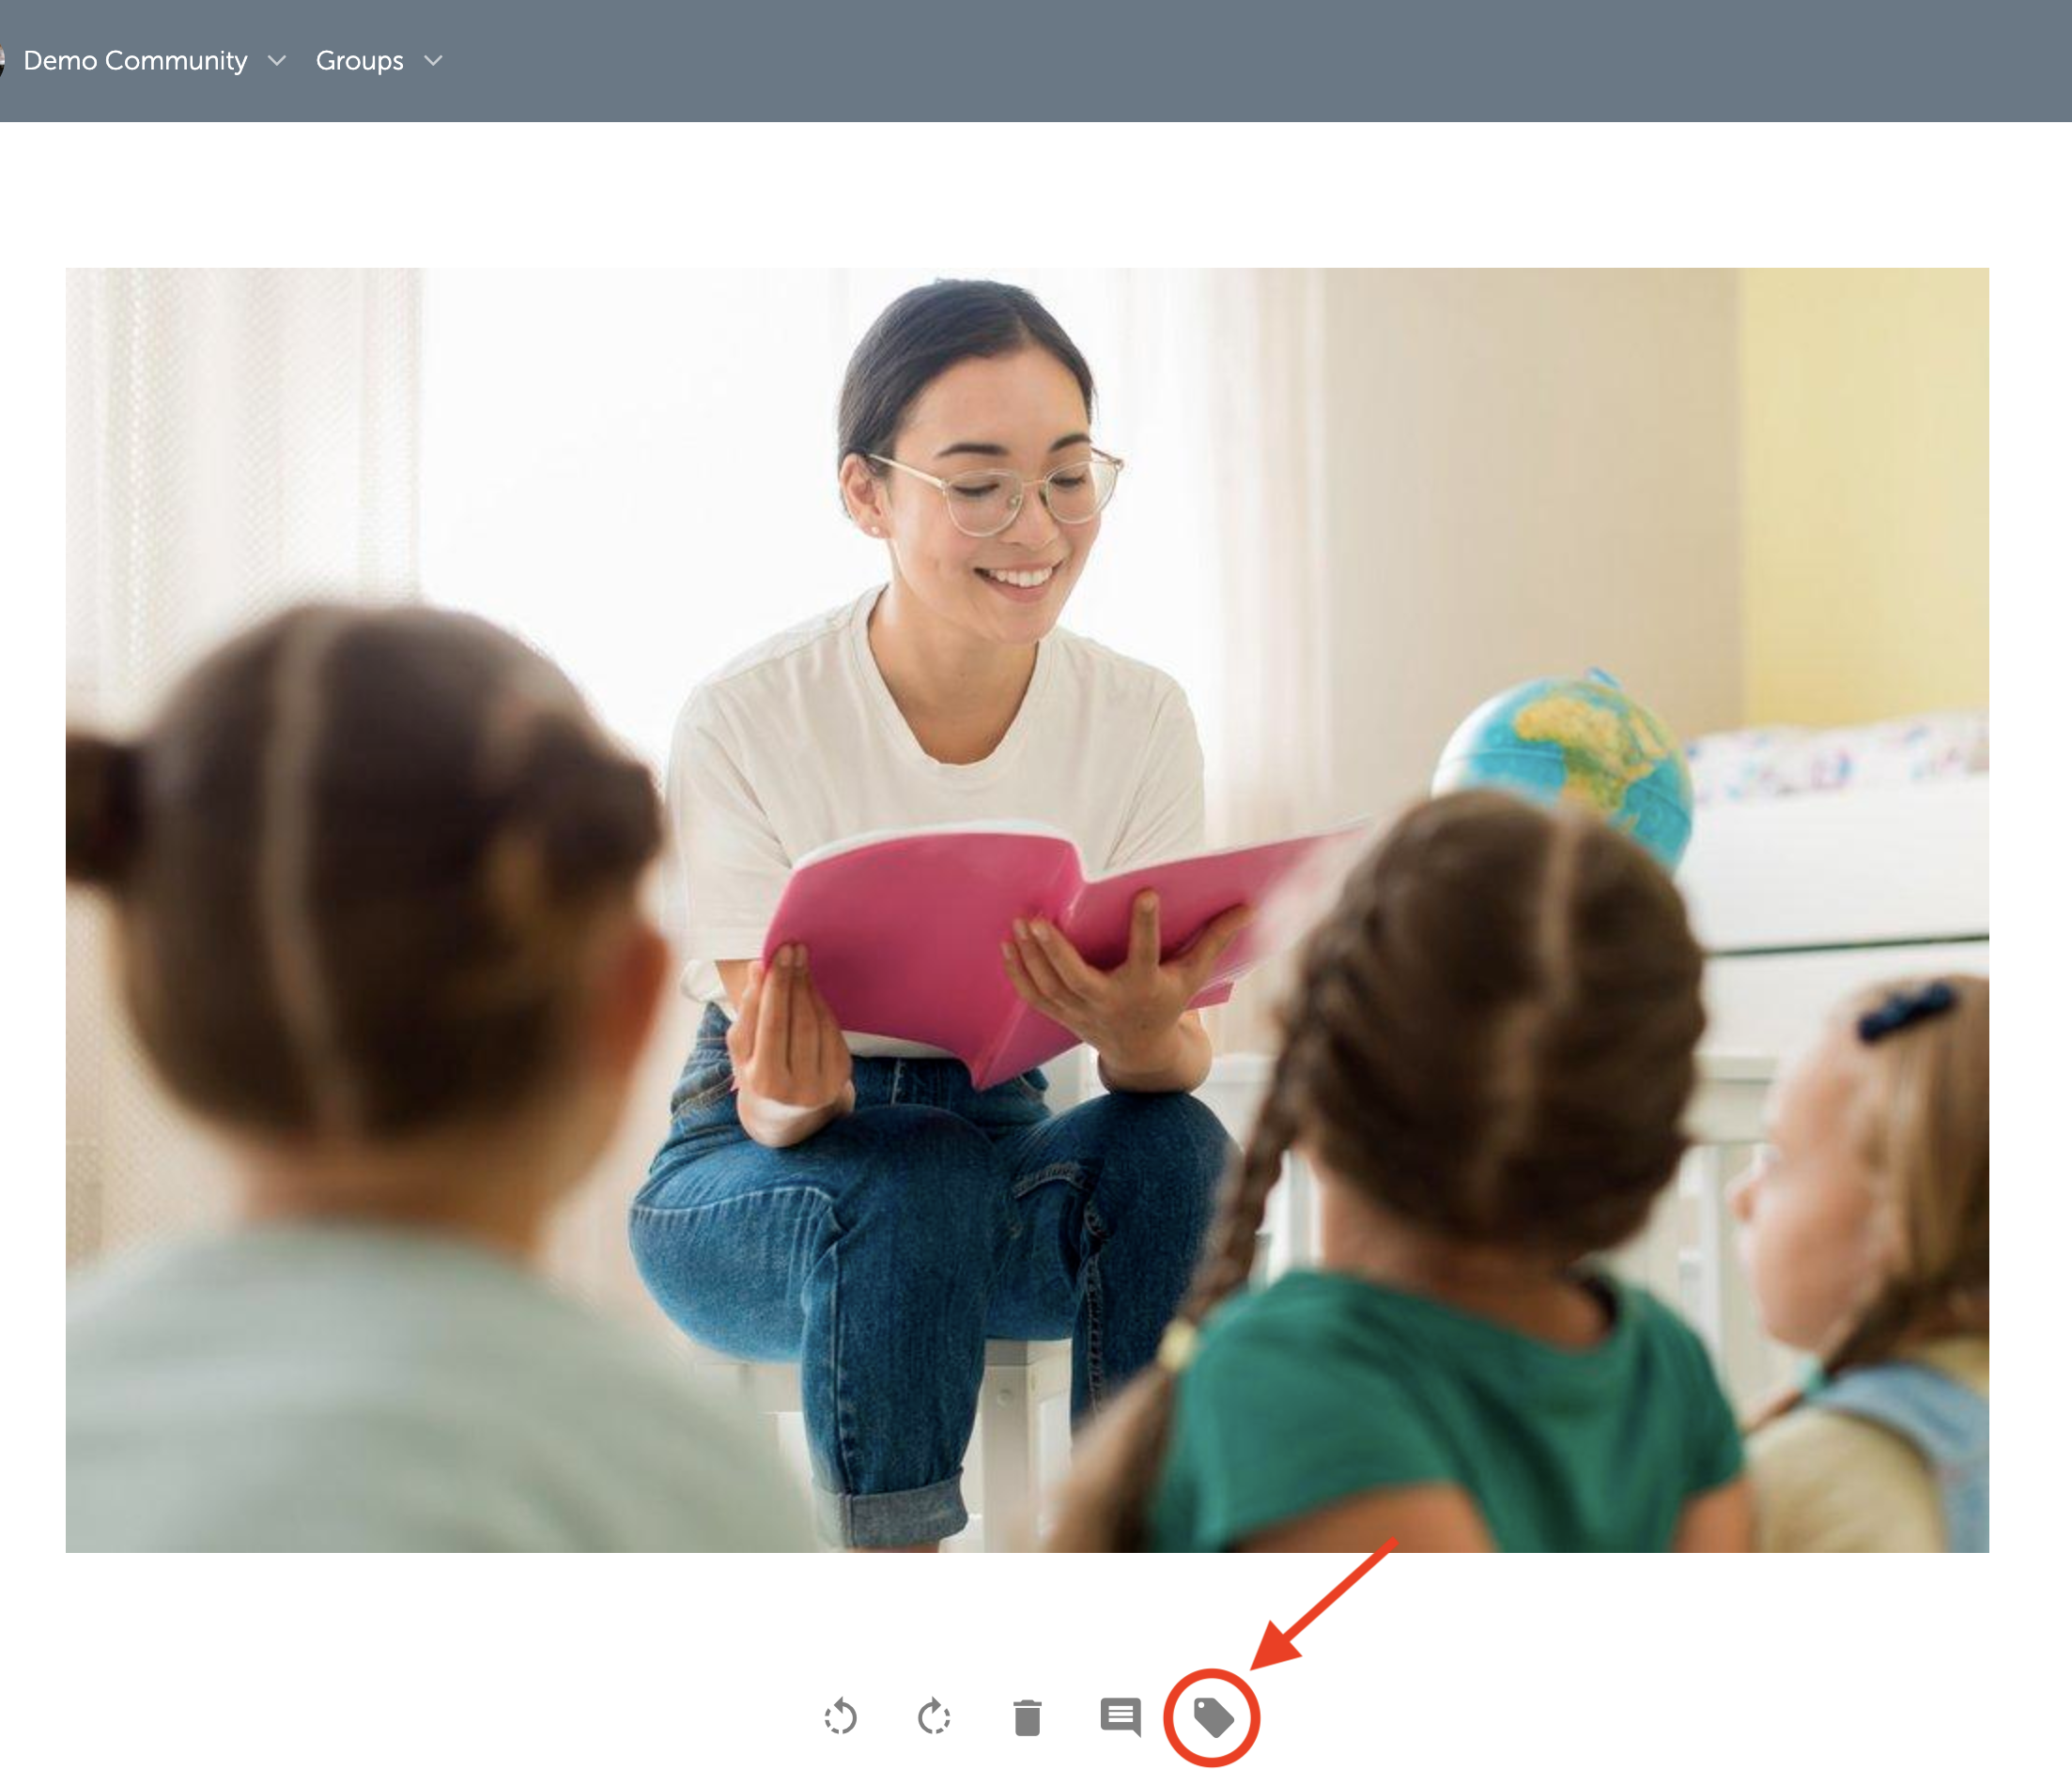
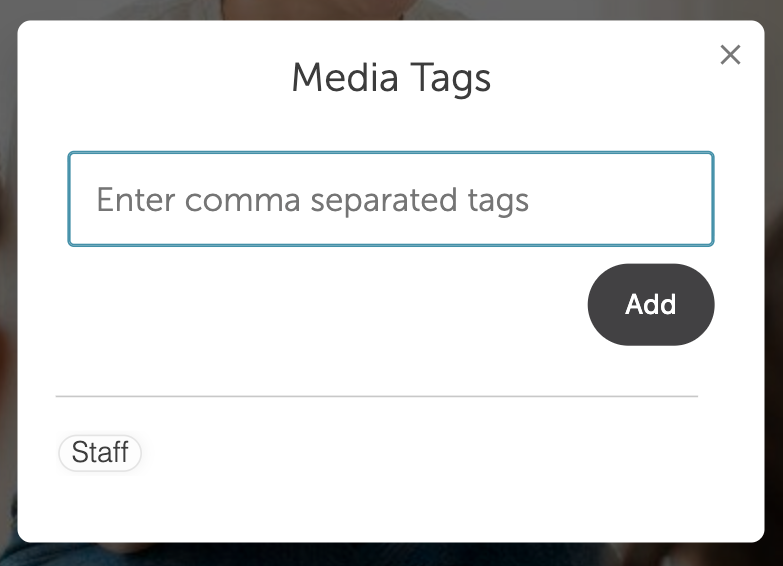
Add the tags you would like placed on the photo.
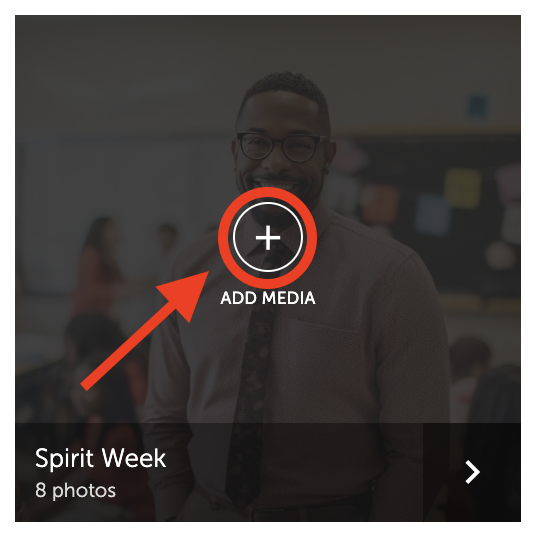
How to add photos to an Event?
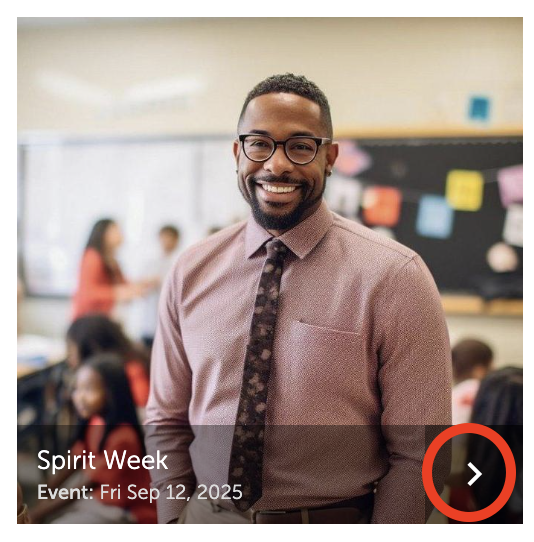
To begin adding photos to an event folder, hover over the event folder, and click on the plus sign (+).
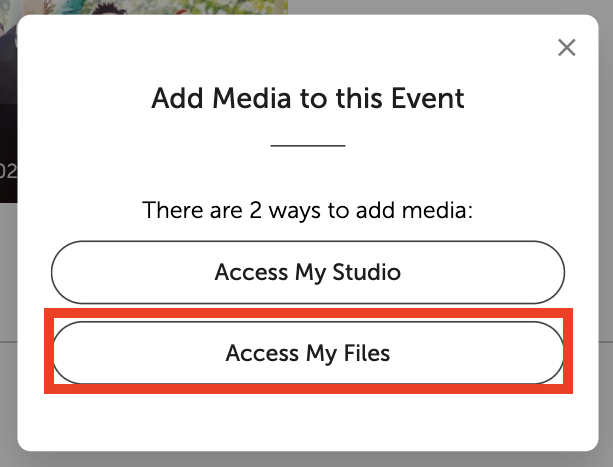
Click Access my Files
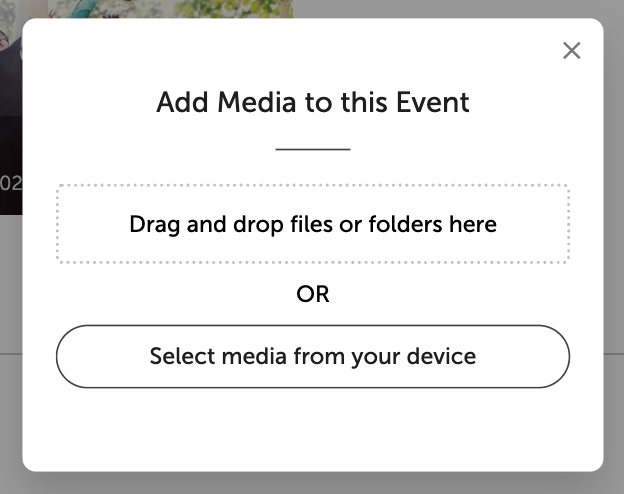
Drag and drop your files onto the screen or select them from your device (desktop or phone).
How to delete photos in your Media Library?
Firstly, click on the album that includes the photos you would like to delete.
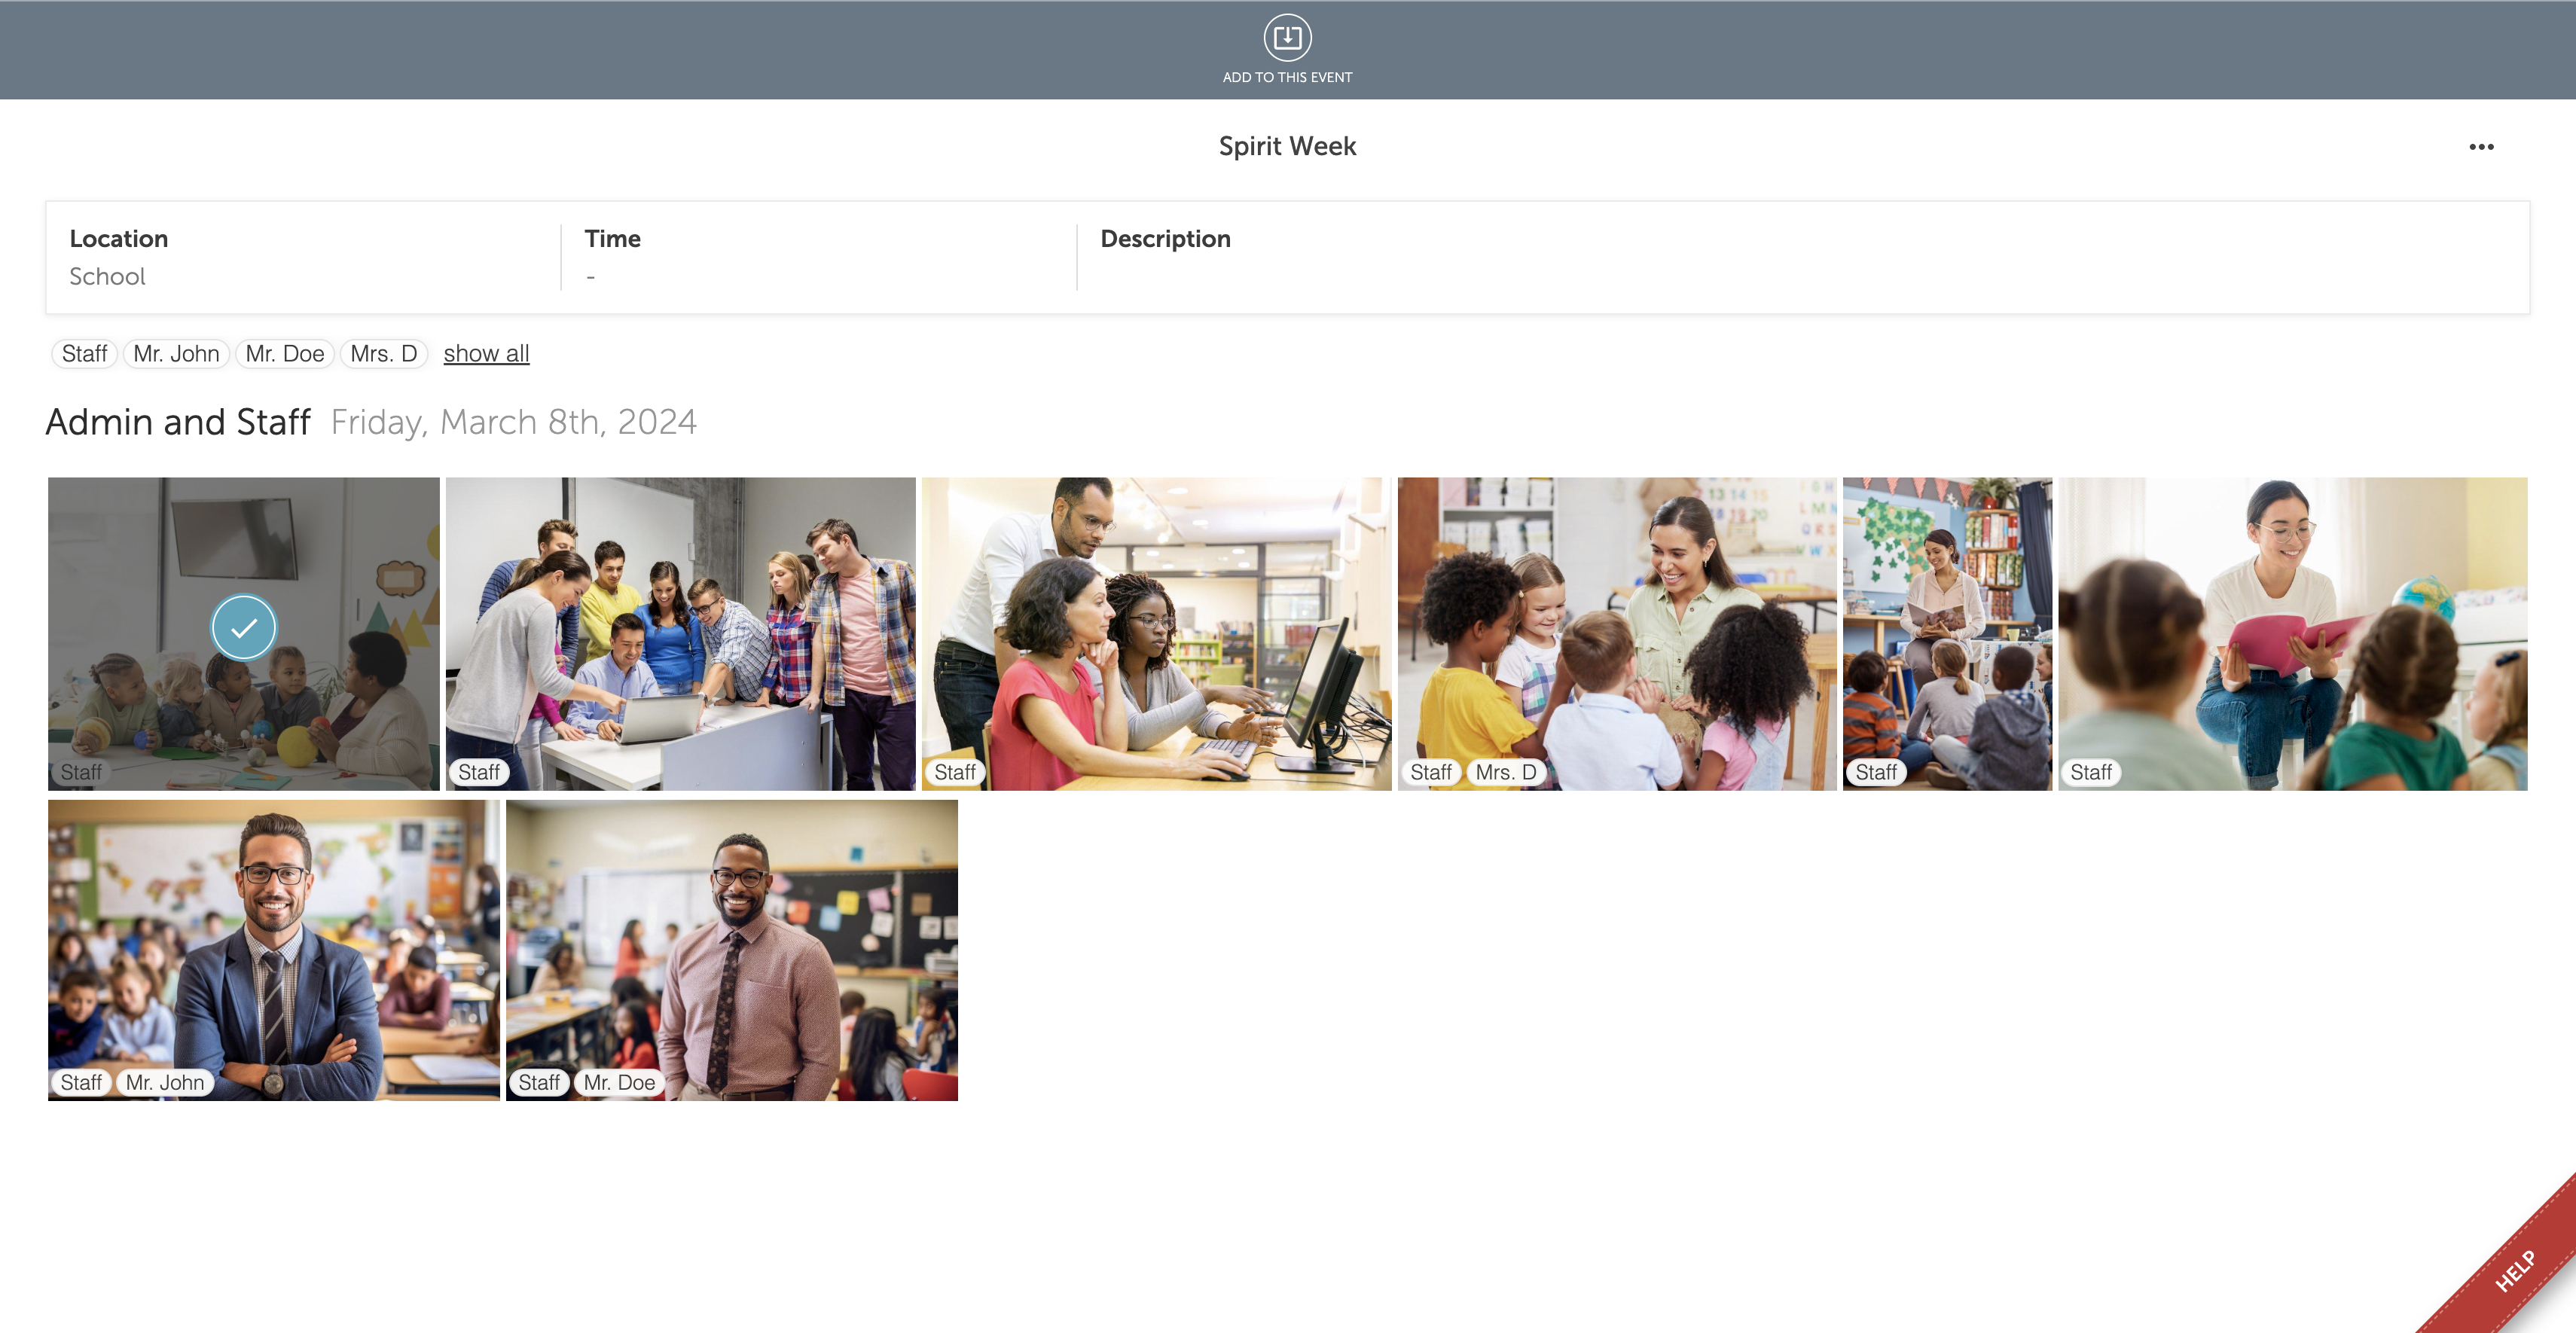
Once you are in the album click on the photo that you would like to delete.
Once you click on the photo, you will see a Trashcan button on the bottom of the image. Click on the bottom and confirm you want to delete the photo.
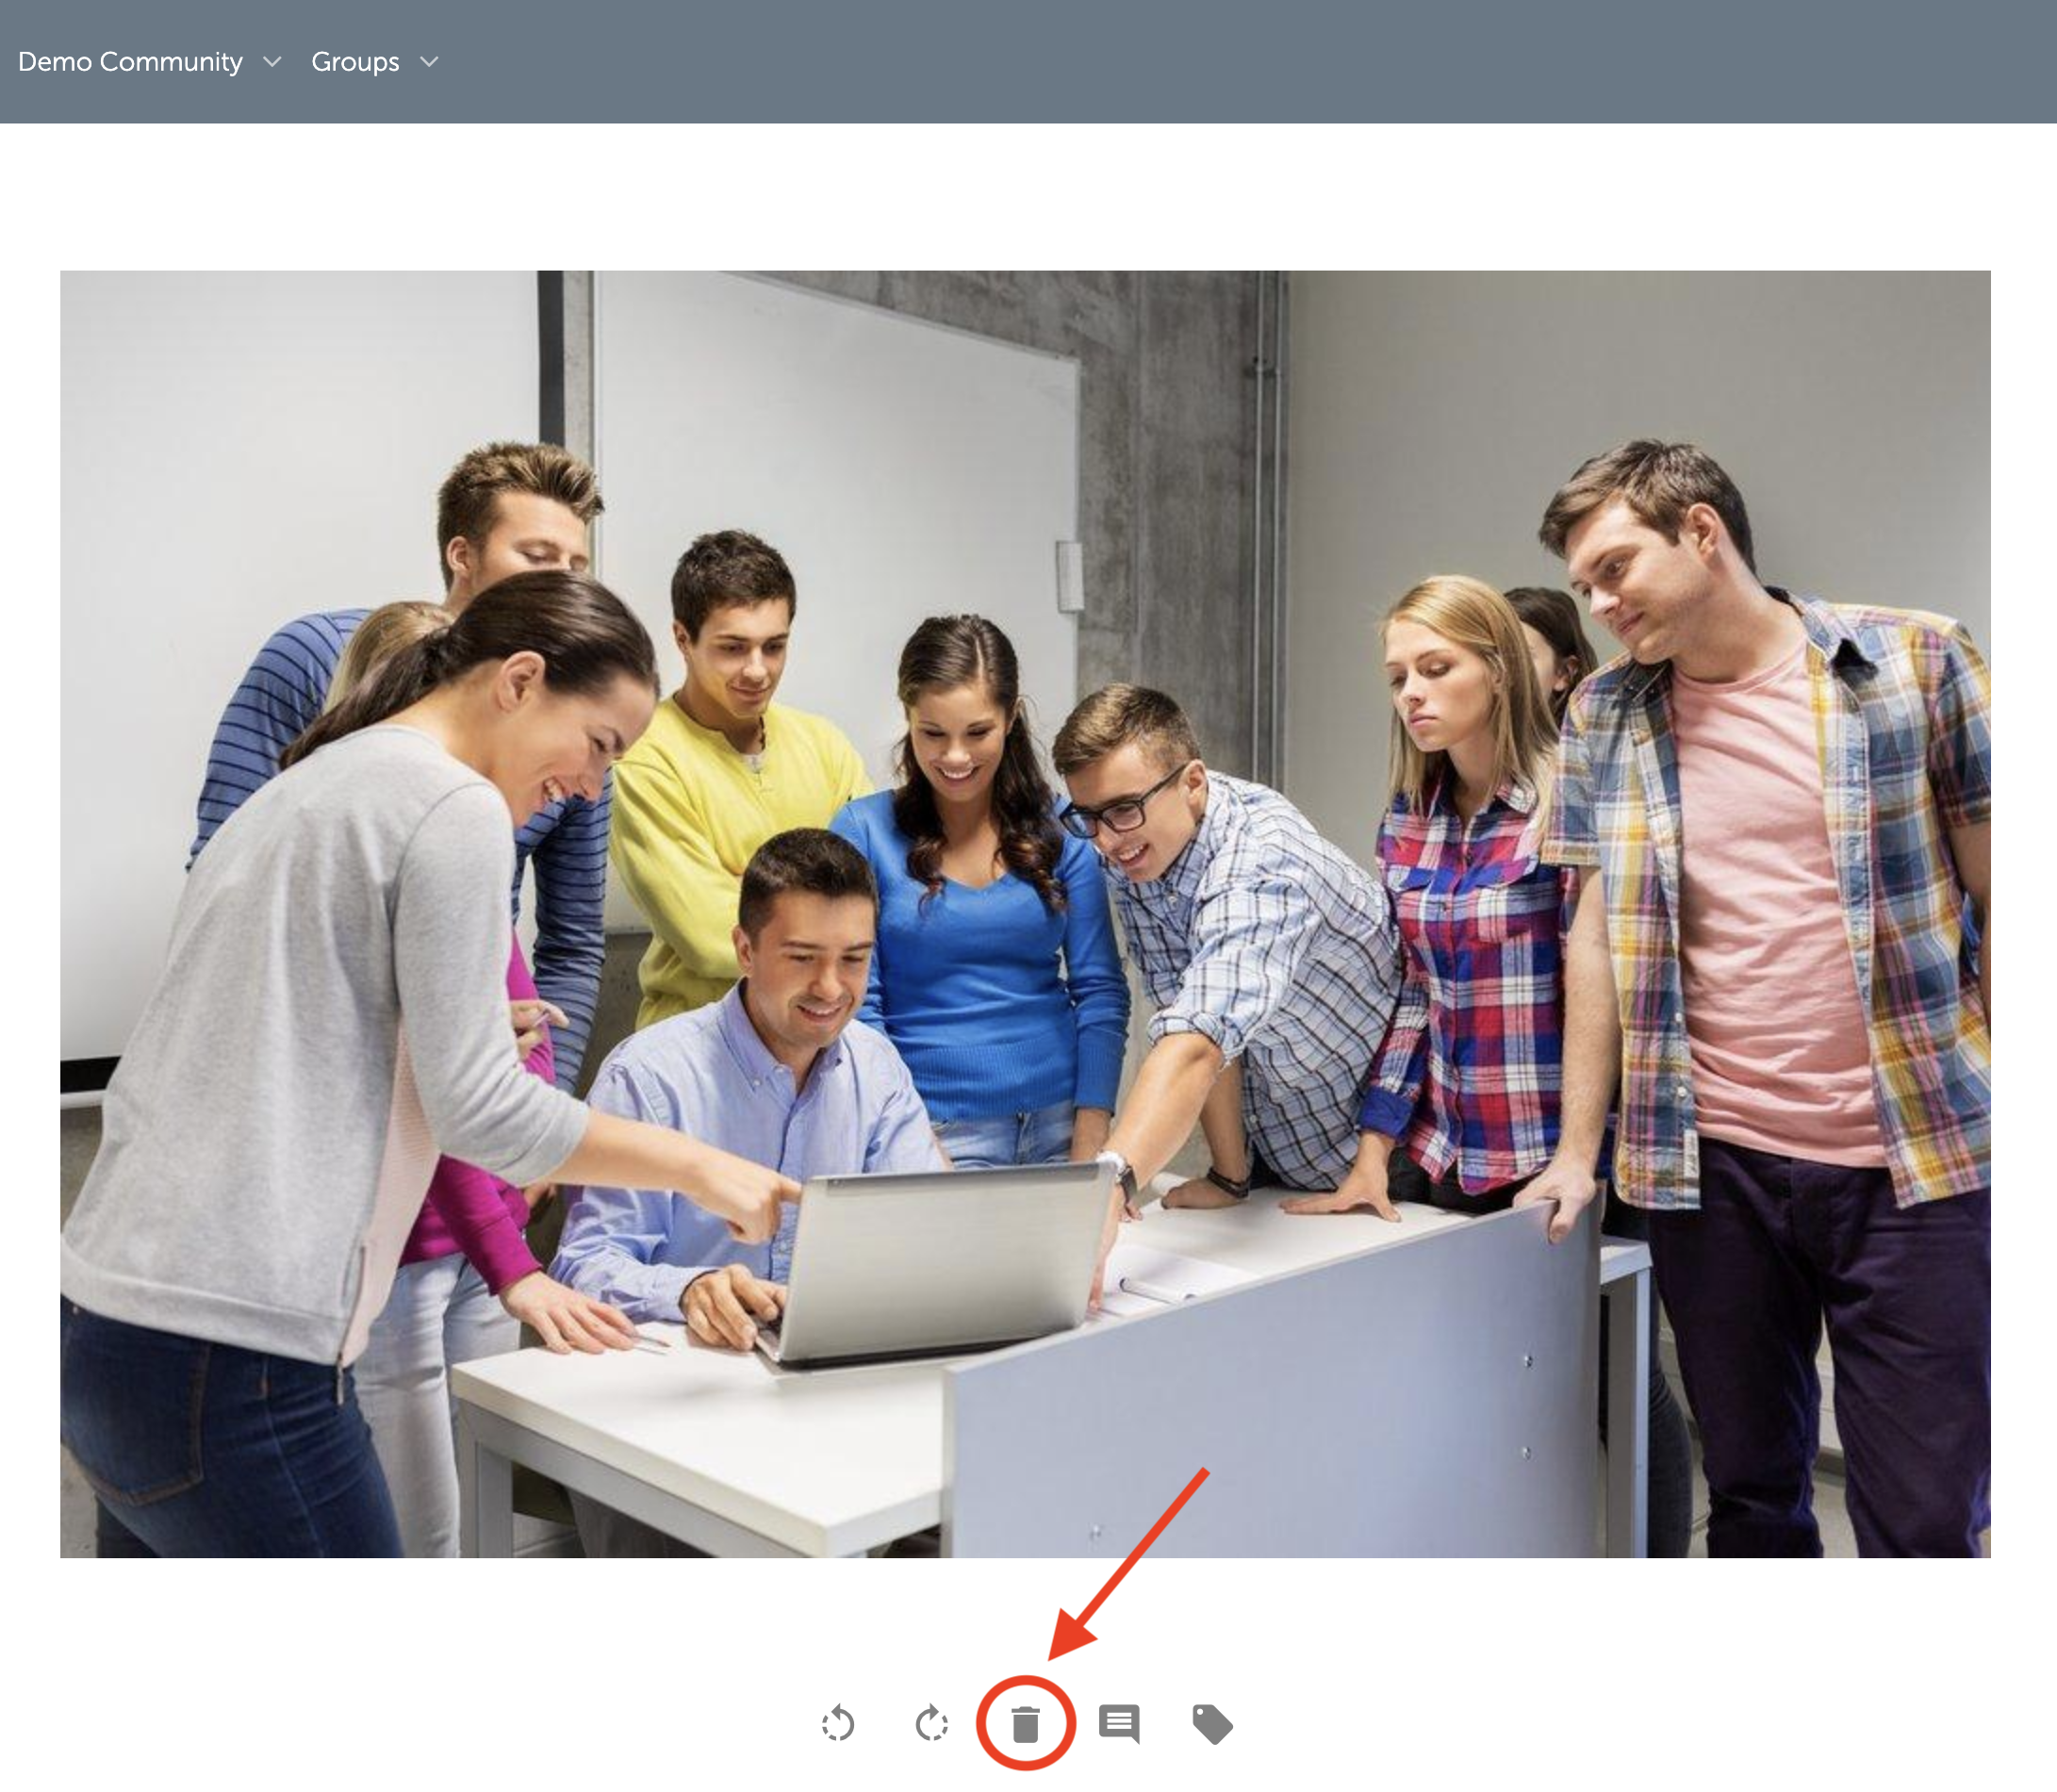
Once you click on Delete, it will remove the photo from the album!
How to add photos to the Media Library?
Once you are in your school's Media Library, locate and click on the ellipsis button In the top right hand corner.
An assortment of options will appear. Click on Add to Media Library.

From here, you will be prompted to add photos from your device (access my files) or from your previous uploads (access my studio). To directly upload photos from your device, click on access my files.
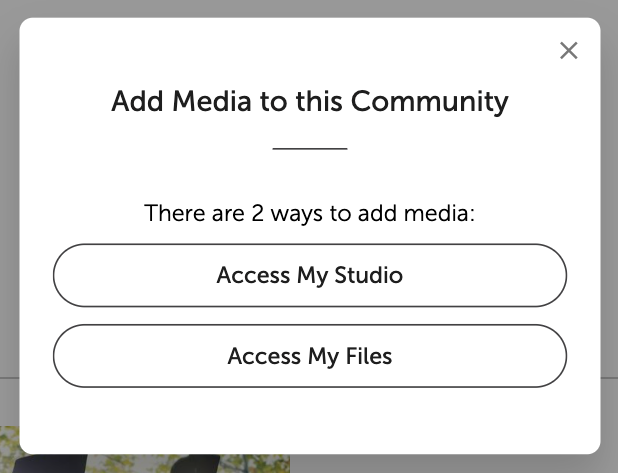
From here, you can drag and drop photos from your desktop or upload them from the files you have on your device. Choose an option that works best for you!
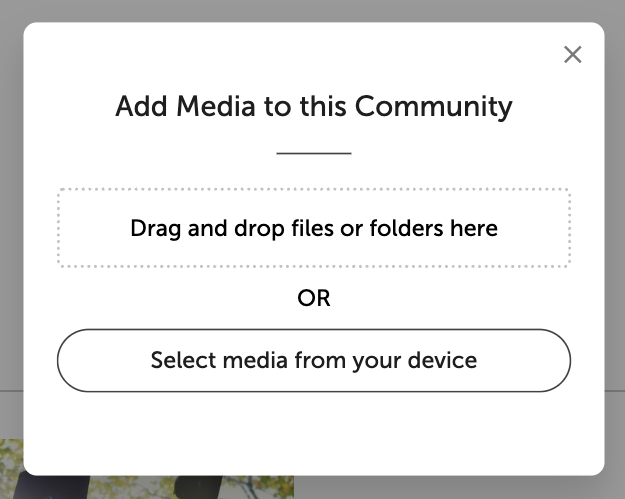
Next, upload your photos! Once they are uploaded, it will ask you to upload them to Events or straight to the Community Stream.
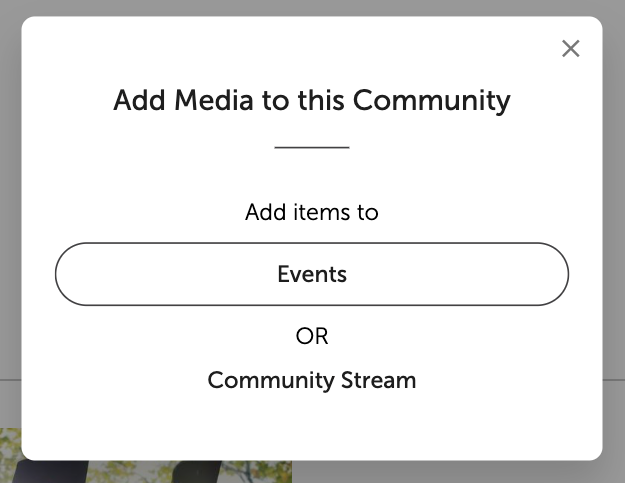
If you choose Community Stream, it will directly upload your photos into an album in the Media Library.
If you choose an event, it will allow you to add photos into a previously created event.
Please note only admin members can create events in the Admin Panel.
In comparison to the Media Library upload, events act like folders that you can always add photos to on an ongoing basis!
You can choose where you would like to upload your photos.
Once you click add media, your photos will appear in the Media Library.